开放源代码
本项目,由于工作没时间折腾,它的前后端代码已经在Gitee上开源,但最重要的是为了共同学习为目的,互相学习。
源码:
school_wall(前端)
school_wall(后端)
推荐阅读
参考:
MarkerHub: Java 代码的14个好习惯
API规划 RESTful API
REST (英文:Representational State Transfer ,简称 REST )
一种互联网软件架构设计的风格,但它并不是标准,它只是提出了一组客户端和服务器交互时的架构理念和设计原则,基于这种理念和原则设计的接口可以更简洁,更有层次,REST这个词,是 Roy Thomas Fielding 在他 2000 年的博士论文中提出的。
任何的技术都可以实现这种理念,如果一个架构符合 REST 原则,就称它为 RESTFul 架构。
REST 是 Representational State Transfer的缩写,如果一个架构符合REST原则,就称它为RESTful架构。
RESTful 架构可以充分的利用 HTTP 协议的各种功能,是 HTTP 协议的最佳实践。
RESTful API 是一种软件架构风格、设计风格,可以让软件更加清晰,更简洁,更有层次,可维护性更好。
参考:
RESTful API
The Difference Between a URL, URI, and a URN
CSDN:SpringBoot中使用RESTful风格
请求 = 动词 + 宾语 动词(五种方法):
GET(查)—————— Retrieve(译:检索)
POST(增)—————— Create(译:创建)
PUT(改)—————— Update(译:更新)
PATCH(改)—————— Update(通常部分更新)
DELETE(删)—————— Delete(译:删除)
API 响应设计
服务器回应数据
客户端请求时,要明确告诉服务器,接受 JSON 格式,请求的 HTTP 头的 ACCEPT 属性要设成 application/json
服务端返回的数据,不应该是纯文本,而应该是一个 JSON 对象。服务器回应的 HTTP 头的 Content-Type 属性要设为 application/json
错误处理 如果状态码是4xx,就应该向用户返回出错信息。一般来说,返回的信息中将 error 作为键名,出错信息作为键值即可。 {error: “Invalid API key”}
认证 RESTful API 应该是无状态,每个请求应该带有一些认证凭证。推荐使用 JWT 认证,并且使用 SSL
Hypermedia 即返回结果中提供链接,连向其他API方法,使得用户不查文档,也知道下一步应该做什么
API管理工具Swagger3
详细:
铸鼎:SpringBoot Swagger3
小程序首页 首页轮播图和精选内容 http://0.0.0.0:3000/schoolwall/options/homeconfig
后端实现
前端实现
10篇帖子为1页,分页获取列表 旧:http://0.0.0.0:3000/schoolwall/posts?per_page=10&orderby=date&order=desc&page=X
新:http://0.0.0.0:3000/schoolwall/posts/page={}
变量
类型
描述
page={}
Int
变量从1开始一直+1来获取分页后的下一页内容,每页包含10篇帖子。
后端实现
前端实现
根据帖子ID获取帖子详细信息 http://0.0.0.0:3000/schoolwall/getpost/id={}
后端实现
前端实现
根据帖子ID获取评论列表并实现翻页 http://0.0.0.0:3000/schoolwall/getcomments/postid={}/commentspage={}
变量
类型
描述
postid={}
Long
帖子ID(主键)
commentspage={}
Int
评论分页的页数
小程序分类页 获取帖子分类列表并计算类别下贴子数 http://0.0.0.0:3000/schoolwall/categories
根据分类ID获取某个分类信息 http://0.0.0.0:3000/schoolwall/getcategorie/id={}
变量
类型
描述
id={}
Int
分类表ID(主键)
后端实现
详细实现过程:
数据库设计 > 数据分析 > 帖子分类
后端开发 > MyBatis Plus > 根据某个ID获取某个分类信息
前端实现
根据分类ID获取所有该ID下的帖子并翻页 http://0.0.0.0:3000/schoolwall/posts/page={}/categorieid={}
变量
类型
描述
page={}
Int
分页页面数
categorieid={}
Int
分类表ID(主键)
后端实现
详细实现过程:
数据库设计 > 数据分析 > 根据分类ID获取所有该ID下的帖子并翻页
后端开发 > MyBatis plus > 根据分类ID获取所有该ID下的帖子并翻页
前端实现
搜索文章或标题功能的实现 http://0.0.0.0:3000/schoolwall/posts/page={}/search={}
变量
类型
描述
page={}
Int
搜素结果分页,页面号
search={}
String
搜索关键字
后端开发
后端开发选用目前最流行的Spring Boot进行各种依赖的整合。
参考:
超详细!4小时开发一个SpringBoot+vue前后端分离博客项目!!
IntelliJ IDEA
主要是方便写代码,方便配置。
推荐:
Free Educational Licenses(申请学生认证提供免费使用)
参考:
springboot热部署之spring-boot-devtools
为什么要放弃 Lombok
MyBatis-Plus
创建一个Project 配置Maven:
IDEA本来就带有Maven,但是每次都需要联网去外网中心仓库下载才可以进行项目的开发,所以不建议直接使用,直接替换原有的Maven,设置仓库为国内源即可顺利进行开发。
打开IDEA,创建一个Web项目:
IDEA新创建一个Mode
这个步骤主要是项目需要一个文件管理,发布墙贴的时候需要进行文件管理。
详细实现过程:
后端开发 > 文件上传下载
参考:
IntelliJ IDEA 中 Project 和 Module 的概念及区别
IDEA创建一个Module
这个过程其实就是IDEA帮你写了一个Maven的文件包含进去创建Module时候选择的依赖Jar包并做了相应的Spring Boot配置(创建Project其实一个道理)。
选择Jar依赖
点击Finish即可创建完成
每个Jar依赖包的功能就在右边有解释。
创建结果
下面是创建的目录,自己品味一下该如何填写Group和Artifact了吧?
改名跑配置文件
后缀改为.yml,记得要安装一个识别yml的插件。
创建多个Module互相不干扰,直接配置不同的服务器端口可以提供多个后端。
Maven
使得Java依赖jar包的导入更加方便便捷,以往使用的比如String就要导入除了spring.jar文件,Spring还包括有其它13个独立的jar包Spring需要哪些jar包 ,有了Maven就可以非常迅速的手动写入pom.xml配置文件(Maven配置文件),来导入所需的Jar包。
详细请查看本博客Maven帖子。
例如:导入包含Srping Boot、SpringMVC、MyBatis Plus、等…基本jar包:
1
2
3
4
5
6
7
8
9
10
11
12
13
14
15
16
17
18
<?xml version="1.0" encoding="UTF-8" ?> <project xmlns ="http://maven.apache.org/POM/4.0.0" xmlns:xsi ="http://www.w3.org/2001/XMLSchema-instance" xsi:schemaLocation ="http://maven.apache.org/POM/4.0.0 https://maven.apache.org/xsd/maven-4.0.0.xsd" > <modelVersion > 4.0.0</modelVersion > <groupId > com.example</groupId > <artifactId > myproject</artifactId > <version > 0.0.1-SNAPSHOT</version > <parent > <groupId > org.springframework.boot</groupId > <artifactId > spring-boot-starter-parent</artifactId > <version > 2.6.3</version > </parent > </project >
Spring Boot
Spring Boot helps you to create stand-alone, production-grade Spring-based applications that you can run. We take an opinionated view of the Spring platform and third-party libraries, so that you can get started with minimum fuss. Most Spring Boot applications need very little Spring configuration.
Spring Boot帮助您创建可以运行的独立的、生产级的基于Spring的应用程序。我们对Spring平台和第三方库有自己的看法,因此您在开始时不会有太多麻烦。
You can use Spring Boot to create Java applications that can be started by using java -jar or more traditional war deployments. We also provide a command line tool that runs “spring scripts”.
大多数Spring Boot应用程序只需要很少的Spring配置。您可以使用Spring Boot创建Java应用程序,这些程序可以通过使用Java -jar或更传统的战争部署启动。我们还提供了一个运行spring脚本的命令行工具。
Our primary goals are:
我们的主要目标是:
IDEA生成只带有Spring Boot 2.7.1的Maven pom.xml,可看出Spring Boot配置成功都需要哪些Jar包。
1 2 3 4 5 6 7 8 9 10 11 12 13 14 15 16 17 18 19 20 21 22 23 24 25 26 27 28 29 30 31 32 33 34 35 36 37 38 39 40 41 42 <?xml version="1.0" encoding="UTF-8" ?> <project xmlns ="http://maven.apache.org/POM/4.0.0" xmlns:xsi ="http://www.w3.org/2001/XMLSchema-instance" xsi:schemaLocation ="http://maven.apache.org/POM/4.0.0 https://maven.apache.org/xsd/maven-4.0.0.xsd" > <modelVersion > 4.0.0</modelVersion > <parent > <groupId > org.springframework.boot</groupId > <artifactId > spring-boot-starter-parent</artifactId > <version > 2.7.1</version > <relativePath /> </parent > <groupId > com.example</groupId > <artifactId > demo</artifactId > <version > 0.0.1-SNAPSHOT</version > <name > demo</name > <description > demo</description > <properties > <java.version > 1.8</java.version > </properties > <dependencies > <dependency > <groupId > org.springframework.boot</groupId > <artifactId > spring-boot-starter</artifactId > </dependency > <dependency > <groupId > org.springframework.boot</groupId > <artifactId > spring-boot-starter-test</artifactId > <scope > test</scope > </dependency > </dependencies > <build > <plugins > <plugin > <groupId > org.springframework.boot</groupId > <artifactId > spring-boot-maven-plugin</artifactId > </plugin > </plugins > </build > </project >
以下代码来自官网对Spring Boot 产品的简单介绍:
1 2 3 4 5 6 7 8 9 10 11 12 13 14 15 16 17 18 19 import org.springframework.boot.SpringApplication;import org.springframework.boot.autoconfigure.EnableAutoConfiguration;import org.springframework.web.bind.annotation.RequestMapping;import org.springframework.web.bind.annotation.RestController;@RestController @EnableAutoConfiguration public class MyApplication { @RequestMapping("/") String home () { return "Hello World!" ; } public static void main (String[] args) { SpringApplication.run(MyApplication.class, args); } }
@RequestMapping是最普通的写法,更简便的写法比如@GetMaping @POSTMapping 即,直接定义Get方式还是Post方式。
@RestController(@ResponseBody 和Controller的合集)。
@Controller将Class注册为Bean。
@ResponseBody:表示该方法的返回结果直接写入HTTP response body中,一般在异步获取数据时使用,用于构建RESTful的api。
@RequestMapping添加后,返回值通常解析为跳转路径,加上@ResponseBody后返回结果不会被解析为跳转路径,而是直接写入HTTP response body中。比如异步获取json数据,加上@Responsebody后,会直接返回json数据,而解析成json主要是Spring 中的jackson在起作用。
@ResponseBody和@RequestMapping经常一起使用。
@EnableAutoConfiguration 基于添加的依赖,告诉Spring Boot如何配置Srping。
main方法:Spring Boot依旧遵循Java程序入口规则,主方法通过调用run来委托Srping Boot的SpringApplication类,SrpingApplication启动所需应用程序、启动Spring、启动自动配置的Tomcat,所以我们要将MyApplication.class作为参数传递给run方法,告知那个组件是String的主组件。
@SpringBootConfiguration,包含三种,@Component、@EnableAutoConfiguration、@ComponentScan。
配置Spring Boot去除Json Null值元素
前后端分离项目中,我使用的MyBatis Plus,但其中有一个查询出部分字段的方法返回的实体类生成的JSON里面不需要查询的属性也显示出来了,但它们显示的全是null值,对于一个强迫症的程序员来说这个是非常闹心的一个问题,而且再考虑到以后的项目搭建到阿里云服务器,这个虽然只有那么10几个B的带宽占用,那也是带宽啊,所以决定去掉这些null的JSON元素。
参考:
CSDN:jackSon注解– @JsonInclude 注解不返回null值字段
MyBatis Plus QueryWrapper查询方式:
1 2 3 QueryWrapper queryWrapper= new QueryWrapper <Posts>().select("title" ,"post_medium_image" ,"date" ,"total_comments" ,"like_count" ,"pageviews" ).orderByDesc("date" );
未去除空元素,调用对应的后端接口:
解决方法:
在对应的实体类上加注解
1 @JsonInclude(JsonInclude.Include.NON_NULL)
加此注解后,查询的此实体类显示对应的JSON就会不显示值为null的元素,不加注释的实体类依旧是上面的不去除null元素的状态。
在Spring Boot 配置文件application.yml配置使全局生效
1 2 3 4 5 6 7 8 9 spring: datasource: driver-class-name: com.mysql.cj.jdbc.Driver url: jdbc:mysql://localhost:3306/school_wall?useUnicode=true&useSSL=false&character_set_server = utf8mb4 &serverTimezone=Asia/Shanghai username: fuding password: ****** jackson: default-property-inclusion: non_null
这样配置后所有实体类对应的JOSN查询结果只要是null元素就会不显示。
去除空元素的显示效果 :
Lombok 1 2 3 4 5 6 <dependency > <groupId > org.projectlombok</groupId > <artifactId > lombok</artifactId > <optional > true</optional > </dependency >
MariaDB
MariaDB and MySQL are two of the most widely deployed open source relational databases in the world and, while they share a common ancestry and maintain compatibility via the MySQL protocol (MySQL clients can connect to MariaDB and vice versa), they have evolved in their own ways, becoming separate databases with unique features and different product visions. Organizations of all sizes continue to replace MySQL with MariaDB in order to take advantage of the innovation in MariaDB – and to get out from under Oracle.
MariaDB和MySQL是世界上部署最广泛的两个开源关系数据库,虽然它们共享一个共同的祖先,并通过MySQL协议保持兼容性(MySQL客户端可以连接到MariaDB,反之亦然),但它们以自己的方式发展,成为具有独特功能和不同产品愿景的独立数据库。为了充分利用MariaDB的创新,摆脱Oracle的统治,各种规模的组织都在继续用MariaDB取代MySQL。
参考:
官网使用Maven配置MariaDB
MariaDB对比MySQL
替换掉之前使用的MySQL Java Connector(JDBC):
1 2 3 4 5 6 7 8 9 10 11 <dependency > <groupId > org.mariadb.jdbc</groupId > <artifactId > mariadb-java-client</artifactId > <version > 2.1.2</version > </dependency >
开发过程中选用的是最新版MariaDB:
1 2 3 arch ॐ ~:2015 ◯ mysql -V mysql Ver 15.1 Distrib 10.7.3-MariaDB, for Linux (x86_64) using readline 5.1
允许Mysql用户外部访问:
登进MySQL之后。
输入以下语句,进入mysql库:
更新域属性,’%’表示允许外部访问:
注意MariaDB最新版本,“%”不代表本地主机可登录。
1 update user set host= '%' where user = 'root' ;
执行以上语句之后再执行:
MyBatis-Plus
润物无声只做增强不做改变,引入它不会对现有工程产生影响,如丝般顺滑。
效率至上只需简单配置,即可快速进行单表 CRUD 操作,从而节省大量时间。
丰富功能代码生成、自动分页、逻辑删除、自动填充等功能一应俱全。
缺点当然也有的,这个框架只提供了不用手写SQL不再使用手写xml的单表操作,但多表操作还是要使用MyBatis进行手写多表操作的SQL,然后写对应的xml文件。
参考:
MyBatis-Plus 官方文档
GitHub:baomidou/mybatis-plus
GitHub:Mybatis Plus代码生成器
freemarker(代码生成器依赖)
51CTO博客:100%解决 java.sql.SQLException: Unsupported character encoding ‘utf8mb4’.
mybatis-plus自动生成实体类(包含swagger注解)
准备环境 首先导入以下Jar包:
1 2 3 4 5 6 7 8 9 10 11 12 13 14 15 16 <dependency > <groupId > com.baomidou</groupId > <artifactId > mybatis-plus-boot-starter</artifactId > <version > 3.2.0</version > </dependency > <dependency > <groupId > org.springframework.boot</groupId > <artifactId > spring-boot-starter-freemarker</artifactId > </dependency > <dependency > <groupId > com.baomidou</groupId > <artifactId > mybatis-plus-generator</artifactId > <version > 3.2.0</version > </dependency >
pom中导入mybatis plus的jar包,因为后面会涉及到代码生成器,所以我们还需要导入页面模板引擎,这里我用的是freemarker。
MyBatis Plus需要连接数据库所需配置文件:
/schoolwall/src/main/resources/application.yml(此处默认是properties格式,后缀改过来)
使用.yml更方便,且Spring Boot默认也支持这种格式。
1 2 3 4 5 6 7 8 9 spring: datasource: driver-class-name: com.mysql.cj.jdbc.Driver url: jdbc:mysql://localhost:3306/school_wall?useUnicode=true&useSSL=false&characterEncoding=utf8mb4&serverTimezone=Asia/Shanghai username: root password: admin mybatis-plus: mapper-locations: classpath*:/mapper/**Mapper.xml
开启mapper接口扫描,添加分页插件:
新建一个包:通过@mapperScan 注解指定要变成实现类的接口所在的包,然后包下面的所有接口在编译之后都会生成相应的实现类。PaginationInterceptor是一个分页插件。
com.schoolwall.config.MybatisPlusConfig.java
1 2 3 4 5 6 7 8 9 10 @Configuration @EnableTransactionManagement @MapperScan("com.schoolwall.mapper") public class MybatisPlusConfig { @Bean public PaginationInterceptor paginationInterceptor () { PaginationInterceptor paginationInterceptor = new PaginationInterceptor (); return paginationInterceptor; } }
数据库字符集设置成utf8mb4,代码生成器,报错:
报错如下:
1 java.sql.SQLException: Unsupported character encoding 'utf8mb4'
改掉数据库链接配置(生成器)这块:
1 2 3 4 5 6 7 8 DataSourceConfig dsc = new DataSourceConfig (); dsc.setUrl("jdbc:mysql://localhost:3306/school_wall?useUnicode=true&useSSL=false&character_set_server=utf8mb4 &serverTimezone=Asia/Shanghai" ); dsc.setDriverName("com.mysql.cj.jdbc.Driver" ); dsc.setUsername("root" ); dsc.setPassword("root" ); mpg.setDataSource(dsc);
将原本老的数据集utf8,characterEncoding = utf8;
改为新版数据集utf8mb4,character_set_server =utf8mb4 ;
代码生成器 执行自动生成 Mapper、Service、Controller:
但是在开发过程中遇到了一个非常令人困惑的问题:
查询数据库表数据是没有任何问题的:
但是用Java写的查询数据,生成Json就会出现某些字段为空的情况,调用了接口http://0.0.0.0:3000/schoolwall/posts/page=1:
盯着代码观察好一会儿,最后发现原来只有带_的字段出现了相同的问题,看来是之前配置的MyBatis Plus 代码生成器的配置问题导致生成的实体类不使用驼峰命名法,而是全使用了_进行了命名。
旧生成器配置代码:
1 2 strategy.setNaming(NamingStrategy.no_change); strategy.setColumnNaming(NamingStrategy.no_change);
新生成器配置代码:
1 2 strategy.setNaming(NamingStrategy.underline_to_camel); strategy.setColumnNaming(NamingStrategy.underline_to_camel);
但由于代码生成器已经生成代码,再进行生成同一个表名的话可能会出现代码覆盖的情况,谨慎的我还是自己修改了实体类的变量,将实体类的变量下划线命名法全改为驼峰命名法,解决了这个迷一样的问题:
回到小程序开发工具点击编译查看列表情况:
代码生成器特性:
已经生成的数据库表代码,再次生成不会覆盖之前生成的代码。
显然没有之前生成一个新表那么多的代码了,且没有更改任何之前生成的代码和自己写的PostsController。
生成的代码比如生成的entity代码,自己是可以进行更改的。
比如数据库表的字段进行删除或者添加字段,我们可进行手动进行添加或者删除entity内部变量,并且遵循自己代码生成器的规则。
数据库内部可以多几个字段可以不添加到entity内,但entity里的参数数据库字段必须有,不然查询就会失败等,虽然可以运行项目。
如果需要添加属性但数据库不存在的字段解决方式,在相应的实体类属性添加注解,不加会报错:
1 2 @TableField(exist = false) private List postAllImages;
分页插件
分页插件的使用是需要进行配置的,推荐使用Spring Boot方式进行分页插件的配置,配置详情请查看以下帖子。
参考:
CSDN:MyBatis-Plus 分页查询以及自定义sql分页
配置Mybatis-plus分页插件,返回统一结果集
分页的实现原理:
Mybatis-plus分页插件使用的是IPage进行分页。IPage内部原理是基于拦截器,拦截的是方法以及方法中的参数 。判断是否是查询操作 ,如果是查询操作,才会进入分页的处理逻辑。 进入分页逻辑处理后,拦截器会通过反射获取该方法的参数进行判断是否存在IPage对象的实现类 。如果不存在则不进行分页,存在则将该参数赋值给IPage对象,然后进行拼接sql的处理完成分页操作。
代码中单表查询分页的一个例子,以下是讲一个表进行了按照时间进行排序后,再进过MyBatis Plus分页插件方便进行每5个条目为一页的操作:
1 2 3 4 5 6 7 8 9 public IPage list (@PathVariable(name = "page") Integer page) { Page dividePage = new Page (page, 10 ,false ); QueryWrapper queryWrapper = new QueryWrapper <Posts>().select("id" ,"title" , "post_medium_image" , "date" , "total_comments" , "like_count" , "pageviews" ).orderByDesc("date" ); IPage pageData = postsService.page(dividePage, queryWrapper); return pageData; }
不加false查询结果:
加上false查询结果:
10篇帖子为1页,分页获取列表
参阅以下内容请先参阅:
API规划 > 小程序首页 > 10篇帖子为1页,分页获取列表
数据库设计 > 数据分析 > 10篇帖子为1页,分页获取列表
由于是单表查询操作,开箱即用不用写Mapper直接调用MyBatis Plus内部分页插件方法即可。
PostsController:
和评论列表一样调用分页new Page(page, 10,false)取消配置了计数全部数据的功能,即使用MySQL提供的物理翻页,好处就是节省服务器性能和节省内存,这个模块也是插入修改数据相当频繁的,没必要使用逻辑翻页,不懂请查阅 后端开发 > MyBatis-Plus > 分页插件。
1 2 3 4 5 6 7 8 9 10 11 12 13 14 15 16 17 18 19 @RestController @RequestMapping("/schoolwall") public class PostsController { @Autowired PostsService postsService; @GetMapping("/posts/page={page}") public IPage list (@PathVariable(name = "page") Integer page) { Page dividePage = new Page (page, 10 ,false ); QueryWrapper queryWrapper = new QueryWrapper <Posts>().select("id" ,"title" , "post_medium_image" , "date" , "total_comments" , "like_count" , "pageviews" ).orderByDesc("date" ); IPage pageData = postsService.page(dividePage, queryWrapper); return pageData; } }
调用后端接口http://0.0.0.0:3000/schoolwall/posts/page={}:
1 2 3 4 5 6 7 8 9 10 11 12 13 14 15 16 17 18 19 20 21 22 23 24 25 26 27 28 29 30 31 32 33 34 35 36 37 38 39 40 41 42 43 44 45 46 47 48 49 50 51 52 53 54 55 56 57 58 59 60 61 62 63 64 65 66 67 68 69 70 71 72 73 74 75 76 77 78 79 80 81 82 83 84 85 86 87 88 89 90 91 92 93 94 95 96 97 98 99 100 { "records" : [ { "id" : 123 , "date" : "2022-03-16T16:33:06" , "title" : "水果摊" , "totalComments" : 22 , "postMediumImage" : "https://img2.baidu.com/it/u=3530793501,2812976182&fm=253&fmt=auto&app=120&f=JPEG?w=889&h=500" , "likeCount" : 222 , "pageviews" : 2222 } , { "id" : 122 , "date" : "2022-03-12T10:46:18" , "title" : "伞丢了" , "totalComments" : 16 , "postMediumImage" : "https://gitee.com/ding-f/school_wall_imgs/raw/master/posts/dog.jpg" , "likeCount" : 22 , "pageviews" : 223 } , { "id" : 121 , "date" : "2022-03-12T10:46:18" , "title" : "伞丢了" , "totalComments" : 11 , "postMediumImage" : "https://ding-f.gitee.io/images/error.jpg" , "likeCount" : 111 , "pageviews" : 1111 } , { "id" : 120 , "date" : "2022-03-12T10:46:18" , "title" : "找到对象了" , "totalComments" : 99 , "postMediumImage" : "https://gitee.com/ding-f/school_wall_imgs/raw/master/posts/kids.png" , "likeCount" : 999 , "pageviews" : 9999 } , { "id" : 119 , "date" : "2022-03-12T10:46:18" , "title" : "伞丢了" , "totalComments" : 16 , "postMediumImage" : "https://gitee.com/ding-f/school_wall_imgs/raw/master/posts/dog.jpg" , "likeCount" : 22 , "pageviews" : 223 } , { "id" : 118 , "date" : "2022-03-12T10:46:18" , "title" : "伞丢了" , "totalComments" : 11 , "postMediumImage" : "https://ding-f.gitee.io/images/error.jpg" , "likeCount" : 111 , "pageviews" : 1111 } , { "id" : 117 , "date" : "2022-03-12T10:46:18" , "title" : "找到对象了" , "totalComments" : 99 , "postMediumImage" : "https://gitee.com/ding-f/school_wall_imgs/raw/master/posts/kids.png" , "likeCount" : 999 , "pageviews" : 9999 } , { "id" : 116 , "date" : "2022-03-12T10:46:18" , "title" : "伞丢了" , "totalComments" : 16 , "postMediumImage" : "https://gitee.com/ding-f/school_wall_imgs/raw/master/posts/dog.jpg" , "likeCount" : 22 , "pageviews" : 223 } , { "id" : 115 , "date" : "2022-03-12T10:46:18" , "title" : "伞丢了" , "totalComments" : 11 , "postMediumImage" : "../../images/error.jpg" , "likeCount" : 111 , "pageviews" : 1111 } , { "id" : 114 , "date" : "2022-03-12T10:46:18" , "title" : "找到对象了" , "totalComments" : 99 , "postMediumImage" : "https://gitee.com/ding-f/school_wall_imgs/raw/master/posts/kids.png" , "likeCount" : 999 , "pageviews" : 9999 } ] , "total" : 0 , "size" : 10 , "current" : 1 , "orders" : [ ] , "searchCount" : false , "pages" : 0 }
根据分类ID获取某个分类信息
实现这个依旧是单表查询操作,MyBatis Plus 直接几句即可搞定。
1 2 3 4 5 6 7 8 9 10 11 12 @Autowired PostCategoriesService postCategoriesService; @GetMapping("getcategorie/id={cid}") public PostCategories getCategorById (@PathVariable(name = "cid") Integer cid) { PostCategories postCategories= postCategoriesService.getById(cid); return postCategories; }
根据分类ID获取所有该ID下的帖子并翻页
帖子表其中的分类表格的ID还是有的,等于说分类表为帖子表的主表,从表的数据直接可以利用其外键字段查出所有某一分类下的所有帖子。
1 2 3 4 5 6 7 8 9 10 11 12 13 14 15 16 @Autowired PostsService postsService; @GetMapping("/posts/page={page}/categorieid={cid}") public IPage<Posts> postListByCategorieId (@PathVariable(name = "page") Integer pageNum ,@PathVariable(name = "cid") Integer cateId) { QueryWrapper queryWrapper= new QueryWrapper <Posts>().select("id" ,"title" , "post_medium_image" , "date" , "total_comments" , "like_count" , "pageviews" ).eq("category_id" ,cateId); Page page = new Page (pageNum,10 ,false ); IPage<Posts> pageData = postsService.page(page,queryWrapper); return pageData; }
调用后端接口:
http://0.0.0.0:3000/schoolwall/posts/page=1/categorieid=3
1 2 3 4 5 6 7 8 9 10 11 12 13 14 15 16 17 18 19 20 21 22 23 24 25 26 27 28 29 30 31 32 33 34 35 36 37 38 39 40 41 42 43 44 45 46 47 48 49 50 51 52 53 54 55 56 57 58 59 60 61 62 63 64 65 66 67 68 69 70 71 72 73 74 75 76 77 78 79 80 81 82 83 84 85 86 87 88 89 90 91 92 93 94 95 96 97 98 99 100 { "records" : [ { "id" : 6 , "date" : "2022-03-10T19:55:41" , "title" : "伞丢了" , "totalComments" : 23 , "postMediumImage" : "../../images/error.jpg" , "likeCount" : 56 , "pageviews" : 135 } , { "id" : 101 , "date" : "2022-03-12T10:45:05" , "title" : "伞丢了" , "totalComments" : 16 , "postMediumImage" : "https://gitee.com/ding-f/school_wall_imgs/raw/master/posts/dog.jpg" , "likeCount" : 22 , "pageviews" : 223 } , { "id" : 103 , "date" : "2022-03-12T10:45:05" , "title" : "伞丢了" , "totalComments" : 11 , "postMediumImage" : "../../images/error.jpg" , "likeCount" : 111 , "pageviews" : 1111 } , { "id" : 104 , "date" : "2022-03-12T10:45:18" , "title" : "伞丢了" , "totalComments" : 16 , "postMediumImage" : "https://gitee.com/ding-f/school_wall_imgs/raw/master/posts/dog.jpg" , "likeCount" : 22 , "pageviews" : 223 } , { "id" : 106 , "date" : "2022-03-12T10:45:18" , "title" : "伞丢了" , "totalComments" : 11 , "postMediumImage" : "../../images/error.jpg" , "likeCount" : 111 , "pageviews" : 1111 } , { "id" : 107 , "date" : "2022-03-12T10:46:00" , "title" : "伞丢了" , "totalComments" : 16 , "postMediumImage" : "https://gitee.com/ding-f/school_wall_imgs/raw/master/posts/dog.jpg" , "likeCount" : 22 , "pageviews" : 223 } , { "id" : 109 , "date" : "2022-03-12T10:46:00" , "title" : "伞丢了" , "totalComments" : 11 , "postMediumImage" : "../../images/error.jpg" , "likeCount" : 111 , "pageviews" : 1111 } , { "id" : 110 , "date" : "2022-03-12T10:46:00" , "title" : "伞丢了" , "totalComments" : 16 , "postMediumImage" : "https://gitee.com/ding-f/school_wall_imgs/raw/master/posts/dog.jpg" , "likeCount" : 22 , "pageviews" : 223 } , { "id" : 112 , "date" : "2022-03-12T10:46:00" , "title" : "伞丢了" , "totalComments" : 11 , "postMediumImage" : "../../images/error.jpg" , "likeCount" : 111 , "pageviews" : 1111 } , { "id" : 115 , "date" : "2022-03-12T10:46:18" , "title" : "伞丢了" , "totalComments" : 11 , "postMediumImage" : "../../images/error.jpg" , "likeCount" : 111 , "pageviews" : 1111 } ] , "total" : 0 , "size" : 10 , "current" : 1 , "orders" : [ ] , "searchCount" : false , "pages" : 0 }
调用后端接口http://0.0.0.0:3000/schoolwall/posts/page=2/categorieid=3:
1 2 3 4 5 6 7 8 9 10 11 12 13 14 15 16 17 18 19 20 21 22 23 24 25 26 27 28 29 30 31 32 33 34 35 36 37 38 39 40 41 42 43 44 45 46 { "records" : [ { "id" : 116 , "date" : "2022-03-12T10:46:18" , "title" : "伞丢了" , "totalComments" : 16 , "postMediumImage" : "https://gitee.com/ding-f/school_wall_imgs/raw/master/posts/dog.jpg" , "likeCount" : 22 , "pageviews" : 223 } , { "id" : 118 , "date" : "2022-03-12T10:46:18" , "title" : "伞丢了" , "totalComments" : 11 , "postMediumImage" : "https://ding-f.gitee.io/images/error.jpg" , "likeCount" : 111 , "pageviews" : 1111 } , { "id" : 119 , "date" : "2022-03-12T10:46:18" , "title" : "伞丢了" , "totalComments" : 16 , "postMediumImage" : "https://gitee.com/ding-f/school_wall_imgs/raw/master/posts/dog.jpg" , "likeCount" : 22 , "pageviews" : 223 } , { "id" : 121 , "date" : "2022-03-12T10:46:18" , "title" : "伞丢了" , "totalComments" : 11 , "postMediumImage" : "https://ding-f.gitee.io/images/error.jpg" , "likeCount" : 111 , "pageviews" : 1111 } ] , "total" : 0 , "size" : 10 , "current" : 2 , "orders" : [ ] , "searchCount" : false , "pages" : 0 }
搜索文章或标题功能的实现
参考:
MyBatis Plus官网:条件构造器
菜鸟教程:encodeURIComponent()
脚本之家:Java实现代码搜索功能详解
主要还是通过数据库的关键字查找两个字段就可以实现,MyBatis Plus 实现同样的功能就相当于下面的SQL语句:
1 2 3 4 5 6 7 8 9 SELECT id, title, post_medium_image, date , total_comments, like_count, pageviewsFROM school_wall.sw_postswhere content like concat('%' #concat() 连接字符串的作用 , #{searchKey} , '%' ) or title like concat('%' , #{searchKey} , '%' ) order by date desc
1 2 3 4 5 6 7 8 9 10 11 12 13 14 15 16 17 18 19 20 @Autowired PostsService postsService; @GetMapping("/posts/page={pagenum}/search={keyword}") public IPage<Posts> searchPosts (@PathVariable("pagenum") Integer pageNum,@PathVariable("keyword") String keyWord) { QueryWrapper queryWrapper = new QueryWrapper <Posts>() .select("id" ,"title" , "post_medium_image" , "date" , "total_comments" , "like_count" , "pageviews" ) .like("content" ,keyWord) .or() .like("title" ,keyWord); Page page = new Page (pageNum, 10 ,false ); IPage<Posts> searchPostsPage= postsService.page(page,queryWrapper); return searchPostsPage; }
调用后端接口:
http://0.0.0.0:3000/schoolwall/posts/page=2/search=%E4%BC%9E(伞),前端往search传值的时候做了`encodeURIComponent()`对关键字进行了处理,以免出现不能访问的情况
1 2 3 4 5 6 7 8 9 10 11 12 13 14 15 16 17 18 19 20 21 22 23 24 25 26 27 28 29 30 31 32 33 34 35 36 37 38 39 40 41 42 43 44 45 46 47 48 49 50 51 52 53 54 55 56 57 58 59 60 61 62 63 64 65 66 67 68 69 70 71 72 73 74 75 76 77 78 79 80 81 82 83 84 85 86 87 88 89 90 91 92 93 94 95 96 97 98 99 100 { "records" : [ { "id" : 6 , "date" : "2022-03-10T19:55:41" , "title" : "伞丢了" , "totalComments" : 23 , "postMediumImage" : "../../images/error.jpg" , "likeCount" : 56 , "pageviews" : 135 } , { "id" : 101 , "date" : "2022-03-12T10:45:05" , "title" : "伞丢了" , "totalComments" : 16 , "postMediumImage" : "https://gitee.com/ding-f/school_wall_imgs/raw/master/posts/dog.jpg" , "likeCount" : 22 , "pageviews" : 223 } , { "id" : 103 , "date" : "2022-03-12T10:45:05" , "title" : "伞丢了" , "totalComments" : 11 , "postMediumImage" : "../../images/error.jpg" , "likeCount" : 111 , "pageviews" : 1111 } , { "id" : 104 , "date" : "2022-03-12T10:45:18" , "title" : "伞丢了" , "totalComments" : 16 , "postMediumImage" : "https://gitee.com/ding-f/school_wall_imgs/raw/master/posts/dog.jpg" , "likeCount" : 22 , "pageviews" : 223 } , { "id" : 106 , "date" : "2022-03-12T10:45:18" , "title" : "伞丢了" , "totalComments" : 11 , "postMediumImage" : "../../images/error.jpg" , "likeCount" : 111 , "pageviews" : 1111 } , { "id" : 107 , "date" : "2022-03-12T10:46:00" , "title" : "伞丢了" , "totalComments" : 16 , "postMediumImage" : "https://gitee.com/ding-f/school_wall_imgs/raw/master/posts/dog.jpg" , "likeCount" : 22 , "pageviews" : 223 } , { "id" : 109 , "date" : "2022-03-12T10:46:00" , "title" : "伞丢了" , "totalComments" : 11 , "postMediumImage" : "../../images/error.jpg" , "likeCount" : 111 , "pageviews" : 1111 } , { "id" : 110 , "date" : "2022-03-12T10:46:00" , "title" : "伞丢了" , "totalComments" : 16 , "postMediumImage" : "https://gitee.com/ding-f/school_wall_imgs/raw/master/posts/dog.jpg" , "likeCount" : 22 , "pageviews" : 223 } , { "id" : 112 , "date" : "2022-03-12T10:46:00" , "title" : "伞丢了" , "totalComments" : 11 , "postMediumImage" : "../../images/error.jpg" , "likeCount" : 111 , "pageviews" : 1111 } , { "id" : 115 , "date" : "2022-03-12T10:46:18" , "title" : "伞丢了" , "totalComments" : 11 , "postMediumImage" : "../../images/error.jpg" , "likeCount" : 111 , "pageviews" : 1111 } ] , "total" : 0 , "size" : 10 , "current" : 1 , "orders" : [ ] , "searchCount" : false , "pages" : 0 }
http://0.0.0.0:3000/schoolwall/posts/page=2/search=%E4%BC%9E(伞)
1 2 3 4 5 6 7 8 9 10 11 12 13 14 15 16 17 18 19 20 21 22 23 24 25 26 27 28 29 30 31 32 33 34 35 36 37 38 39 40 41 42 43 44 45 46 47 48 49 50 51 52 53 54 55 { "records" : [ { "id" : 116 , "date" : "2022-03-12T10:46:18" , "title" : "伞丢了" , "totalComments" : 16 , "postMediumImage" : "https://gitee.com/ding-f/school_wall_imgs/raw/master/posts/dog.jpg" , "likeCount" : 22 , "pageviews" : 223 } , { "id" : 118 , "date" : "2022-03-12T10:46:18" , "title" : "伞丢了" , "totalComments" : 11 , "postMediumImage" : "https://ding-f.gitee.io/images/error.jpg" , "likeCount" : 111 , "pageviews" : 1111 } , { "id" : 119 , "date" : "2022-03-12T10:46:18" , "title" : "伞丢了" , "totalComments" : 16 , "postMediumImage" : "https://gitee.com/ding-f/school_wall_imgs/raw/master/posts/dog.jpg" , "likeCount" : 22 , "pageviews" : 223 } , { "id" : 121 , "date" : "2022-03-12T10:46:18" , "title" : "伞丢了" , "totalComments" : 11 , "postMediumImage" : "https://ding-f.gitee.io/images/error.jpg" , "likeCount" : 111 , "pageviews" : 1111 } , { "id" : 122 , "date" : "2022-03-12T10:46:18" , "title" : "伞丢了" , "totalComments" : 16 , "postMediumImage" : "https://gitee.com/ding-f/school_wall_imgs/raw/master/posts/dog.jpg" , "likeCount" : 22 , "pageviews" : 223 } ] , "total" : 0 , "size" : 10 , "current" : 2 , "orders" : [ ] , "searchCount" : false , "pages" : 0 }
MyBatis
参阅以下内容请先参阅:
后端开发 > MyBatis-Plus > 分页插件
API规划 > 小程序首页 > 根据帖子ID获取评论列表
数据库设计 > 数据分析 > 评论列表
MyBatis Plus 开始的介绍已经提到,MyBatis Plus 不支持对多表查询的优化,由于MyBatis Plus是基于MyBatis进行开发的,所以之前的MyBatis的东西该有的还是有的,直接使用MyBatis自身有的老方式进行多表查询操作,这个模块将进行MyBatis Plus的分页插件进行一个分页操作。
参考:
MyBatis官网: XML 映射文件配置
云海天教:详解MyBatis resultType与resultMap中的几种返回类型
知乎:mybatisplus比mybatis到底好在哪里?
使用的MyBatis 其中配置了代码生成器直接就可以编辑Mapper文件,写MyBatis 的xml配置,不用手动或者依靠IDEA手动操作生成,开箱即用。
帖子分类列表 Mapper配置:
1 2 3 4 5 6 7 8 9 10 11 12 13 14 15 16 <resultMap id ="postCategoriesMap" type ="com.schoolwall.entity.PostCategories" autoMapping ="true" > <result property ="count" column ="posts_count" /> </resultMap > <select id ="selectCountPostByCategories" resultMap ="postCategoriesMap" > select spc.id, spc.name, spc.description, spc.category_thumbnail_image, count(sp.id) as posts_count from sw_post_categories spc left join sw_posts sp on sp.category_id = spc.id group by spc.id order by posts_count desc </select >
Mapper接口:
1 2 3 4 5 @Component(value = "PostCategoriesMapper") public interface PostCategoriesMapper extends BaseMapper <PostCategories> { List<PostCategories> selectCountPostByCategories () ; }
Service接口:
1 2 3 4 5 6 public interface PostCategoriesService extends IService <PostCategories> { List<PostCategories> selectCountPostByCategories () ; }
ServiceImp:
1 2 3 4 5 6 7 8 9 10 11 12 @Service public class PostCategoriesServiceImpl extends ServiceImpl <PostCategoriesMapper, PostCategories> implements PostCategoriesService { @Autowired PostCategoriesMapper postCategoriesMapper; @Override public List<PostCategories> selectCountPostByCategories () { List<PostCategories> categorisesConutList = postCategoriesMapper.selectCountPostByCategories(); return categorisesConutList; } }
实现后调用帖子分类计数的接口: http://0.0.0.0:3000/schoolwall/categories:
1 2 3 4 5 6 7 8 9 10 11 12 13 14 15 16 17 18 19 20 21 22 23 24 25 26 27 28 29 30 31 32 33 34 35 36 37 38 39 40 41 42 43 44 45 46 47 48 49 50 51 52 53 54 55 56 57 58 59 60 61 62 63 64 65 66 67 68 69 70 71 72 73 74 75 76 { "code" : 200 , "msg" : "操作成功" , "data" : [ { "id" : 3 , "name" : "寻物" , "description" : "没有描述~" , "categoryThumbnailImage" : "https://gitee.com/ding-f/school_wall_imgs/raw/master/category/losejpeg.jpeg" , "count" : 14 } , { "id" : 1 , "name" : "校园生活" , "description" : "爱校园,爱生活~" , "categoryThumbnailImage" : "https://gitee.com/ding-f/school_wall_imgs/raw/master/category/schoollife.jpeg" , "count" : 9 } , { "id" : 4 , "name" : "二手交易" , "description" : "没有描述~" , "categoryThumbnailImage" : "https://gitee.com/ding-f/school_wall_imgs/raw/master/category/used.png" , "count" : 1 } , { "id" : 2 , "name" : "表白" , "description" : "你眨一下眼,就翻阅了我心里的春夏秋冬。" , "categoryThumbnailImage" : "https://gitee.com/ding-f/school_wall_imgs/raw/master/category/love.jpg" , "count" : 0 } , { "id" : 5 , "name" : "建议" , "description" : "没有描述~" , "categoryThumbnailImage" : "" , "count" : 0 } , { "id" : 6 , "name" : "捞人" , "description" : "没有描述~" , "categoryThumbnailImage" : "https://gitee.com/ding-f/school_wall_imgs/raw/master/category/look_for.jpg" , "count" : 0 } , { "id" : 7 , "name" : "交友" , "description" : "没有描述~" , "categoryThumbnailImage" : "" , "count" : 0 } , { "id" : 8 , "name" : "学习" , "description" : "没有描述~" , "categoryThumbnailImage" : "" , "count" : 0 } , { "id" : 9 , "name" : "推广" , "description" : "没有描述~" , "categoryThumbnailImage" : "" , "count" : 0 } , { "id" : 10 , "name" : "失物招领" , "description" : "没有描述~" , "categoryThumbnailImage" : "" , "count" : 0 } ] }
Bilibili评论列表
参考:
CSDN:MyBatis-Plus 分页查询以及自定义sql分页
CSDN:Spring Boot:关于“No converter found for return value of type: class xxx”的解决方法
CSDN:Expected one result (or null) to be returned by selectOne(), but found: 3
CSDN:使用Mybatis-Plus时,注入mapper提示Could not autowire. No beans of ‘xxxMapper‘ type found.
关于Mybatis的@Param注解
Bilibili评论列表的Mapper配置:
下面的配置文件手动进行了映射操作,当然可以进行自动映射的,模仿大佬,提升一下性能,不使用自动映射,把每个字段都进行一个手动配置,说真的挺累的,报了两次类型不匹配的异常才把手动映射试成功。
1 2 3 4 5 6 7 8 9 10 11 12 13 14 15 16 17 18 19 20 21 22 23 24 25 26 27 28 29 30 31 32 33 34 35 36 37 38 39 40 41 42 <?xml version="1.0" encoding="UTF-8" ?> <!DOCTYPE mapper PUBLIC "-//mybatis.org//DTD Mapper 3.0//EN" "http://mybatis.org/dtd/mybatis-3-mapper.dtd" > <mapper namespace ="com.schoolwall.mapper.FatherReplyMapper" > <resultMap id ="replyVoResultMap" type ="com.schoolwall.entity.vo.ReplyVo" > <id column ="f_id" property ="id" jdbcType ="BIGINT" /> <result column ="f_nick_name" property ="nickName" jdbcType ="CHAR" /> <result column ="f_avatar_url" property ="avatarUrl" jdbcType ="VARCHAR" /> <result column ="f_content" property ="content" jdbcType ="LONGVARCHAR" /> <result column ="f_father_reply_date" property ="fatherReplyDate" jdbcType ="TIMESTAMP" /> <collection property ="sonList" ofType ="com.schoolwall.entity.vo.SonReplyVo" > <id column ="s_id" property ="id" jdbcType ="BIGINT" /> <result column ="s_nick_name" property ="nickName" jdbcType ="CHAR" /> <result column ="s_avatar_url" property ="avatarUrl" jdbcType ="VARCHAR" /> <result column ="s_content" property ="content" jdbcType ="LONGVARCHAR" /> <result column ="s_receiver_nick" property ="receiverNick" jdbcType ="CHAR" /> <result column ="s_son_reply_date" property ="sonReplyDate" jdbcType ="TIMESTAMP" /> </collection > </resultMap > <select id ="selectReplyVoByPostId" resultMap ="replyVoResultMap" parameterType ="java.lang.Long" > select f.id as f_id,u.nick_name as f_nick_name,u.avatar_url as f_avatar_url,f.content as f_content,f.father_reply_date as f_father_reply_date, s.id as s_id,su.nick_name as s_nick_name,su.avatar_url as s_avatar_url,s.content as s_content,s.receiver_nick as s_receiver_nick,s.son_reply_date as s_son_reply_date from sw_father_reply f left join sw_user u on user_id = u.id left join sw_son_reply s on father_reply_id = f.id left join sw_user su on su.id = s.user_id <where > f.post_id = #{post_id} </where > order by father_reply_date asc, son_reply_date asc </select > </mapper >
Mapper接口:
1 2 3 4 5 6 7 @Component(value = "FatherReplyMapper") public interface FatherReplyMapper extends BaseMapper <FatherReply> { IPage<Map<String, Object>> selectReplyVoByPostId (IPage<Map<String, Object>> page,@Param("post_id") Long postID) ; }
Service接口:
1 2 3 4 5 public interface FatherReplyService extends IService <FatherReply> { IPage<Map<String, Object>> selectReplyVoByPostId (IPage<Map<String, Object>> page,@Param("post_id") Long postId) ; }
仔细的读者会发现其中的@Param注解,此注解一定是标注在接口上的,作用是将查询数据映射到数据库字段的,其中@Param注解中含有字符串post_id就是数据表字段名。
ServiceImp:
1 2 3 4 5 6 7 8 9 10 11 12 13 @Service public class FatherReplyServiceImpl extends ServiceImpl <FatherReplyMapper, FatherReply> implements FatherReplyService {@Autowired private FatherReplyMapper fatherReplyMapper; @Override public IPage<Map<String, Object>> selectReplyVoByPostId (IPage<Map<String, Object>> page, Long postId) { IPage<Map<String, Object>> iPageFatherReply= fatherReplyMapper.selectReplyVoByPostId(page,postId); return iPageFatherReply; } }
以上的注意观察会发现返回类型和一般情况下有所不同,原因是使用了MyBatis Plus的分页插件,MyBatis Plus的分页插件可以作用于未做增强的MyBatis之上的。
调用接口没有问题的话就是这样的结果:
调用后端接口:
http://0.0.0.0:3000/schoolwall/getcomments/postid=123/commentspage=1
1 2 3 4 5 6 7 8 9 10 11 12 13 14 15 16 17 18 19 20 21 22 23 24 25 26 27 28 29 30 31 32 33 34 35 36 37 38 39 40 41 42 43 44 45 46 47 48 49 50 51 52 53 54 55 56 57 58 59 60 61 62 63 64 65 66 67 68 69 70 71 72 { "code" : 200 , "msg" : "操作成功" , "data" : { "records" : [ { "id" : 10 , "nickName" : "华强" , "avatarUrl" : "https://syimg.3dmgame.com/uploadimg/xiaz/2021/0803/1627959355632.gif" , "content" : "瓜多少钱一斤啊" , "fatherReplyDate" : "2022-03-16T20:35:12" , "sonList" : [ { "id" : 8 , "nickName" : "水果摊摊主" , "avatarUrl" : "https:\\/\\/thirdwx.qlogo.cn\\/mmopen\\/vi_32\\/JTQ8vfn8CDFaNQ55EPtfVibEBESvV8UAb9E5JiahibwKLbKG41HJxRib2uhpleutD4EiajNKkibV7bQWb83qvxicQdaibQ\\/132" , "content" : "2.5一斤。" , "receiverNick" : "华强" , "sonReplyDate" : "2022-03-20T19:37:41" } , { "id" : 9 , "nickName" : "华强" , "avatarUrl" : "https://syimg.3dmgame.com/uploadimg/xiaz/2021/0803/1627959355632.gif" , "content" : "皮瓜金子做的还是瓜粒子金子做的? 看,吸铁石,另外你说的瓜要是生的你自己吞进去?!" , "receiverNick" : "水果摊摊主" , "sonReplyDate" : "2022-03-20T19:38:54" } , { "id" : 10 , "nickName" : "水果摊摊主" , "avatarUrl" : "https:\\/\\/thirdwx.qlogo.cn\\/mmopen\\/vi_32\\/JTQ8vfn8CDFaNQ55EPtfVibEBESvV8UAb9E5JiahibwKLbKG41HJxRib2uhpleutD4EiajNKkibV7bQWb83qvxicQdaibQ\\/132" , "content" : "你是故意找茬儿是不是??" , "receiverNick" : "华强" , "sonReplyDate" : "2022-03-20T19:39:39" } ] } , { "id" : 1 , "nickName" : "铸鼎_" , "avatarUrl" : "https://ding-f.gitee.io/medias/detail/logo.png\n" , "content" : "你是哪位??" , "fatherReplyDate" : "2022-03-17T20:22:42" , "sonList" : [ { "id" : 1 , "nickName" : "水果摊摊主" , "avatarUrl" : "https:\\/\\/thirdwx.qlogo.cn\\/mmopen\\/vi_32\\/JTQ8vfn8CDFaNQ55EPtfVibEBESvV8UAb9E5JiahibwKLbKG41HJxRib2uhpleutD4EiajNKkibV7bQWb83qvxicQdaibQ\\/132" , "content" : "我是你**。" , "receiverNick" : "铸鼎_" , "sonReplyDate" : "2022-03-20T19:30:59" } , { "id" : 2 , "nickName" : "铸鼎_" , "avatarUrl" : "https://ding-f.gitee.io/medias/detail/logo.png\n" , "content" : "出来单挑啊?" , "receiverNick" : "水果摊摊主" , "sonReplyDate" : "2022-03-20T19:32:10" } ] } ] , "total" : 0 , "size" : 5 , "current" : 1 , "orders" : [ ] , "searchCount" : false , "pages" : 0 } }
http://0.0.0.0:3000/schoolwall/getcomments/postid=123/commentspage=2
1 2 3 4 5 6 7 8 9 10 11 12 13 14 15 16 17 18 19 20 21 22 23 24 25 26 27 28 29 30 31 32 33 34 35 36 37 38 39 40 41 42 43 44 45 46 47 48 49 50 51 52 53 54 55 56 57 58 59 60 61 62 63 { "code": 200 , "msg": "操作成功", "data": { "records": [ { "id": 1 , "nickName": "铸鼎_", "avatarUrl": "https://ding-f.gitee.io/medias/detail/logo.png\n", "content": "你是哪位??", "fatherReplyDate": "2022-03-17T20:22:42", "sonList": [ { "id": 3 , "nickName": "水果摊摊主", "avatarUrl": "https:\\/\\/thirdwx.qlogo.cn\\/mmopen\\/vi_32\\/JTQ8vfn8CDFaNQ55EPtfVibEBESvV8UAb9E5JiahibwKLbKG41HJxRib2uhpleutD4EiajNKkibV7bQWb83qvxicQdaibQ\\/132", "content": "单挑啊", "receiverNick": "铸鼎_", "sonReplyDate": "2022-03-20T19:33:11" }, { "id": 4 , "nickName": "铸鼎_", "avatarUrl": "https://ding-f.gitee.io/medias/detail/logo.png\n", "content": "来啊", "receiverNick": "水果摊摊主", "sonReplyDate": "2022-03-20T19:34:16" }, { "id": 5 , "nickName": "水果摊摊主", "avatarUrl": "https:\\/\\/thirdwx.qlogo.cn\\/mmopen\\/vi_32\\/JTQ8vfn8CDFaNQ55EPtfVibEBESvV8UAb9E5JiahibwKLbKG41HJxRib2uhpleutD4EiajNKkibV7bQWb83qvxicQdaibQ\\/132", "content": "你打我", "receiverNick": "铸鼎_", "sonReplyDate": "2022-03-20T19:34:51" }, { "id": 6 , "nickName": "铸鼎_", "avatarUrl": "https://ding-f.gitee.io/medias/detail/logo.png\n", "content": "我打你,你打我又怎样?", "receiverNick": "水果摊摊主", "sonReplyDate": "2022-03-20T19:35:35" }, { "id": 7 , "nickName": "水果摊摊主", "avatarUrl": "https:\\/\\/thirdwx.qlogo.cn\\/mmopen\\/vi_32\\/JTQ8vfn8CDFaNQ55EPtfVibEBESvV8UAb9E5JiahibwKLbKG41HJxRib2uhpleutD4EiajNKkibV7bQWb83qvxicQdaibQ\\/132", "content": "你有没有砍过人", "receiverNick": "铸鼎_", "sonReplyDate": "2022-03-20T19:36:24" } ] } ], "total": 0 , "size": 5 , "current": 2 , "orders": [], "searchCount": false , "pages": 0 } }
Shiro Redis +JWT
JSON Web Token(缩写 JWT)是目前最流行的跨域认证解决方案,本节介绍它的原理和用法。
需要做的是前后端分离项目的骨架,所以一般我们会采用jwt作为跨域身份验证解决方案。所以整合shiro的过 程中,我们需要引入jwt的身份验证过程。
请教前端大佬,小程序APP都要解决跨域问题,于是查询资料上说明要解决跨域问题还是要整合JWT登录实现JSON Web Token作为SessionID代替Session方式进行验证用户身份等问题。
参考:
springboot热部署之spring-boot-devtools
GitHub:pring-boot-devtools+shiro-redis集成的一个错误
整合Shiro Session和JWT登录
知乎:Base64编码详解
GitHub:jjwt
JWT 原理
参考:
简书:什么是 JWT – JSON WEB TOKEN
RESTful API:JWT 认证
JWT官网
CSDN:从零入门HMAC-SHA256
服务器认证以后,生成一个 JSON 对象,发回给用户,就像下面这样。
1 2 3 4 5 { "姓名": "张三", "角色": "管理员", "到期时间": "2018年7月1日0点0分" }
以后,用户与服务端通信的时候,都要发回这个 JSON 对象。服务器完全只靠这个对象认定用户身份。为了防止用户篡改数据,服务器在生成这个对象的时候,会加上签名(详见后文)。
服务器就不保存任何 session 数据了,也就是说,服务器变成无状态了,从而比较容易实现扩展。
JWT 的数据结构 :
实际的 JWT 大概就像下面这样。
它是一个很长的字符串,中间用点(.)分隔成三个部分。注意,JWT 内部是没有换行的,这里只是为了便于展示,将它写成了几行。
JWT 的三个部分依次如下。
1 2 3 Header(头部) Payload(负载) Signature(签名)
写成一行,就是下面的样子。
Header.Payload.Signature
下面依次介绍这三个部分。
Header
Header 部分是一个 JSON 对象,描述 JWT 的元数据,通常是下面的样子。
1 2 3 4 { "alg": "HS256", "typ": "JWT" }
上面代码中,alg属性表示签名的算法(algorithm),默认是 HMAC SHA256(写成 HS256);typ属性表示这个令牌(token)的类型(type),JWT 令牌统一写为JWT。
最后,将上面的 JSON 对象使用 Base64URL 算法转成字符串。
Payload
Payload 部分也是一个 JSON 对象,用来存放实际需要传递的数据。JWT 规定了7个官方字段,供选用。
1 2 3 4 5 6 7 iss (issuer):签发人 exp (expiration time):过期时间 sub (subject):主题 aud (audience):受众 nbf (Not Before):生效时间 iat (Issued At):签发时间 jti (JWT ID):编号
除了官方字段,你还可以在这个部分定义私有字段,下面就是一个例子。
1 2 3 4 5 { "phone": "1234567890", "name": "John Doe", "admin": true }
注意,不要把秘密信息放在这个部分。
这个 JSON 对象也要使用 Base64URL 算法转成字符串。
Signature
Signature 部分是对前两部分进行HS256签名,防止数据篡改。
首先,指定一个密钥(secret)。密钥只有服务器知道,不能泄露给用户。然后,使用 Header 里面指定的签名算法(默认是 HMAC SHA256),按照下面的函数产生签名,即需要base64url加密后的header和base64url加密后的payload使用.连接组成的字符串,然后通过header中声明的加密方式进行加盐secret组合加密,就构成了jwt的第三部分Signature。
1 HMACSHA256(base64UrlEncode(header) + "." + base64UrlEncode(payload), secret)
算出签名以后,把 Header、Payload、Signature 三个部分拼成一个字符串,每个部分之间用”点”(.)分隔,就可以返回给用户。
总结:
构建 Header:JWT 的 Header 部分包含了关于生成后的 token 的元数据以及签名算法信息。通常,Header 中包含了两个重要的字段:alg(算法)和 typ(类型)。alg 字段指定了使用的加密算法,例如 HMAC SHA256 或者 RSA。typ 字段指定了 token 的类型,通常为 “JWT”。Header 是一个 JSON 对象,然后将其转换为 Base64 编码字符串。
构建 Payload:Payload 包含了用户的信息或者其他需要传递的数据。Payload 也是一个 JSON 对象,可以包含自定义的字段,也可以包含一些预定义的字段,比如 iss(issuer,签发者)、sub(subject,主题)、exp(expiration time,过期时间)等。Payload 被转换为 Base64 编码字符串。
生成 Signature:Signature 是对 Header 和 Payload 进行签名后得到的字符串。签名算法通常使用 Header 中指定的加密算法,以及使用一个密钥(称为 secret)来生成签名。具体的生成方式取决于所选的算法。通常是将 Header 和 Payload 这两部分通过指定的加密算法生成一个哈希值,然后再使用密钥对哈希值进行加密。最终得到的 Signature 也是一个 Base64 编码字符串。
组装 JWT:将 Base64 编码后的 Header、Payload 和 Signature 用.连接起来,形成最终的 JWT。
Base64URL
前面提到,Header 和 Payload 串型化的算法是 Base64URL。这个算法跟 Base64 算法基本类似,但有一些小的不同。
JWT 作为一个令牌(token),有些场合可能会放到 URL(比如 api.example.com/?token=xxx)。Base64 有三个字符+、/和=,在 URL 里面有特殊含义,所以要被替换掉:=被省略、+替换成-,/替换成_ 。这就是 Base64URL 算法。
JWT 的使用方式
客户端收到服务器返回的 JWT,可以储存在 Cookie 里面,也可以储存在 localStorage(此项目小程序做法) 。
此后,客户端每次与服务器通信,都要带上这个 JWT。你可以把它放在 Cookie 里面自动发送,但是这个方式跨域需要考虑更多问题,所以更好的做法是放在 HTTP 请求的头信息Authorization字段里面(此项目的做法) 。
Authorization: Bearer
另一种做法是,跨域的时候,JWT 就放在 POST 请求的数据体里面。
JWT替换Session方案
参考:
V2EX:JWT 服务端怎么理解不需要存储 session
阿里云开发者社区:单点登录(SSO)看这一篇就够了
JWT分析:
JWT 默认是不加密,但也是可以加密的。生成原始 Token 以后,可以用密钥再加密一次。
JWT 不加密的情况下,不能将秘密数据写入 JWT。
JWT 不仅可以用于认证,也可以用于交换信息。有效使用 JWT,可以降低服务器查询数据库的次数。
JWT 本身包含了认证信息,一旦泄露,任何人都可以获得该令牌的所有权限。为了减少盗用,JWT 的有效期应该设置得比较短。对于一些比较重要的权限,使用时应该再次对用户进行认证。
为了减少盗用,JWT 不应该使用 HTTP 协议明码传输,要使用 HTTPS 协议传输。
JWT 是作为令牌设计的。如果只是入门使用,那么设计的是低级令牌,有这些特点:
需要预先申请;
不可伪造,但可复制,可以被冒用;
令牌是唯一认证手段,见牌如见人;
有有效期,但不可收回;
可以负载其它信息,包括授权。低级令牌有这些漏洞:
另外还有一个大漏洞,直接在令牌上放授权,不过一般没人这么干。
SessionID与JWT Token 对比:
JWT登录步骤
Session登录步骤
客户端 携带认证名和密码 发起登录请求
客户端 携带认证名和密码 发起登录请求
服务器端验证成功,返回 token 给客户端
服务器端验证成功,将用户信息存储下来,生成一个 sessionId, 返回给客户端,并通知客户端将sessionId set到cookie中
客户端保存 token(通常是保存在Cookie或者LocalStorage中)
客户端自动执行服务器端将sessionId set到cookie中的命令,sessionId被自动保存在cookie中
客户端以后每次请求,都在Header中 携带该Token
客户端以后每次请求,都会自动将cookie中的sessionId发送给服务器端
服务器端,每次接收非登录请求,都验证Header中是否有token
服务器端,每次接收请求,都从cookie中取出sessionId,根据这个id找到存储的用户信息,如果有,说明登录,否则说明未登录或者已过期。
替换方案分析:
使用Shiro管理并存储登录了的用户信息,退出登录时候销毁服务器端用户信息,用类似于JWT作为SessionId,客户端采用JWT模式来保存和发送这个sessionId,保存在cookie或localStorage中,发送时用header;
为了接收非同源客户端的AJAX请求,服务器端需要启用 CORS(Cross-Origin Resource Sharing) 跨域访问,为指定域名的客户端开通白名单,以便接收其他不同客户端的请求;
服务器端采用JWT + Shiro的处理方式,服务器端使用Shiro处理保存用户信息到Redis,根据请求来更新JWT过期时间;
平滑的处理token过期,如果用户一直在活动,服务器端需要刷新token,客户端要配合。
JWT 的最大缺点是,由于服务器不保存 session 状态,因此无法在使用过程中废止某个 token,或者更改 token 的权限,比如某个用户更改了密码或者此用户权限被管理员更改,但只有JWT方式已经将其签证出去,还未到JWT失效时间服务器端拿他并没有办法的,也就是说拿着这个JWT的客户端依旧不用验证新的密码还是登录状态,权限依旧是之前的状态。也就是说,一旦 JWT 签发了,在到期之前就会始终有效,除非服务器部署额外的逻辑,比如本项目中额外的逻辑即是使用Shiro+Redis进行一个解决。
总结:
至于为什么要使用Shiro Redis +JWT 方案,有人可能会觉得这样不是和Session方案没什么区别之类的想法,或者直接使用JWT不就可以实现无状态的登录方式,也不需要对用户信息进行存储在内存之类的,但要考虑:
在只使用JWT情况下虽然实现了无状态的登录方式,但安全得不到保障,比如用户修改了密码,一般情况下都是要进行重新验证用户名密码进行登录的,但由于只是使用JWT情况下,由于它的Token是一但签发给用户有效期没有过的时候是不能被销毁的,在别的设备上登录不能使其进行密码验证操作。
只有Session sessionId set到cookie中的的情况下实现跨域、单点登录、负载均衡、多平台开发是很不方便的。
虽然Shiro对比Session的方式同样是将用户信息存储在内存当中,但是参考到的文章中有个评论是这样说的: JWT的payload 大部分不需要存储在 redis 里,因为可以用签名来验证,真正需要的只有一个 uuid ;而 session 共享要全都存储。存储成本小 ,即说明使用Shiro就可以节省服务器内存空间。
实验证明果然是Redis存储到内存的是UUID,登录某个用户获取Redis KEYS *信息:
在搭建起来Shiro Redis +JWT,偶然发现其实这个方案还有一个好处就是,当签发的Jwt请求一次受限资源,Shiro就会生成该用户的UUID,只要UUID不过期,以后就不用再携带Jwt进行受限资源访问,除非用户退出登录。
Apache Shiro内部方法说明
要理解SHIRO-REDIS的配置,就得先学习Apache shiro基本工作原理以及内部组件之间是如何进行工作的,比如Apache Shiro 框架的一些专业名词。
详见:
铸鼎_ > Apache-Shiro + JWT
SHIRO-REDIS
考虑到后面可能需要做集群、负载均衡等,所以就需要会话共享,而shiro的缓存和会话信息,我们一般考虑使用redis来存储这些数据,所以,我们不仅仅需要整合shiro,同时也需要整合redis。在开源的项目中,我们找到了一个starter可以快速整合shiro-redis。
来自官网的SHIRO-REDIS配置,以下是我的总结。
配置SHIRO-REDIS,官方文档里有好几种方式,比如,Shiro.ini专属Shiro内部的配置文件使用方式(跟Spring方式差不多)、Spring方式,当然最方便易用的还是Spring Boot的配置方式,直接可以用Java语言对SHIRO-REDIS进行配置,省去比如写xml配置Spring、Shiro.ini方式写配置的诸多不便。
参考:
Apache Shiro 官网
SHIRO-REDIS 官方文档
GitHub:shiro-redis
博客园:shiro(java安全框架)
博客园:SpringBoot + Shiro + shiro.ini 的踩坑记录
Java问答社:整合shiro+jwt,并会话共享
Bilibili:Shiro 整合 JWT逻辑分析
SpringBoot Integrate With JWT And Apache Shiro
Spring Boor配置SHIRO-REDIS
无论是哪种配置方式,Web项目 基本上都是下面的结构,按照这个结构官网上提供的那几种配置方式都可以行得通,但会发现为什么没有Filter相关的模块,原因是以下的配置方式没有涉及到JWT,只是自带的SHIRO默认Session过滤器处理方式,整合JWT配置请参阅:SpringBoot Integrate With JWT And Apache Shiro 。
主要是要了解一下Spring Boot的SHIRO-REDIS配置方式和过程:
建议先看参考资料,再看Spring Boot配置代码:
1 2 3 4 5 6 7 8 9 10 11 12 13 14 15 16 17 18 19 20 21 22 23 24 25 26 27 28 29 30 31 32 33 34 35 36 37 38 39 40 41 42 43 44 45 46 47 48 49 50 51 52 53 54 55 56 57 58 59 60 61 62 63 64 65 66 67 68 69 70 71 72 73 74 75 76 77 78 79 80 81 82 @Configuration public class ShiroConfig { @Autowired JwtFilter jwtFilter; @Bean public SessionManager sessionManager (RedisSessionDAO redisSessionDAO) { DefaultWebSessionManager sessionManager = new DefaultWebSessionManager (); sessionManager.setSessionDAO(redisSessionDAO); return sessionManager; } @Bean public DefaultWebSecurityManager securityManager (AccountRealm accountRealm, SessionManager sessionManager, RedisCacheManager redisCacheManager) { DefaultWebSecurityManager securityManager = new DefaultWebSecurityManager (accountRealm); securityManager.setSessionManager(sessionManager); securityManager.setCacheManager(redisCacheManager); return securityManager; } @Bean public ShiroFilterChainDefinition shiroFilterChainDefinition () { DefaultShiroFilterChainDefinition chainDefinition = new DefaultShiroFilterChainDefinition (); Map<String, String> filterMap = new LinkedHashMap <>(); filterMap.put("/**" , "jwt" ); chainDefinition.addPathDefinitions(filterMap); return chainDefinition; } @Bean("shiroFilterFactoryBean") public ShiroFilterFactoryBean shiroFilterFactoryBean (SecurityManager securityManager, ShiroFilterChainDefinition shiroFilterChainDefinition) { ShiroFilterFactoryBean shiroFilter = new ShiroFilterFactoryBean (); shiroFilter.setSecurityManager(securityManager); Map<String, Filter> filters = new HashMap <>(); filters.put("jwt" , jwtFilter); shiroFilter.setFilters(filters); Map<String, String> filterMap = shiroFilterChainDefinition.getFilterChainMap(); shiroFilter.setFilterChainDefinitionMap(filterMap); return shiroFilter; } }
自定义Ream 了规则为AccountRealm;原生的Shiro使用的Session方式,过滤器也是Session方式,要自定义过滤器 JwtFilter,后面介绍自定义JwtFilter。
ShiroFilterFactoryBean定义链接要走过滤器。
Ream规则定义AccountRealm:
1 2 3 4 5 6 7 8 9 10 11 12 13 14 15 16 17 18 19 20 21 22 23 24 25 26 27 28 29 30 31 32 33 34 35 36 37 38 39 40 41 42 43 44 45 46 47 48 @Component public class AccountRealm extends AuthorizingRealm { @Autowired JwtUtil jwtUtil; @Autowired UserService userService; @Override public boolean supports (AuthenticationToken token) { return token instanceof JwtToken; } @Override protected AuthorizationInfo doGetAuthorizationInfo (PrincipalCollection principals) { return null ; } @Override protected AuthenticationInfo doGetAuthenticationInfo (AuthenticationToken token) throws AuthenticationException { JwtToken jwtToken = (JwtToken) token; String userId = jwtUtil.getClaimByToken((String) jwtToken.getPrincipal()).getSubject(); User user = userService.getById(Long.valueOf(userId)); if (user == null ) { throw new UnknownAccountException ("账户不存在" ); } if (user.getEnable().equals("0" )) { throw new LockedAccountException ("账户已被锁定" ); } AccountProfile profile = new AccountProfile (); BeanUtil.copyProperties(user, profile); return new SimpleAuthenticationInfo (profile, jwtToken.getCredentials(), getName()); } }
其中最重要的还是要实现身份认证和授权管理;
可见Ream类在Shiro内不仅只是用户资源获取,还有身份验证和权限管理;
JwtUtil需要自定义,主要对处理JWT相关业务,比如生成JWT内部信息(Header、Payload)、加密解密,后面介绍自定义的JwtUtil;
JwtToken需要自定义;
AccountProfile自定义,要保证其内部变量在数据库里数值唯一;
返回 new SimpleAuthenticationInfo(profile, jwtToken.getCredentials(), getName());,猜测应该是将用户的唯一信息写入Redis,就像Session那样在内存中用户登录就为该用户建立一个Session,生成一个SessionID返回给客户端,而目前的Shiro+Jwt方式就返回给用户Jwt。
AccountProfile:
1 2 3 4 5 6 7 8 9 10 11 12 13 @Data public class AccountProfile implements Serializable { private Integer id; private String userName; private String avatarUrl; private String email; }
JwtUtil:
1 2 3 4 5 6 7 8 9 10 11 12 13 14 15 16 17 18 19 20 21 22 23 24 25 26 27 28 29 30 31 32 33 34 35 36 37 38 39 40 41 42 43 44 45 46 47 48 49 50 51 52 53 @Slf4j @Data @Component @ConfigurationProperties(prefix = "schoolwall.jwt") public class JwtUtil { private String secret; private long expire; private String header; public String generateToken (long userId) { Date nowDate = new Date (); Date expireDate = new Date (nowDate.getTime() + expire); return Jwts.builder() .setHeaderParam("typ" , "JWT" ) .setSubject(userId+"" ) .setIssuedAt(nowDate) .setExpiration(expireDate) .signWith(SignatureAlgorithm.HS512, secret) .compact(); } public Claims getClaimByToken (String token) { try { return Jwts.parser() .setSigningKey(secret) .parseClaimsJws(token) .getBody(); }catch (Exception e){ log.debug("validate is token error " , e); return null ; } } public boolean isTokenExpired (Date expiration) { return expiration.before(new Date ()); } }
JwtToken:
1 2 3 4 5 6 7 8 9 10 11 12 13 14 15 16 17 18 public class JwtToken implements AuthenticationToken { private String token; public JwtToken (String jwt) { this .token = jwt; } @Override public Object getPrincipal () { return token; } @Override public Object getCredentials () { return token; } }
JwtFilter:
逻辑关系用代码进行表示:
1 2 3 4 5 6 7 8 9 10 11 12 13 14 15 16 17 18 19 20 21 22 23 24 25 26 27 28 29 30 31 32 33 34 35 36 37 38 39 40 41 42 43 44 45 46 47 48 49 50 51 52 53 54 55 56 57 58 59 60 61 62 63 64 65 66 67 68 69 70 71 @Component public class JwtFilter extends AuthenticatingFilter { @Autowired JwtUtil jwtUtil; @Override protected AuthenticationToken createToken (ServletRequest request, ServletResponse response) throws Exception { HttpServletRequest userRequest= (HttpServletRequest) request; String jwt=userRequest.getHeader("Authorization" ); if (StringUtils.isEmpty(jwt)) return null ; return new JwtToken (jwt); } @Override protected boolean onAccessDenied (ServletRequest request, ServletResponse response) throws Exception { HttpServletRequest userRequest= (HttpServletRequest) request; String jwt=userRequest.getHeader("Authorization" ); if (StringUtils.isEmpty(jwt)) { return true ; } else { Claims claim = jwtUtil.getClaimByToken(jwt); if (claim==null || jwtUtil.isTokenExpired(claim.getExpiration())){ throw new ExpiredCredentialsException ("token失效,请重新登录" ); } } return executeLogin(request,response); } @Override protected boolean onLoginFailure (AuthenticationToken token, AuthenticationException e, ServletRequest request, ServletResponse response) { HttpServletResponse httpServletResponse=(HttpServletResponse) response; Throwable throwable=e.getCause()==null ? e:e.getCause(); Result result=Result.fail(throwable.getMessage()); String jsonfailmess= JSONUtil.toJsonStr(result); try { httpServletResponse.getWriter().print(jsonfailmess); }catch (IOException ioException){ } return false ; } }
其中onLoginFailure方法不必须进行复写的,但因为项目是前后端分离的模式进行开发的,一定要打印错误信息为JSON形式输出到前端,复写了这个方法当调用executeLogin(request,response)抛出异常就可以将其捕获并输出JSON错误信息,原先不进行复写只是return false禁止下一步。
最后优化一下总体配置
方便对项目进行管理加上以下配置信息:
1 2 3 4 shiro-redis: enabled: true redis-manager: host: 127.0 .0 .1 :6379
若使用shiro和springboot热部署spring-boot-devtools工具,则需要添加一个文件src/main/resources/META-INF/spring-devtools.properties,这样就解决两个工具之间的冲突报错:
1 restart.include.shiro-redis =/shiro-[\\w-\\.]+jar
跨域认证的问题 互联、网服务离不开用户认证。一般流程是下面这样。
用户向服务器发送用户名和密码。
服务器验证通过后,在当前对话(session)里面保存相关数据,比如用户角色、登录时间等等。
服务器向用户返回一个 session_id,写入用户的 Cookie。
用户随后的每一次请求,都会通过 Cookie,将 session_id 传回服务器。
服务器收到 session_id,找到前期保存的数据,由此得知用户的身份。
这种模式的问题在于,扩展性(scaling)不好。单机当然没有问题,如果是服务器集群,或者是跨域的服务导向架构,就要求 session 数据共享,每台服务器都能够读取 session。
举例来说,A 网站和 B 网站是同一家公司的关联服务。现在要求,用户只要在其中一个网站登录,再访问另一个网站就会自动登录,请问怎么实现?
一种解决方案是 session 数据持久化,写入数据库或别的持久层。各种服务收到请求后,都向持久层请求数据。这种方案的优点是架构清晰,缺点是工程量比较大。另外,持久层万一挂了,就会单点失败。
另一种方案是服务器索性不保存 session 数据了,所有数据都保存在客户端,每次请求都发回服务器。JWT 就是这种方案的一个代表。
Session与Shiro JWT方式不同之处在于:
Session登录方式,sessionId是自动保存到cookie中的,且发送请求时,浏览器是自动附加上cookie信息的,这一切的前提是:前后端处于同一域下面,如果不是相同的域,cookie信息是不会自动提交给后端的。
Session登录方式,服务器端缓存了登录用户的信息,而JWT方式,服务器端可以不存储任何信息,只要验证Token通过即可,不一定要知道用户信息,实际上JWT方式,JWT的Token本身存储了一些关键数据(比如用户名,过期时间),token是根据密码学算法生成的,无法更改token里面的内容。
Session登录方式,缓存的过期时间是由服务器端设定的,而JWT方式,token信息中自带过期时间(服务器端生成token的时候就设定好了过期时间),过期之后token验证失败。
Session登录方式,优点是不存在CORS跨域问题,且服务器端处理登录过期很简单、自然。但不支持跨域访问在某些情况下是硬伤!!(比如APP登录)
Session登录方式,sessionId是自动保存和发送的,而JWT方案,客户端需要写代码实现token的保存,并配置AJAX的header实现token的发送。
测试&问题处理
搭建好Shiro Redis + Jwt方式,实验过程中发现的一些问题。
Redis缓存UUID的Key-Value有效期与Jwt有效期
登录了后台中ID=2的用户:
Post方式携带Json信息user passwd访问用户登录接口http://0.0.0.0:3000/schoolwall/user/login 无Jwt情况,登录不经过JwtFilter,直接进入用户登录接口,但此接口代码未经过Shiro,只是下发了JWT。
登录后如果没有访问到带有@RequiresAuthentication 的接口,Shiro Redis是不会生成用户信息到Redis缓存的,也就是说没有建立用户的UUID:
只有访问了带有带有@RequiresAuthentication 的接口,才会生成该用户UUID,且带有有效时间(Redis默认Keys过期时间1800,换算过来是半个小时):
如果等到过了这半个小时,但Jwt有效时间没有过,再次登录就会生成另一个新的UUID,虽然是同一个用户,但UUID就会不一样:
但如果是Jwt时间已过就会阻止用户访问已登录资源。
Jwt重新签发
以下是同一个用户,调用登录接口在Jwt没有过期的情况下进行的两次登录,即重新签发Jwt,本次签发的Jwt与上次签发的毫无关联,且均有效。
1 2 3 4 5 6 7 8 9 10 11 12 13 14 15 16 17 18 19 20 21 22 23 24 25 26 27 28 29 30 31 32 33 34 35 36 37 38 39 40 41 42 43 44 45 46 47 48 49 50 51 52 53 54 55 56 57 58 59 60 61 class SchoolwallApplicationTests { @Test void jwtTimeTest () { DateFormat dateFormat=DateFormat.getDateInstance(DateFormat.FULL,Locale.CHINA); System.out.println("现在时间:" +new Date ().getTime()+"转换为本地时间格式:" +dateFormat.format(new Date ())); String claim1 = Base64.decodeStr("eyJzdWIiOiIyIiwiaWF0IjoxNjUwMjEwMzQ1LCJleHAiOjE2NTA4MTUxNDV9" ); String claim2 = Base64.decodeStr("eyJzdWIiOiIyIiwiaWF0IjoxNjUwMjY0NDEyLCJleHAiOjE2NTA4NjkyMTJ9" ); String Header=Base64.decodeStr("eyJ0eXAiOiJKV1QiLCJhbGciOiJIUzUxMiJ9" ); System.out.println(Header); System.out.println("------------------用户第一次登录实验----------------" ); System.out.println("用户登录第一次后的JWT-Payload:" +claim1); long iat=1650210345 ; long exp=604800000 /1000 ; long i=iat+exp; System.out.println("1650210345[签发时间戳] + " +":604800[系统设置有效期时间戳(换算成秒)]" +i+"【过期时间戳】" ); String formatJwtDate1=formatJwtDate(iat,i); System.out.println(formatJwtDate1); System.out.println("------------------用户第二次登录实验----------------" ); System.out.println("用户登录第二次后的JWT-Payload:" +claim2); String formatJwtDate2=formatJwtDate(1650264412 ,1650869212 ); System.out.println(formatJwtDate2); } public String formatJwtDate (long iat,long exp) { DateFormat dateFormat=DateFormat.getDateInstance(DateFormat.FULL,Locale.CHINA); long iatms=iat*1000 ; long expms=exp*1000 ; String formatIatms= dateFormat.format(new Date (iatms)); String formatExpms= dateFormat.format(new Date (expms)); return "签证时间:" +formatIatms+"\n过期时间:" +formatExpms; } }
输出结果:
1 2 3 4 5 6 7 8 9 10 11 12 13 现在时间:1650267596485 转换为本地时间格式:2022 年4 月18 日 星期一 { "typ" : "JWT" , "alg" : "HS512" } ------------------用户第一次登录实验---------------- 用户登录第一次后的JWT-Payload:{ "sub" : "2" , "iat" : 1650210345 , "exp" : 1650815145 } 1650210345 [ 签发时间戳] + :604800 [ 系统设置有效期时间戳(换算成秒)] 1650815145 【过期时间戳】签证时间:2022 年4 月17 日 星期日 过期时间: 2022 年4 月24 日 星期日 ------------------用户第二次登录实验---------------- 用户登录第二次后的JWT-Payload:{ "sub" : "2" , "iat" : 1650264412 , "exp" : 1650869212 } 签证时间:2022 年4 月18 日 星期一 过期时间: 2022 年4 月25 日 星期一 Process finished with exit code 0
同一用户情况下带着之前的Jwt重新登录就会刷新Jwt,如果没带之前的Jwt,重新登录就会将之前登录过的Jwt重新返回给用户,但UUID不过期,正常请求受限资源情况下不会更换UUID。
Shiro Session(UUID)特性
登录测试过程中发现,客户端被签发Jwt后,客户端只需提交一次Jwt验证,Shiro就将根据用户提交的Jwt生成Shiro SessionID(UUID)并记录到Redis中,只要Redis中UUID不过期,用户所有对受限资源的请求都可以不带Jwt,但用户如果退出登录,Shiro Redis就会删除该用户的Session UUID。
微信开发者官网:wx.setStorage(Object object)
登录ID=1用户:
签证了Jwt但未进行受限资源请求,查询Redis,Shiro未生成该用户UUID:
带着签证的Jwt请求受限资源:
接着上一步骤,不进行上传Jwt,依然访问成功:
该用户访问退出登录接口:
查询Redis:
再次登录UUID也会不同。
删除Session UUID(相当于退出登录),进行测试:
再次携带访问会成功,但Session UUID会和之前不一致:
再次查询Redis:
总结:
可以利用这个Shiro这个特性,降低安全风险,因为可以不用每次都携带着Jwt,比普通Session方式更加安全。
本项目是小程序后端,Jwt签证7天有效期,可以将Redis存入的UUID设置长一些,比如说设置UUID为1天时间有效期,如果过期就需要小程序端重新传递Jwt,重新登录判断Jwt是否过期,过期的话如果登录成功就需要重新进行签证,未过期不进行重新签证,Jwt保存在小程序的Storage内部,如果用户点击退出登录,不会清除Jwt,当小程序端检查微信服务器Session_key如果过期就会重新获取Code,此时的Session_key(保证客户端数据传过来可以与微信服务器数据对应)也就重新获取了,所以当Session_key有效期过了就应该重新清除Jwt,没有Jwt小程序后端就需要重新登录,重新登录就会判断到没有Jwt就会重新签证一个,这样就会使得信息更加安全,UUID有效期可以设置更长一些,这样就不会频繁的传递Jwt,还可以将Jwt信息使用微信提供的wx.setStorage(Object object) 对其Jwt信息进行一个加密,加强安全性。
文件上传下载
项目中上传图片还是涉及到了文件上传下载。分析小程序后端要搭建在云服务器,如果文件服务器搭建在云服务器的话还是会占用不小的系统资源。解决方案一共有两个,一、单独买图床服务器,但好像没啥好玩的。二、重新开启一个项目,将这个程序专门跑在自己家里作为小程序文件上传下载服务器。本着自己喜欢技术决定还是选择方案二比较合适。
参考:
Commons IO – Commons IO Overview
FileUpload – Using FileUpload
异常处理
Shiro 在处理登录请求的时候,就会抛出相应的异常,比如用户不存在、用户校验密码错误、用户被禁用等异常,由于是前后端分离项目,不处理只会默认返回tomcat或者nginx的5XX页面(spring boot 默认情况下会映射到 /error 进行异常处理,提示并不十分友好),这样处理对于普通用户来说并不友好,处理必要的结果为Json信息返回给前端还是很必要的。
参考:
Java问答社:超详细!4小时开发一个SpringBoot+vue前后端分离博客项目!!
Bilibili:4小时项目全局异常处理
博客园:Spring Boot 系列(八)@ControllerAdvice 拦截异常并统一处理
数据库设计 创建数据库
参考:
mysql使用utf8mb4经验吐血总结
创建新的数据库,选用字符集utf8mb4 排序字符集utf8mb4_unicode_ci:
MySQL在 5.5.3 之后增加了 utf8mb4 字符编码,mb4即 most bytes 4。简单说 utf8mb4 是 utf8 的超集并完全兼容utf8,能够用四个字节存储更多的字符。也就是当你的数据库里要求能够存入这些表情或宽字符时,可以把字段定义为 utf8mb4
常见排序字符集有两种:
utf8mb4_unicode_ci 是基于标准的Unicode来排序和比较,能够在各种语言之间精确排序utf8mb4_general_ci 没有实现Unicode排序规则,在遇到某些特殊语言或字符是,排序结果可能不是所期望的。utf8mb4_general_ci 在比较和排序的时候更快utf8mb4_unicode_ci 在特殊情况下,Unicode排序规则为了能够处理特殊字符的情况,实现了略微复杂的排序算法。
但目前来说,性能已经不是这个时代的瓶颈了,推荐是 utf8mb4_unicode_ci,将来 8.0 里也极有可能使用变为默认的规则。
数据分析
JSON分析:
数据库可以多几个前端不需要的字段,但不能缺少前端所需字段。
查询出JSON数据也不能少于前端所需元素,可以多但不能少元素。
整体分析:
刚开始觉得应该设计数据库可能要和WordPress数据库字段基本上对应的差不多,其实还是要具体问题具体分析的,就比如小程序里面可能就不需要WordPress前端那样需要处理那么多的数据,比如一个查看帖子详情的页面可能就只需要标题、内容、发布时间、帖子插图等,但如果换作WordPress前端那样对数据库查询可能就需要更多的信息即字段,以下就是我个人对本项目数据库设计的过程和思路分析。
10篇帖子为1页,分页获取列表
很明显下面的接口都是传入per_page=10代表了每10篇分一页,orderby=date代表按照时间排序,order=desc排序为倒序(最新时间排在前)。
小程序源码:
调用WordPress后端接口标记关键数据https://www.watch-life.net/wp-json/watch-life-net/v1/posts?per_page=10&orderby=date&order=desc&page=1:
1 2 3 4 5 6 7 8 9 10 11 12 13 14 15 16 17 18 19 20 21 22 23 24 25 26 27 28 29 30 31 32 33 34 35 36 37 38 39 40 41 42 43 44 45 46 47 48 49 50 51 52 53 54 55 56 57 58 59 60 61 62 63 64 65 66 67 68 69 70 71 72 73 74 75 76 77 [ { "id" : 2006 , "date" : "2022-03-13T11:53:54" , "date_gmt" : "2022-03-13T03:53:54" , "guid" : { "rendered" : "https:\/\/www.watch-life.net\/?p=2006" } , "modified" : "2022-03-13T12:38:43" , "modified_gmt" : "2022-03-13T04:38:43" , "slug" : "a-slight-illness-logs" , "status" : "publish" , "type" : "post" , "link" : "https:\/\/www.watch-life.net\/life-thinking\/a-slight-illness-logs.html" , "title" : { "rendered" : "\u5fae\u6059\u7410\u8bb0" } , "excerpt" : { "rendered" : "<p>\u7528\u6742\u4e71\u65e0\u7ae0\u7684\u6587\u5b57\uff0c\u8bb0\u5f55\u4e00\u6bb5\u4f4f\u9662\u6cbb\u7597\u75d4\u75ae\u4e4b\u75be\u7684\u601d\u8003\uff0c\u4ee5\u6b64\u4f5c\u4e3a\u7eaa\u5ff5\u3002<\/p>\n" , "protected" : false } , "author" : 1 , "featured_media" : 2007 , "comment_status" : "open" , "ping_status" : "open" , "sticky" : false , "template" : "" , "format" : "standard" , "meta" : [ ] , "categories" : [ 1 ] , "tags" : [ 165 , 261 , 42 , 363 , 267 , 1186 ] , "post_thumbnail_image" : "https:\/\/www.watch-life.net\/images\/2022\/03\/IMG_20220312_153337-113x150.jpg" , "content_first_image" : "https:\/\/www.watch-life.net\/images\/2022\/03\/IMG_20220312_153337-scaled.jpg" , "post_medium_image_300" : "https:\/\/www.watch-life.net\/images\/2022\/03\/IMG_20220312_153337-225x300.jpg" , "post_thumbnail_image_624" : "https:\/\/www.watch-life.net\/images\/2022\/03\/IMG_20220312_153337-769x1024.jpg" , "post_frist_image" : "https:\/\/www.watch-life.net\/images\/2022\/03\/IMG_20220312_153337-scaled.jpg" , "post_medium_image" : "https:\/\/www.watch-life.net\/images\/2022\/03\/IMG_20220312_153337-225x300.jpg" , "post_large_image" : "https:\/\/www.watch-life.net\/images\/2022\/03\/IMG_20220312_153337-769x1024.jpg" , "post_full_image" : "https:\/\/www.watch-life.net\/images\/2022\/03\/IMG_20220312_153337-scaled.jpg" , "post_all_images" : [ { "imagesurl" : "https:\/\/www.watch-life.net\/images\/2022\/03\/IMG_20220312_153337-769x1024.jpg" , "id" : "image0" } ] , "videoAdId" : "adunit-54154da9ac037533" , "listAd" : "1" , "listAdId" : "adunit-04c7f94fa0c24c57" , "listAdEvery" : 7 , "total_comments" : 4 , "category_name" : "\u968f\u601d\u5076\u5f97" , "post_date" : "2022-03-13" , "like_count" : "2" , "pageviews" : 547 , "next_post_id" : null , "next_post_title" : null , "previous_post_id" : 1748 , "previous_post_title" : "\u7236\u4eb2\u4e0d\u9700\u8981\u8282\u65e55" } ]
数据库设计:
1 2 3 4 5 6 7 8 9 10 11 12 13 14 15 16 17 18 19 CREATE TABLE `sw_posts` ( `id` bigint unsigned NOT NULL AUTO_INCREMENT, `user_id` bigint NOT NULL DEFAULT '1' , `date ` datetime NOT NULL DEFAULT CURRENT_TIMESTAMP , `content` longtext CHARACTER SET utf8mb4 COLLATE utf8mb4_unicode_ci NOT NULL , `title` text CHARACTER SET utf8mb4 COLLATE utf8mb4_unicode_ci NOT NULL , `enable` int NOT NULL DEFAULT '1' , `modified` datetime NOT NULL DEFAULT CURRENT_TIMESTAMP , `type` varchar (20 ) CHARACTER SET utf8mb4 COLLATE utf8mb4_unicode_ci NOT NULL DEFAULT 'post' , `total_comments` int unsigned NOT NULL DEFAULT '0' , `post_medium_image` varchar (255 ) COLLATE utf8mb4_unicode_ci NOT NULL DEFAULT '../../images/error.jpg' , `like_count` int unsigned NOT NULL DEFAULT '0' , `pageviews` int unsigned NOT NULL DEFAULT '0' , `category_id` int unsigned NOT NULL DEFAULT '1' , PRIMARY KEY (`id`), KEY `type_status_date` (`type`,`enable`,`date `,`id`), KEY `author` (`user_id`) ) ENGINE= InnoDB AUTO_INCREMENT= 1962 DEFAULT CHARSET= utf8mb4 COLLATE = utf8mb4_unicode_ci;
SQL语句:
MyBatis Plus实现,不用写SQL。
后端实现过程:
后端开发 > MyBatis Plus > 10篇帖子为1页,分页获取列表
评论列表
评论列表一般网页实现方式就以下参考中三种方式,我专门参考了Bilibili上的评论列表,但是实现起来还是网上找了两个类似Java实现方式进行了分析,他们都是这三种方式进行实现的,但是网上的帖子其实第三种也就是参考Bilibili上那种最复杂的评论列表其实讲的原理模糊不清的,只有自己开动大脑进行自己构思,当然也结合以下博客的帖子进行了综合的分析。
参考:
Java徐小白:Java实现评论回复功能
Howlet:评论功能的简单实现
小程序源码:
可以分析以上的方式就是参考博文里的的套娃型 ,即第二种实现方式,但是这样的评论列表有一个明显的缺点,就是套娃层数多了数据就会被前端隐藏,虽然后端可能实现了更多层的套娃。
调用WordPress后端接口,以下的例子就是一个经典的套娃型评论后端实现API:https://www.watch-life.net/wp-json/watch-life-net/v1/comment/getcomments?postid=1959&limit=10&page=1&order=desc:
1 2 3 4 5 6 7 8 9 10 11 12 13 14 15 16 17 18 19 20 21 22 23 24 25 26 27 28 29 30 31 32 33 34 35 36 37 38 39 40 41 42 43 44 45 46 47 48 49 50 51 52 53 54 55 56 57 58 59 60 61 62 63 64 65 66 67 68 69 70 71 72 73 74 75 76 77 78 79 80 { "code" : "success" , "message" : "\u83b7\u53d6\u8bc4\u8bba\u6210\u529f" , "status" : "200" , "data" : [ { "id" : "239892" , "author_name" : "\u5c1b \u660a`" , "author_url" : "https:\/\/thirdwx.qlogo.cn\/mmopen\/vi_32\/ajNVdqHZLLAF1uErNlC9dZGul5ZCYIFoUDSXdA1aIFcgtgOMMUicngGrTULc1Il33yvaUYz1K0cibeYkf3Kte9SA\/132" , "date" : "2021-12-15" , "content" : "\u63d2\u4ef6\u5728\u54ea\u91cc\u4e0b\u8f7d\u5440" , "formId" : null , "userid" : "15521" , "child" : [ { "id" : "239893" , "author_name" : "xjb" , "author_url" : "..\/..\/images\/gravatar.png" , "date" : "2021-12-15" , "content" : "\u8fd8\u6ca1\u6709\u63d0\u4f9b\u4e0b\u8f7d\u5730\u5740\uff0c\u6b63\u5728\u505a\u6700\u540e\u7684\u5b8c\u5584\uff0c\u5373\u5c06\u63d0\u4f9b\u4e0b\u8f7d\u3002" , "formId" : null , "userid" : "1" , "child" : [ { "id" : "239909" , "author_name" : "az" , "author_url" : "..\/..\/images\/gravatar.png" , "date" : "2021-12-21" , "content" : "\u671f\u5f85\u554a\uff01\uff01\uff01" , "formId" : null , "userid" : "0" , "child" : [ { "id" : "239950" , "author_name" : "Twelve" , "author_url" : "https:\/\/thirdwx.qlogo.cn\/mmopen\/vi_32\/PiajxSqBRaEJYL9G3UuHCjr2eZ9XK34j8YtpRzjl1TMeyM7BzsYPOdTOu55cQWT06iaYHev84PgcC0omyX6z8ymg\/132" , "date" : "2022-01-11" , "content" : "\u53ef\u4ee5\u5728\u5fae\u6155\u5546\u57ce\u4e0b\u8f7d\u4e86" , "formId" : null , "userid" : "70" , "child" : [ { "id" : "240270" , "author_name" : "\ue110Immortal\ud83c\udf40" , "author_url" : "https:\/\/thirdwx.qlogo.cn\/mmopen\/vi_32\/cacXgAPOEMSyJpia8hXs6x9R5rVNGSbeTcxUpXHFh7SDRUToKZ4RPgvuTWO09Wt3pVvicMsz8icmcO7ic39gphzic4A\/132" , "date" : "2022-03-17" , "content" : "\u597d" , "formId" : null , "userid" : "15736" , "child" : [ ] } ] } ] } ] } , { "id" : "239964" , "author_name" : "Twelve" , "author_url" : "https:\/\/thirdwx.qlogo.cn\/mmopen\/vi_32\/PiajxSqBRaEJYL9G3UuHCjr2eZ9XK34j8YtpRzjl1TMeyM7BzsYPOdTOu55cQWT06iaYHev84PgcC0omyX6z8ymg\/132" , "date" : "2022-01-14" , "content" : "\u5728\u5fae\u6155\u5546\u57ce\u53ef\u4ee5\u4e0b\u8f7d\u4e86" , "formId" : null , "userid" : "70" , "child" : [ ] } ] } ] }
数据库表设计;
1 2 3 4 5 6 7 8 9 10 CREATE TABLE `sw_father_reply` ( `id` bigint unsigned NOT NULL AUTO_INCREMENT, `post_id` bigint unsigned NOT NULL , `user_id` bigint unsigned NOT NULL , `content` text NOT NULL , `receiver_nick` char (50 ) DEFAULT '0' , `father_reply_date` datetime NOT NULL DEFAULT CURRENT_TIMESTAMP , PRIMARY KEY (`id`) ) ENGINE= InnoDB AUTO_INCREMENT= 16 DEFAULT CHARSET= utf8mb3;
1 2 3 4 5 6 7 8 9 10 11 CREATE TABLE `sw_son_reply` ( `id` bigint unsigned NOT NULL AUTO_INCREMENT, `post_id` bigint unsigned NOT NULL , `father_reply_id` bigint unsigned NOT NULL , `user_id` bigint unsigned NOT NULL , `content` text NOT NULL , `receiver_nick` char (50 ) NOT NULL , `son_reply_date` datetime NOT NULL DEFAULT CURRENT_TIMESTAMP , PRIMARY KEY (`id`) ) ENGINE= InnoDB AUTO_INCREMENT= 11 DEFAULT CHARSET= utf8mb3;
查询语句:
1 2 3 4 5 select spc.id, spc.name, spc.description, spc.category_thumbnail_image, count (sp.id) as posts_count from sw_post_categories spc left join sw_posts sp on sp.category_id = spc.id group by spc.id order by posts_count desc
后端实现过程:
后端开发 > MyBatis > Bilibili评论列表
帖子分类并计数
以下的信息只有分析过小程序源码后分析得出的,可以观察到其实小程序前端就不像是WordPress Web前端那样,或许WordPress数据库内的所有字段也不会被它的前端全部用上,但至少要考虑小程序只有80后端端口才可以被使用,要考虑到后期租服务器,比如阿里云,租的服务器可是要按照带宽大小收费的,后期的话,图片媒体类的服务器也是到时候也是要考虑是否可以使用自己家里的服务器(非80)。
参考:
CSDN:多表计数查询作业
小程序源码:
分析之后其实可以得出,我们小程序项目其实没必要那么多比必要的数据,或者维护这些数据还需要更多的后端代码来管理字段。
以下信息分析过小程序源码后得出下面的标注“关键数据”之外的数据其实对于小程序来说是没有用的,简化数据库后期代码维护会变得相对简单。
对应WordPress调用网站后端接口 https://www.watch-life.net/wp-json/wp/v2/categories?per_page=100&orderby=count&order=desc&openid= :
1 2 3 4 5 6 7 8 9 10 11 12 13 14 15 16 17 18 19 20 21 22 23 24 25 26 27 28 29 30 31 32 33 34 35 36 37 38 39 40 41 42 43 44 45 46 47 48 49 50 51 52 53 54 [ { "id" : 557 , "count" : 128 , "description" : "\u6709\u5173Visual Studio2005\u3001Visual Studio2008\u3001Visual Studio2010\u7684\u6587\u7ae0" , "link" : "https:\/\/www.watch-life.net\/category\/visual-studio" , "name" : "Visual Studio" , "slug" : "visual-studio" , "taxonomy" : "category" , "parent" : 0 , "meta" : [ ] , "subimg" : "subscription.png" , "subflag" : "0" , "category_thumbnail_image" : "https:\/\/www.watch-life.net\/images\/visual-studio.png" , "_links" : { "self" : [ { "href" : "https:\/\/www.watch-life.net\/wp-json\/wp\/v2\/categories\/557" } ] , "collection" : [ { "href" : "https:\/\/www.watch-life.net\/wp-json\/wp\/v2\/categories" } ] , "about" : [ { "href" : "https:\/\/www.watch-life.net\/wp-json\/wp\/v2\/taxonomies\/category" } ] , "wp:post_type" : [ { "href" : "https:\/\/www.watch-life.net\/wp-json\/wp\/v2\/posts?categories=557" } ] , "curies" : [ { "name" : "wp" , "href" : "https:\/\/api.w.org\/{rel}" , "templated" : true } ] } } ]
数据库表设计:
1 2 3 4 5 6 7 8 CREATE TABLE `sw_post_categories` ( `id` int unsigned NOT NULL AUTO_INCREMENT, `name` char (50 ) CHARACTER SET utf8mb4 COLLATE utf8mb4_unicode_ci NOT NULL , `description` varchar (255 ) COLLATE utf8mb4_unicode_ci DEFAULT '没有描述~' , `category_thumbnail_image` varchar (255 ) COLLATE utf8mb4_unicode_ci NOT NULL DEFAULT '' , PRIMARY KEY (`id`), UNIQUE KEY `categorie_name_UNIQUE` (`name`) ) ENGINE= InnoDB AUTO_INCREMENT= 19 DEFAULT CHARSET= utf8mb4 COLLATE = utf8mb4_unicode_ci;
查询语句:
1 select spc.id,spc.name ,spc.description,spc.category_thumbnail_image,count (sp.id) as posts_count from sw_post_categories spc left join sw_posts sp on sp.category_id= spc.id group by spc.id order by posts_count desc ;
后端实现过程:
后端开发 > MyBatis > 帖子分类列表
根据分类ID获取所有该ID下的帖子并翻页
这个功能模块也是需要Json数据分析的,使用的表跟之前的有所重复,我们调用WordPress接口直接分析JSON数据。规划后端代码操作数据库返回小程序所需JSON数据即可。
小程序源码:
以下元素名称都要和自己后端对应起来,所以下面的变量就符合Java变量命名规格。
调用WordPress后端接口标注关键数据https://www.watch-life.net/wp-json/watch-life-net/v1/posts?per_page=10&orderby=date&order=desc&page=1&categories=1:
分析这个链接其实就可以明白它的意思,per_page=10每页10个、orderby=date&order=desc按照时间倒序,即新的在前面,page=1第一页,categories=1哪个分类ID。
1 2 3 4 5 6 7 8 9 10 11 12 13 14 15 16 17 18 19 20 21 22 23 24 25 26 27 28 29 30 31 32 33 34 35 36 37 38 39 40 41 42 43 44 45 46 47 48 49 50 51 52 53 54 55 56 57 58 59 60 61 62 63 64 65 66 67 68 69 70 71 72 73 74 75 76 [ { "id" : 2006 , "date" : "2022-03-13T11:53:54" , "date_gmt" : "2022-03-13T03:53:54" , "guid" : { "rendered" : "https:\/\/www.watch-life.net\/?p=2006" } , "modified" : "2022-03-13T12:38:43" , "modified_gmt" : "2022-03-13T04:38:43" , "slug" : "a-slight-illness-logs" , "status" : "publish" , "type" : "post" , "link" : "https:\/\/www.watch-life.net\/life-thinking\/a-slight-illness-logs.html" , "title" : { "rendered" : "\u5fae\u6059\u7410\u8bb0" } , "excerpt" : { "rendered" : "<p>\u7528\u6742\u4e71\u65e0\u7ae0\u7684\u6587\u5b57\uff0c\u8bb0\u5f55\u4e00\u6bb5\u4f4f\u9662\u6cbb\u7597\u75d4\u75ae\u4e4b\u75be\u7684\u601d\u8003\uff0c\u4ee5\u6b64\u4f5c\u4e3a\u7eaa\u5ff5\u3002<\/p>\n" , "protected" : false } , "author" : 1 , "featured_media" : 2007 , "comment_status" : "open" , "ping_status" : "open" , "sticky" : false , "template" : "" , "format" : "standard" , "meta" : [ ] , "categories" : [ 1 ] , "tags" : [ 165 , 261 , 42 , 363 , 267 , 1186 ] , "post_thumbnail_image" : "https:\/\/www.watch-life.net\/images\/2022\/03\/IMG_20220312_153337-113x150.jpg" , "content_first_image" : "https:\/\/www.watch-life.net\/images\/2022\/03\/IMG_20220312_153337-scaled.jpg" , "post_medium_image_300" : "https:\/\/www.watch-life.net\/images\/2022\/03\/IMG_20220312_153337-225x300.jpg" , "post_thumbnail_image_624" : "https:\/\/www.watch-life.net\/images\/2022\/03\/IMG_20220312_153337-769x1024.jpg" , "post_frist_image" : "https:\/\/www.watch-life.net\/images\/2022\/03\/IMG_20220312_153337-scaled.jpg" , "post_medium_image" : "https:\/\/www.watch-life.net\/images\/2022\/03\/IMG_20220312_153337-225x300.jpg" , "post_large_image" : "https:\/\/www.watch-life.net\/images\/2022\/03\/IMG_20220312_153337-769x1024.jpg" , "post_full_image" : "https:\/\/www.watch-life.net\/images\/2022\/03\/IMG_20220312_153337-scaled.jpg" , "post_all_images" : [ { "imagesurl" : "https:\/\/www.watch-life.net\/images\/2022\/03\/IMG_20220312_153337-769x1024.jpg" , "id" : "image0" } ] , "videoAdId" : "adunit-54154da9ac037533" , "listAd" : "1" , "listAdId" : "adunit-04c7f94fa0c24c57" , "listAdEvery" : 7 , "total_comments" : 4 , "category_name" : "\u968f\u601d\u5076\u5f97" , "post_date" : "2022-03-13" , "like_count" : "2" , "pageviews" : 555 , "next_post_id" : null , "next_post_title" : null , "previous_post_id" : 1748 , "previous_post_title" : "\u7236\u4eb2\u4e0d\u9700\u8981\u8282\u65e55" } ]
数据库表设计:
1 2 3 4 5 6 7 8 9 10 11 12 13 14 15 16 17 18 19 CREATE TABLE `sw_posts` ( `id` bigint unsigned NOT NULL AUTO_INCREMENT, `user_id` bigint NOT NULL DEFAULT '1' , `date ` datetime NOT NULL DEFAULT CURRENT_TIMESTAMP , `content` longtext CHARACTER SET utf8mb4 COLLATE utf8mb4_unicode_ci NOT NULL , `title` text CHARACTER SET utf8mb4 COLLATE utf8mb4_unicode_ci NOT NULL , `enable` int NOT NULL DEFAULT '1' , `modified` datetime NOT NULL DEFAULT CURRENT_TIMESTAMP , `type` varchar (20 ) CHARACTER SET utf8mb4 COLLATE utf8mb4_unicode_ci NOT NULL DEFAULT 'post' , `total_comments` int unsigned NOT NULL DEFAULT '0' , `post_medium_image` varchar (255 ) COLLATE utf8mb4_unicode_ci NOT NULL DEFAULT '../../images/error.jpg' , `like_count` int unsigned NOT NULL DEFAULT '0' , `pageviews` int unsigned NOT NULL DEFAULT '0' , `category_id` int unsigned NOT NULL DEFAULT '1' , PRIMARY KEY (`id`), KEY `type_status_date` (`type`,`enable`,`date `,`id`), KEY `author` (`user_id`) ) ENGINE= InnoDB AUTO_INCREMENT= 1962 DEFAULT CHARSET= utf8mb4 COLLATE = utf8mb4_unicode_ci;
MyBatis Plus下的操作,无SQL。
后端实现过程:
后端开发 > MyBatis Plus > 根据分类ID获取所有该ID下的帖子并翻页
前端开发
参考:
四种常见的 POST 提交数据方式(application/x-www-form-urlencoded,multipart/form-data,application/json,text/xml) 博客园
GitHub:微慕小程序开源版-WordPress版微信小程序
Json-server
由于刚开始有一个可进行二次开发的小程序,但后端只能自己写,为了方便理解代码的运作方式以及测试内部API的以便进行后期代码的修改测试,分析小程序后端数据库以方便建立适合的数据表。
参考:
Github:json-server
简书:json-server全攻略
WordPress:守望生活, 审视自我,宁静雅致的小轩馆
基于前后端分离 其中最有用的还是自定义路由功能,可进行模仿小程序内部请求的API进行数据响应,比如我的小程序需要调用API:https://www.watch-life.net/wp-json/watch-life-net/v1/options/homeconfig ,返回小程序所需要的数据,当然后期也不一定遵循和小程序原先请求的API一模一样,可以根据自己的需求进行更改,更改好后再修改小程序内部源码进行添加一些需求或者去掉一些不需要的数据解析,这样以来对后端数据库的设计也是很有帮助的。
请求原后端API返回Json数据:
由于目前基本上都是使用的前后端分离的形式来进行项目开发的,所以只要是调用API基本上后端都是以JSON形式返回数据,这无论是对开发或者是对一个后端项目进行小程序、Android、网页前端开发,都是非常方便的,当然这些都是前后端分离的成效!
Json-server 运行
-r route.json 配置了路由:
1 2 3 4 { "/schoolwall/options/homeconfig" : "/get_homeconfig" , "/schoolwall/posts?per_page=10&orderby=date&order=desc&page=1" : "/getposts" }
-w index.json 配置了请求响应的数据:
1 2 3 4 5 6 7 8 9 10 11 12 13 14 15 16 17 18 19 20 21 22 23 24 25 26 27 28 29 30 31 32 33 34 35 36 37 { "downloadfileDomain" : "thirdwx.qlogo.cn,www.watch-life.net,wx.qlogo.cn,blog.minapper.com,www.minapper.com,shops.minapper.com" , "businessDomain" : "blog.minapper.com,plus.minapper.com,blog.minapper.com,www.minapper.com,www.watch-life.net" , "zanImageurl" : "https:\/\/www.watch-life.net\/images\/2021\/02\/\u5fae\u4fe1\u56fe\u7247_20210201182058.jpg" , "logoImageurl" : "https:\/\/www.watch-life.net\/images\/2021\/01\/watch-life.png" , "expand" : { "swipe_nav" : [ { "type" : "apppage" , "appid" : "" , "image" : "https:\/\/www.watch-life.net\/images\/2021\/02\/\u5fae\u4fe1\u56fe\u7247_20210201093932-1-scaled.jpg" , "path" : "\/pages\/detail\/detail?id=1827" , "url" : "" , "enable" : "yes" , "title" : "\u5fae\u6155\u5c0f\u7a0b\u5e8f\u4e13\u4e1a\u7248V3.6-\u89c6\u9891\u53f7\u6269\u5c55" } , { "type" : "apppage" , "appid" : "" , "image" : "https:\/\/www.watch-life.net\/images\/2019\/07\/miapper-plus2.jpg" , "path" : "\/pages\/detail\/detail?id=1773" , "url" : "" , "enable" : "yes" , "title" : "\u5fae\u6155WordPress\u5c0f\u7a0b\u5e8f\u589e\u5f3a\u7248v2.0\u53d1\u5e03" } , { "type" : "apppage" , "appid" : "" , "image" : "https:\/\/www.watch-life.net\/images\/2019\/11\/minapper.jpg" , "path" : "\/pages\/detail\/detail?id=1840" , "url" : "" , "enable" : "yes" , "title" : "\u5fae\u6155\u5c0f\u7a0b\u5e8f\u5f00\u6e90\u7248v4.0\u53d1\u5e03" } ] } }
-c config.json配置了可以进行外部主机访问:
由于这里的默认配置是localhost,但不能进行局域网内部的访问,所以改写了默认配置,可用小程序开发者工具生成二维码供开发者进行局域网内部互相访问,当然开启使用预览功能得是小程序的开发者(Appid要和自己开发的Appid一致)或者去小程序开发者测试号申请 :
小程序登录逻辑
参考:
微信开放社区:微信登录
微信开放社区:Session_key开放数据校验与解密
微信开发者官网:wx.setStorage(Object object)
小程序登录步骤:
小程序 用wx.login()首先向微信服务器 请求一个Code,Code请求成功返回给小程序端,此Code(微信登录凭证)只有5分钟内有效期,如果5分钟内小程序的后台不拿着这个临时身份证来微信后台服务器换取微信用户id的话,那么这个身份证就会被作废 。
点击小程序端同意授权,调用wx.getUserProfile()success后才能获取用户其他信息(头像,微信网名)。
小程序 用wx.request()带着临时Code 和其他信息 到自己的后台(三方服务器 ),如果查询到后台服务器(三方服务器 )没有进行用户的绑定就会验证三方服务器中的用户名和密码通过后才能进行下一个步骤。
如果绑定了三方服务器 就会访问带有code2Session的微信服务器API加上参数Code,*AppID 和微信服务器 为了确保拿过来的Code就是刚刚对应的小程序开发者)等信息从微信服务器获得JSON格式的openid和session_key信息。
如果发现泄露了AppSecret,就要进行重置(重置会导致Code成功换取一次信息后直接失效,即便生成openID、session_key,等… 的时间还没有到期)。
发送请求Code到微信服务器接口https://api.weixin.qq.com/sns/jscode2session?appid=%3CAppId%3E&secret=%3CAppSecret%3E&js_code=%3Ccode%3E&grant_type=authorization_code (AppID AppSecret Code)后会响应三个参数:
字段 描述
openid
微信用户的唯一标识
session_key
会话密钥,未过期预示着微信用户已登录
unionid
用户在微信开放平台的唯一标识符。本字段在满足一定条件的情况下才返回。
openid:即微信用户ID,用来区分不同的微信用户身份。
session_key:如果我们每次都通过小程序前端wx.login()生成微信登录凭证code去微信服务器请求信息,步骤太多造成整体耗时比较严重,因此对于一个比较可信的服务端,给开发者服务器颁发一个时效性更长的会话密钥就显得很有必要了。
获取到openid(微信用户身份ID)和自己服务器的用户ID需要进行一个绑定。有了这个绑定信息,小程序在下次需要用户登录的时候就可以不需要输入账号密码,可以直接使用用户的微信身份openid,通过绑定信息就可以查出后端的用户身份id,直接就可以进行登录操作。
业务凭证SessionID:小程序后端对小程序登录后发布的SessionID,此时要进行跨域处理,所以后端必须用上shiro+jwt(Json web token) ,才可以解决这个跨域问题,就是上边提到的,客户端保存 token(通常是保存在Cookie或者LocalStorage中),而Session登录方式,客户端是自动执行服务器端将sessionId set到cookie中的命令,sessionId被自动保存在cookie中的。
测试Code获取OpenID
后端code失效测试
Session_key作用
总结:Code(5分钟有效)为了换取用户OpenID(相当于身份证号码),Code换取OpenID之后,微信服务器才会在内部设置Session_key(有效期根据用户活跃度而定),Session_key作用在官网描述为用它可以校验客户端数据获取的数据的完整性,详见开放数据校验与解密
Bilibili评论列表
参阅以下内容请先参阅:
API规划 > 小程序首页 > 根据帖子ID获取评论列表
数据库设计 > 数据分析 > 评论列表
后端开发 > MyBatis
后端开发 > MyBatis Plus > 分页插件
由于前面分析过WordPress实现的评论列表是经典套娃型的列表,不符合校园墙这样的需要频繁交流的平台,但参考了网上Java实现类似Bilibili评论列表的方式又含糊不清,于是自己琢磨一个和Bilibili一样的评论列表出来也是必不可少的。
其中Bilibili这种评论列表的实现也少不了对评论列表进行一个分页处理的,但是分页列表也可放在后端进行,但后来在后端实现的时候用到了MyBatis Plus 的分页插件,我的这种实现方式其实可能是SQL语句写的不够优秀,只能导致关联表查询只能对子评论进行一个分页但不能对父级列表分类,直接将分页的组合放到前端去处理一下就可以了。
参考:
菜鸟教程:concat()
以下数据"total": 0即说明了分页插件未开启全部数据的统计,由于评论这种类型的数据是需要不端进行修改和查询的,关闭数据统计可以节省服务器性能以及内存,当然这样对于前端逻辑判断比如是最后一页的设计的难度就会更大一些。
上面注释了父级ID翻页后第二页与第一页结果是一样的,学习过MySQL数据库的都知道,多表查询中的左联查询数据库执行分页,当然是分的相当是右边的页面,因为左边是重的。
虽然可以在后端也可以进行一个两个父级的结合,但最好还是放在前端进行两个相同父级结合最符合常理。
前端实现结合相同父级的子列表:
1 2 3 4 5 6 7 8 9 10 11 12 13 14 15 16 17 18 19 20 21 22 var resFatherList = response.data .data .records ; var locaList=this .data .commentsList ; if (locaList[0 ] && resFatherList[0 ]){ var locaListLast = locaList.slice (-1 )[0 ]; var resListFirst= resFatherList.slice (0 ,1 )[0 ]; if (locaListLast.id === resListFirst.id ){ var unionSon = resFatherList.shift ().sonList ; var locaLastSon=locaListLast.sonList .concat (unionSon); locaList[locaList.length -1 ].sonList =locaLastSon; } }
1 2 3 4 5 6 7 8 9 10 11 12 13 14 15 16 17 18 19 20 21 22 23 24 25 26 27 28 29 30 31 32 33 34 35 <view style ="display:{{display}}" class ="comment-container" > <view class ="subTitle" id ="relatedTitle" > <view > 评论交流</view > <view class ="comment-num" > {{commentCount}}</view > </view > <view class ="subTitle_line subTitle_line_comment" > </view > <block wx:key ="id" wx:for ="{{commentsList}}" > <view class ="comment" > <view class ="comment-user" > <image src ="{{item.avatarUrl}}" class ="comment-gravatar" > </image > <view class ="comment-user-right" > <view bindtap ="replay" data-id ="{{item.id}}" data-name ="{{item.nickName}}" data-commentdate ="{{item.fatherReplyDate}}" > {{item.nickName}}</view > <view class ="time" bindtap ="replay" data-id ="{{item.id}}" data-name ="{{item.nickName}}" data-commentdate ="{{item.fatherReplyDate}}" > {{item.fatherReplyDate}}</view > </view > </view > <view class ="comment-summary" bindtap ="replay" data-id ="{{item.id}}" data-name ="{{item.author_name}}" data-userid ="{{item.userid}}" data-formId ="{{item.formId}}" data-commentdate ="{{item.date}}" > {{item.content}}</view > <view wx:for ="{{item.sonList}}" wx:key ="itemid1" wx:for-index ="idx" wx:for-item ="item1" > <view class ="replay-user" bindtap ="replay" data-id ="{{item1.id}}" data-name ="{{item1.nickName}}" data-commentdate ="{{item1.sonReplyDate}}" > <text class ="comment-username" > {{item1.nickName}}</text > <text style ="margin: 0 6rpx; color: #959595;" > 回复</text > <text class ="comment-username" > {{item1.receiverNick}}</text > :{{item1.content}} </view > </view > </view > </block >
实现效果:
本来铸鼎_的评论是分开的显示两个评论块,但合一后铸鼎_的子评论刷新时合在了一起

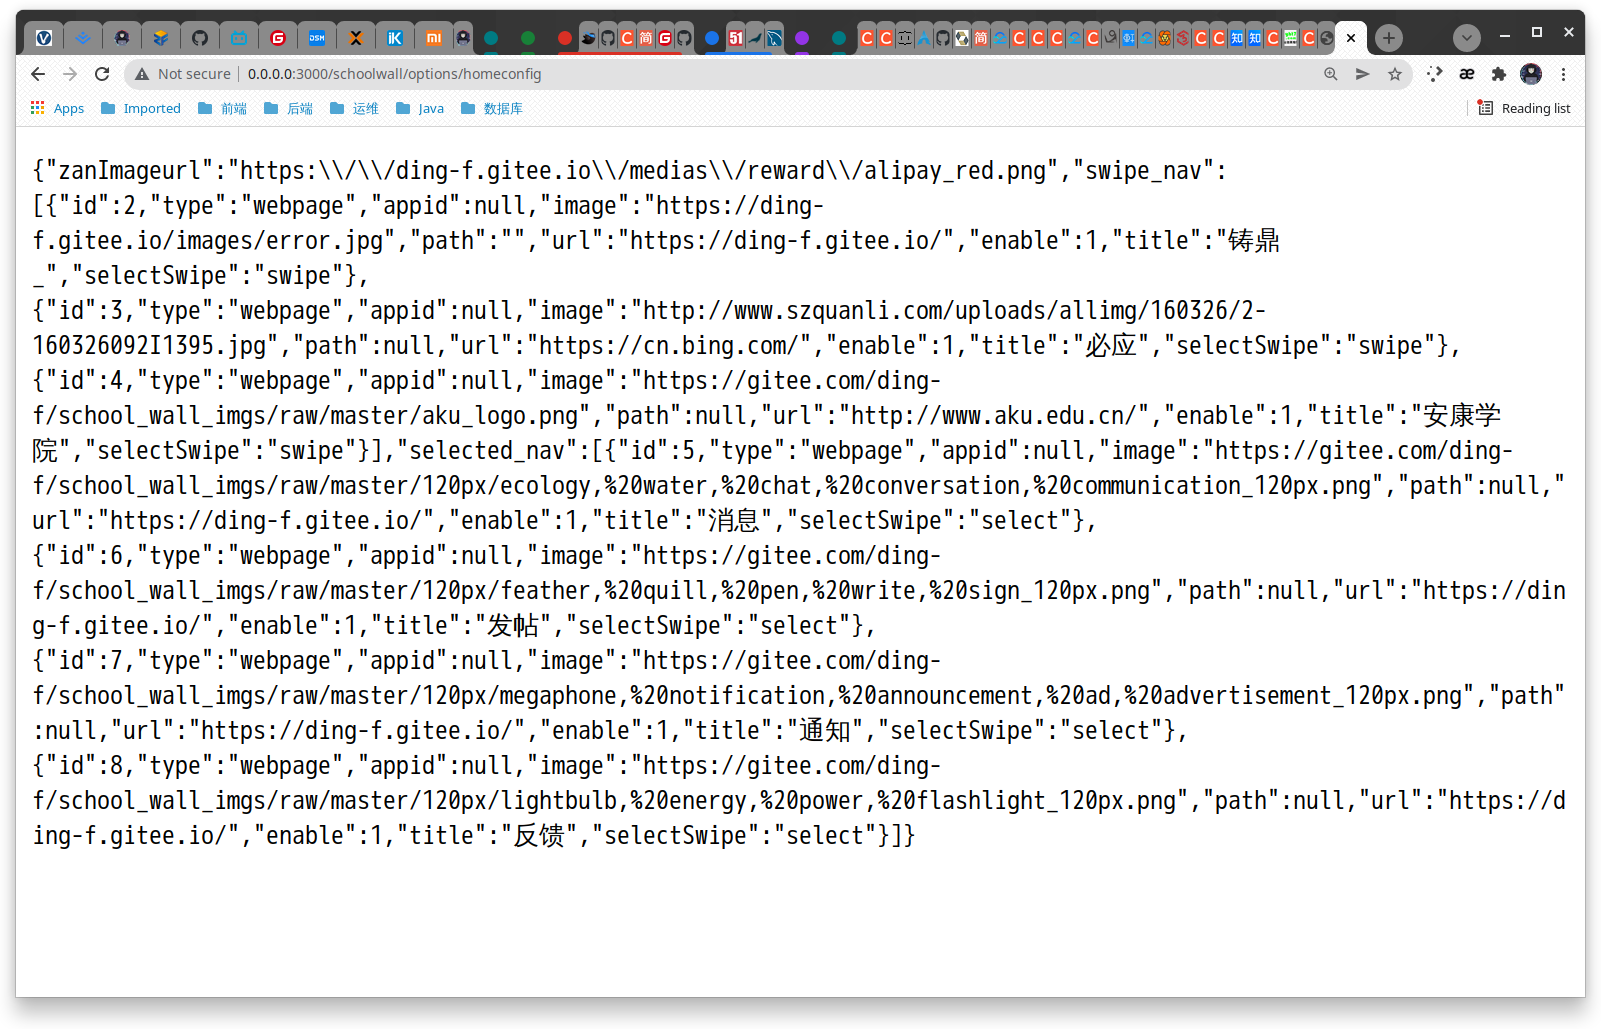
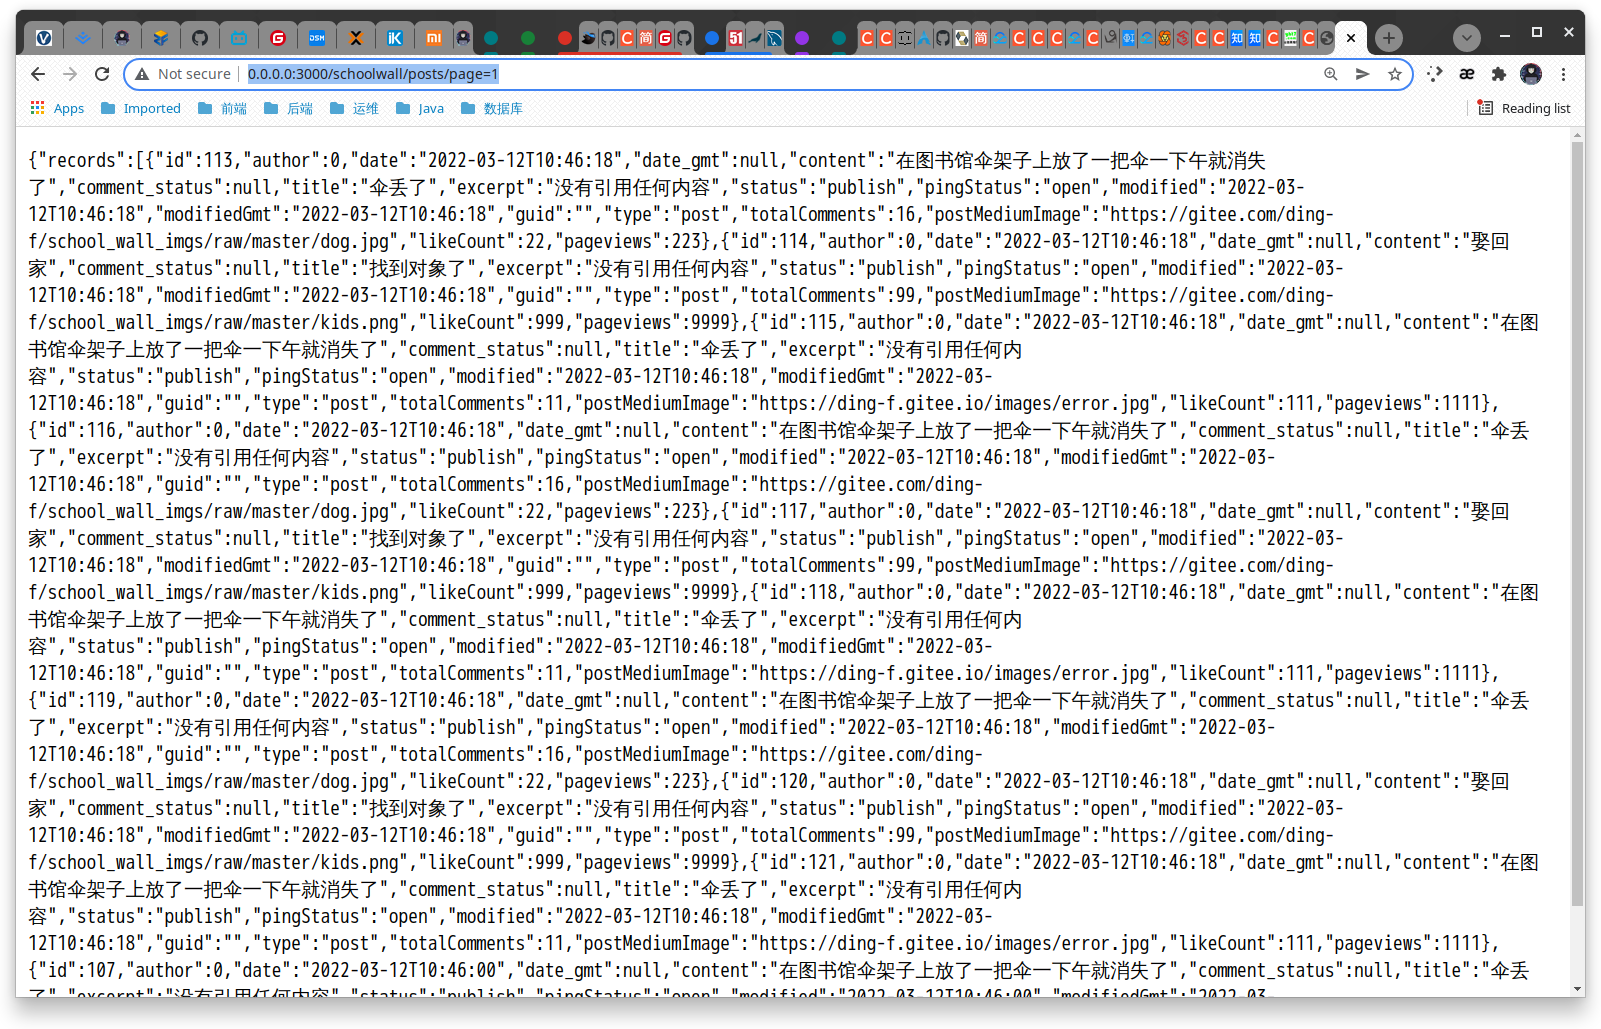
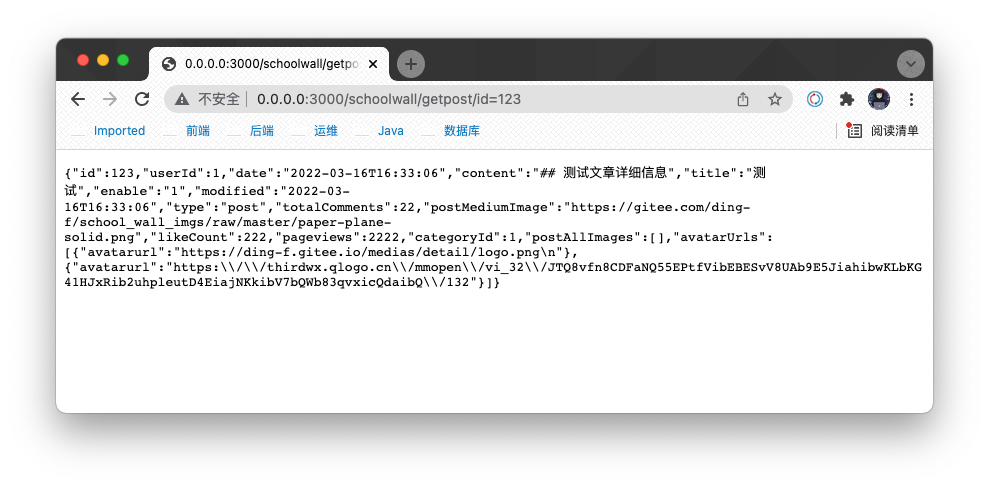
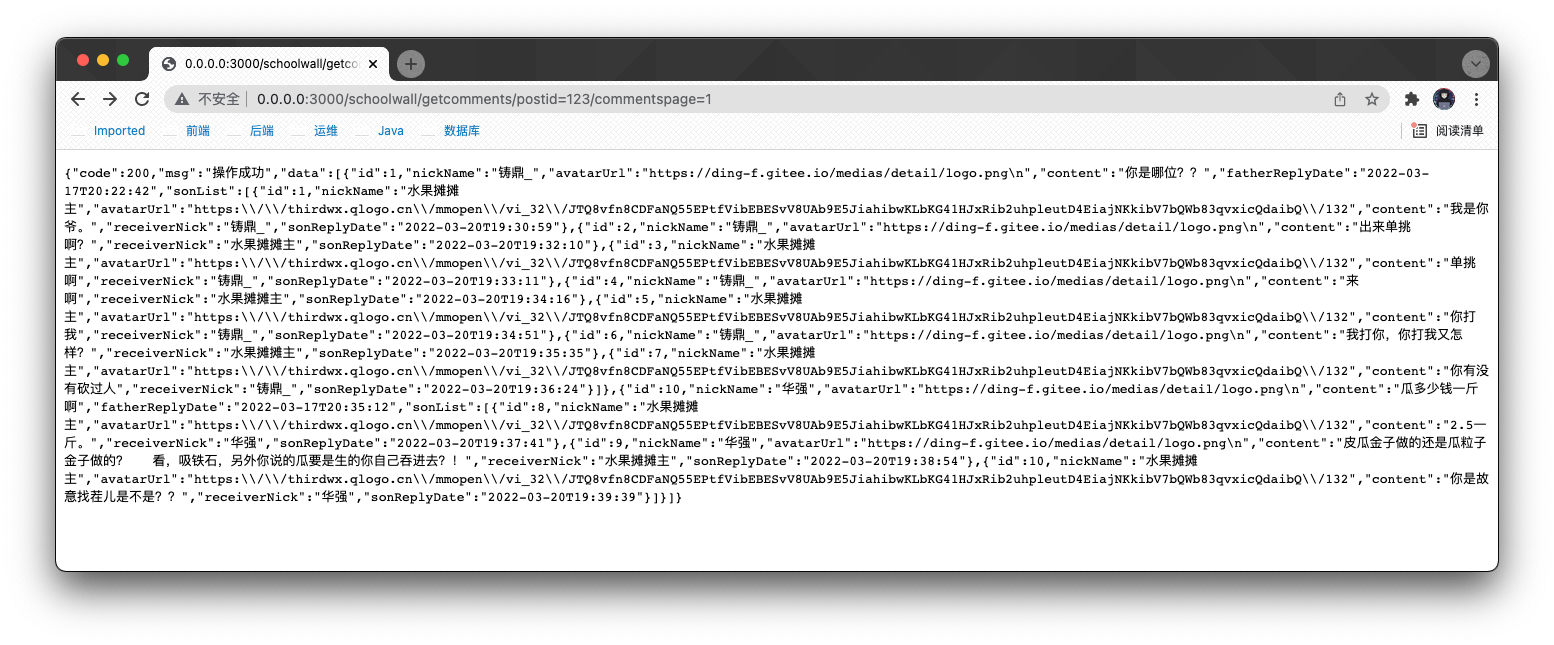
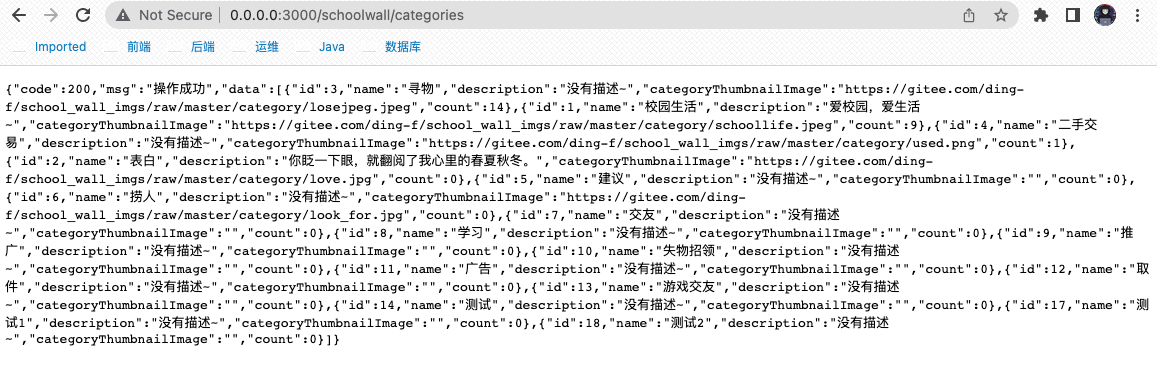


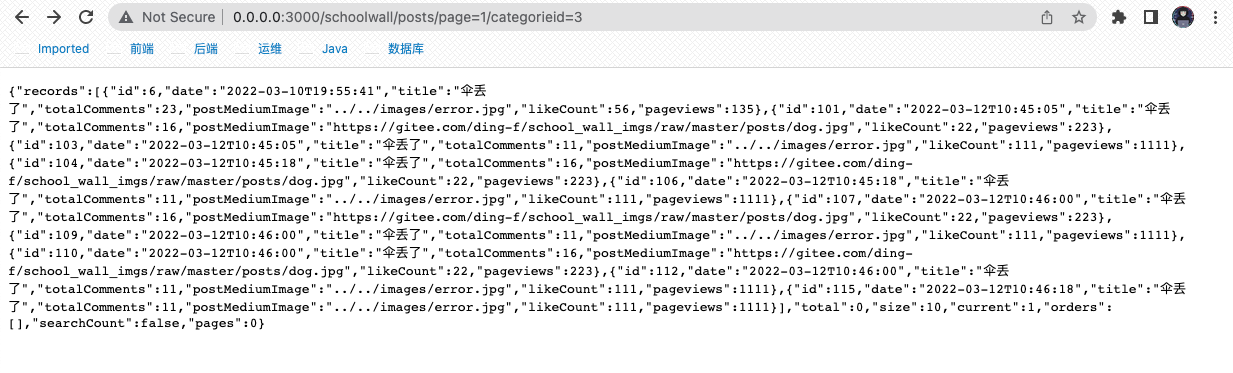

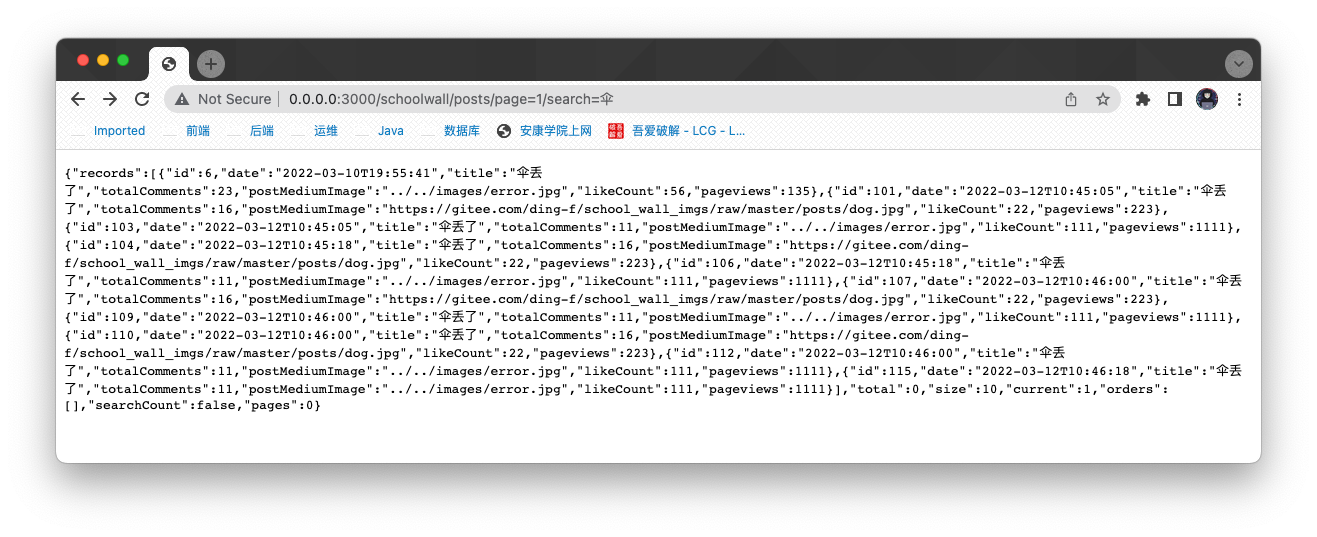
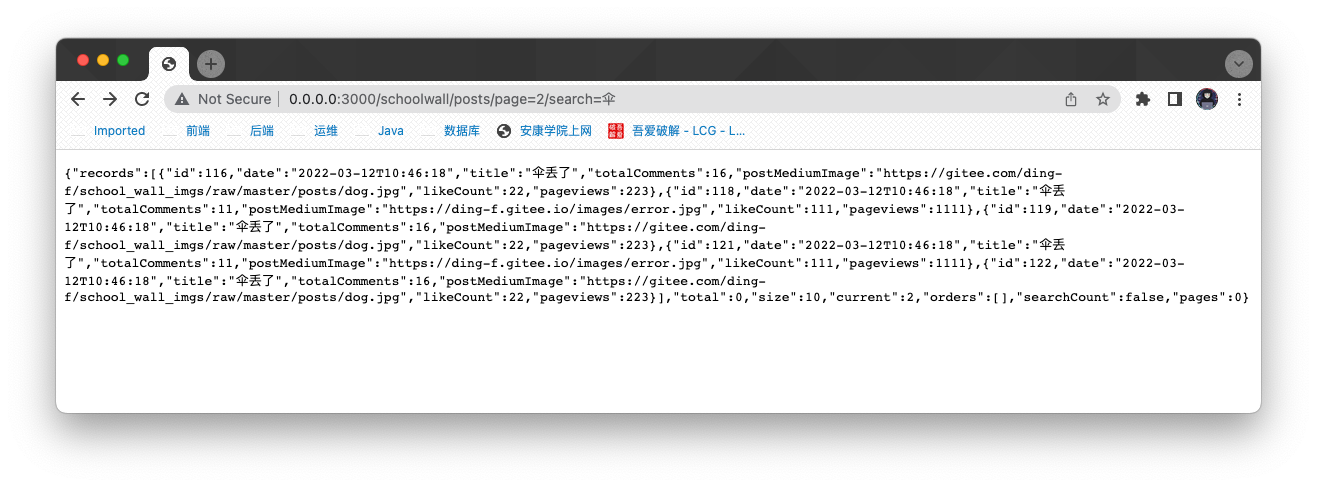
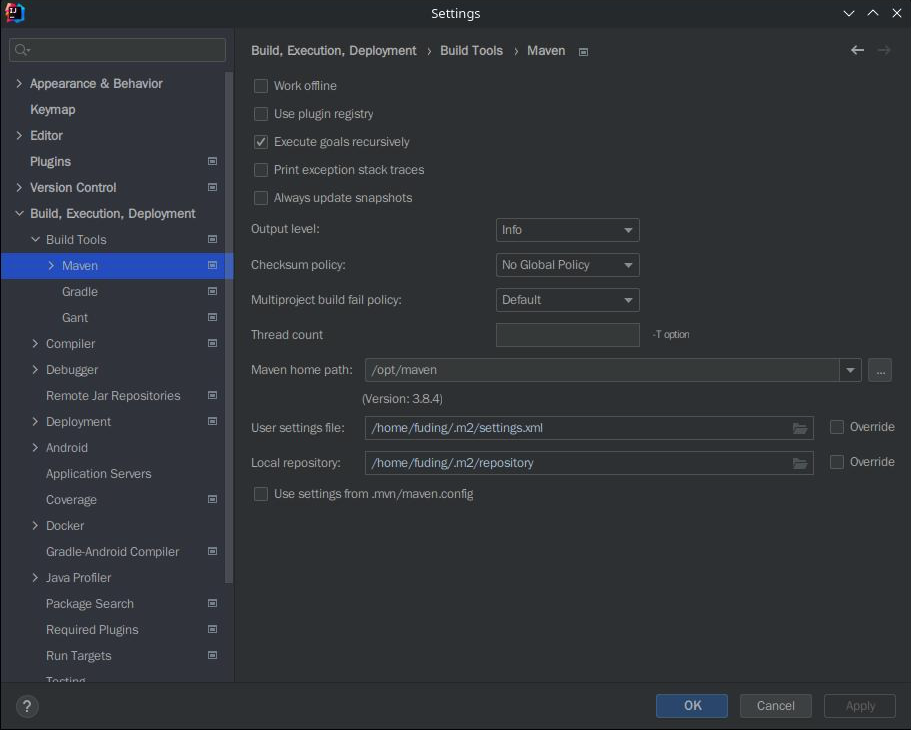
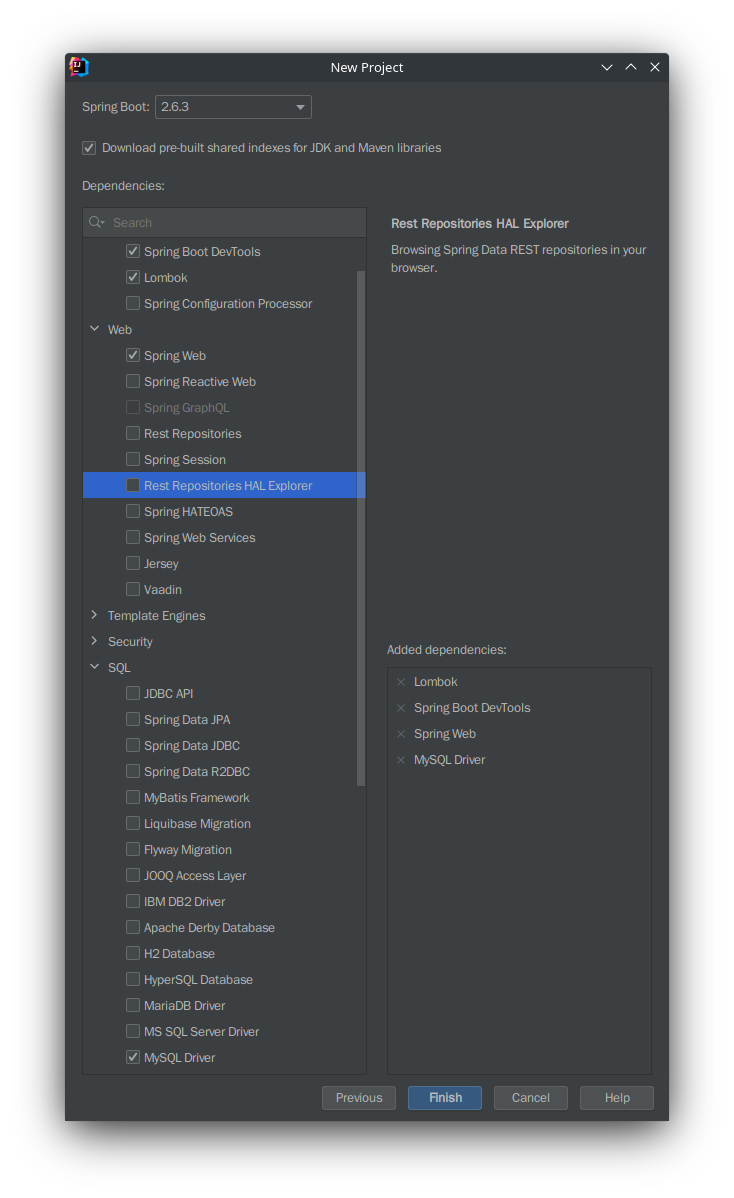
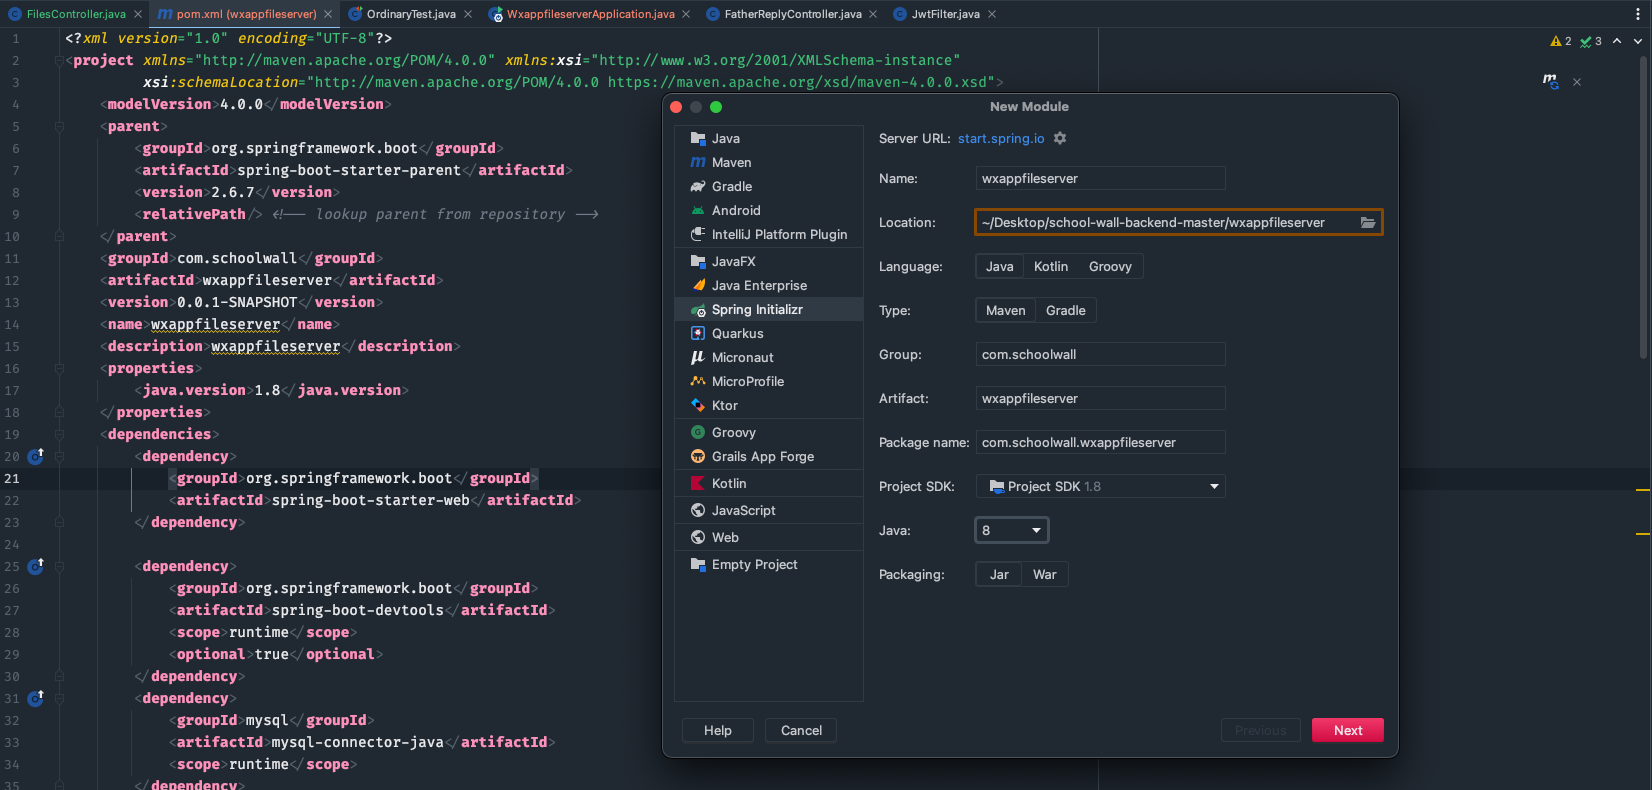
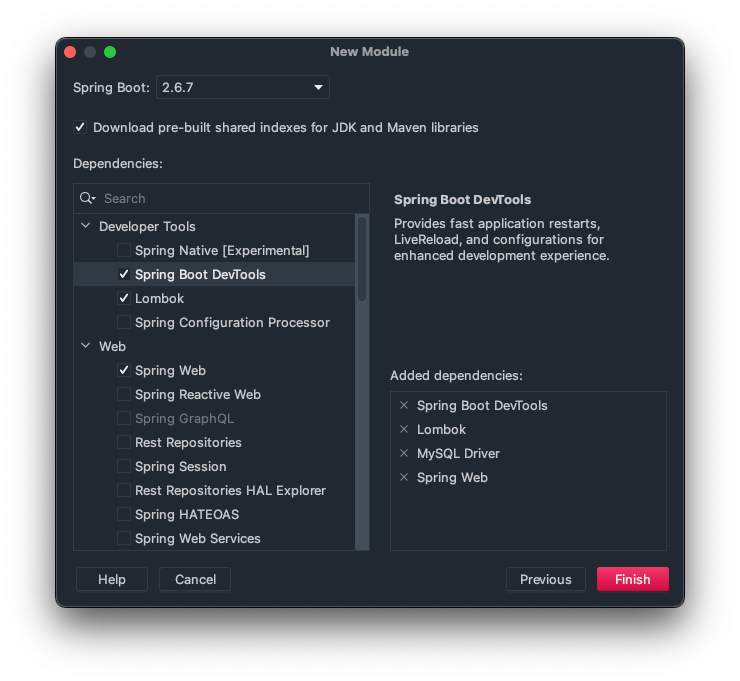
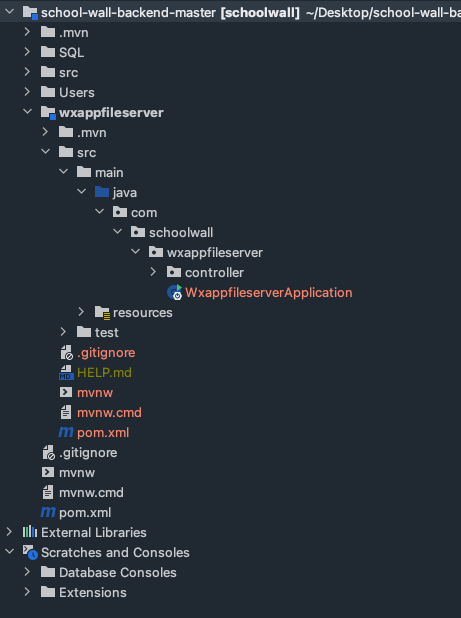
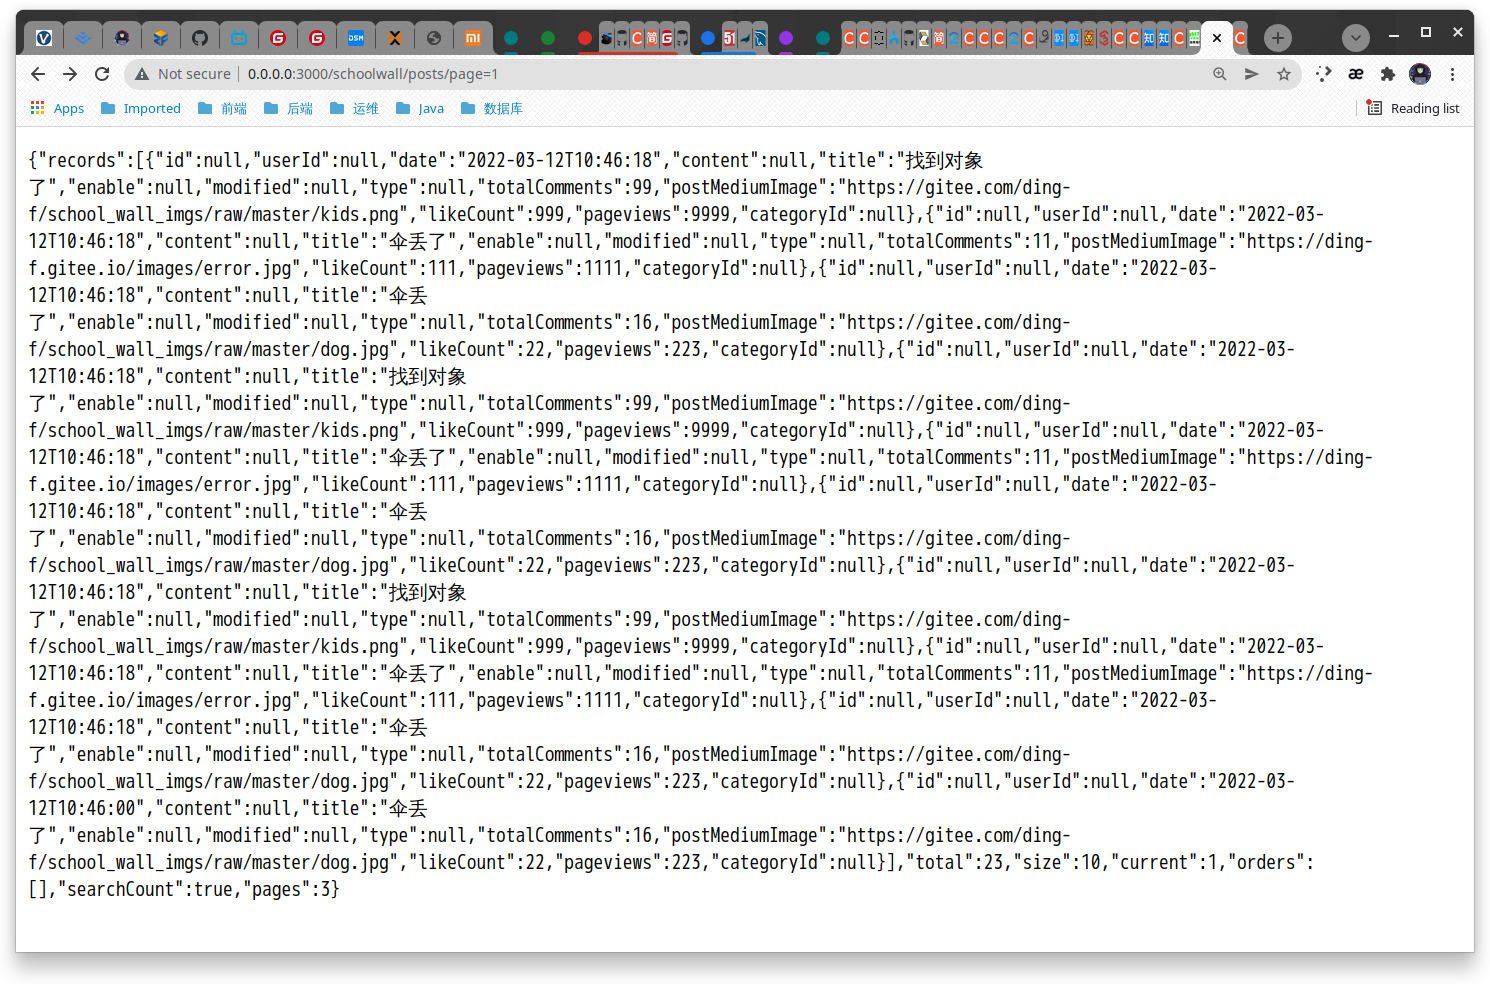
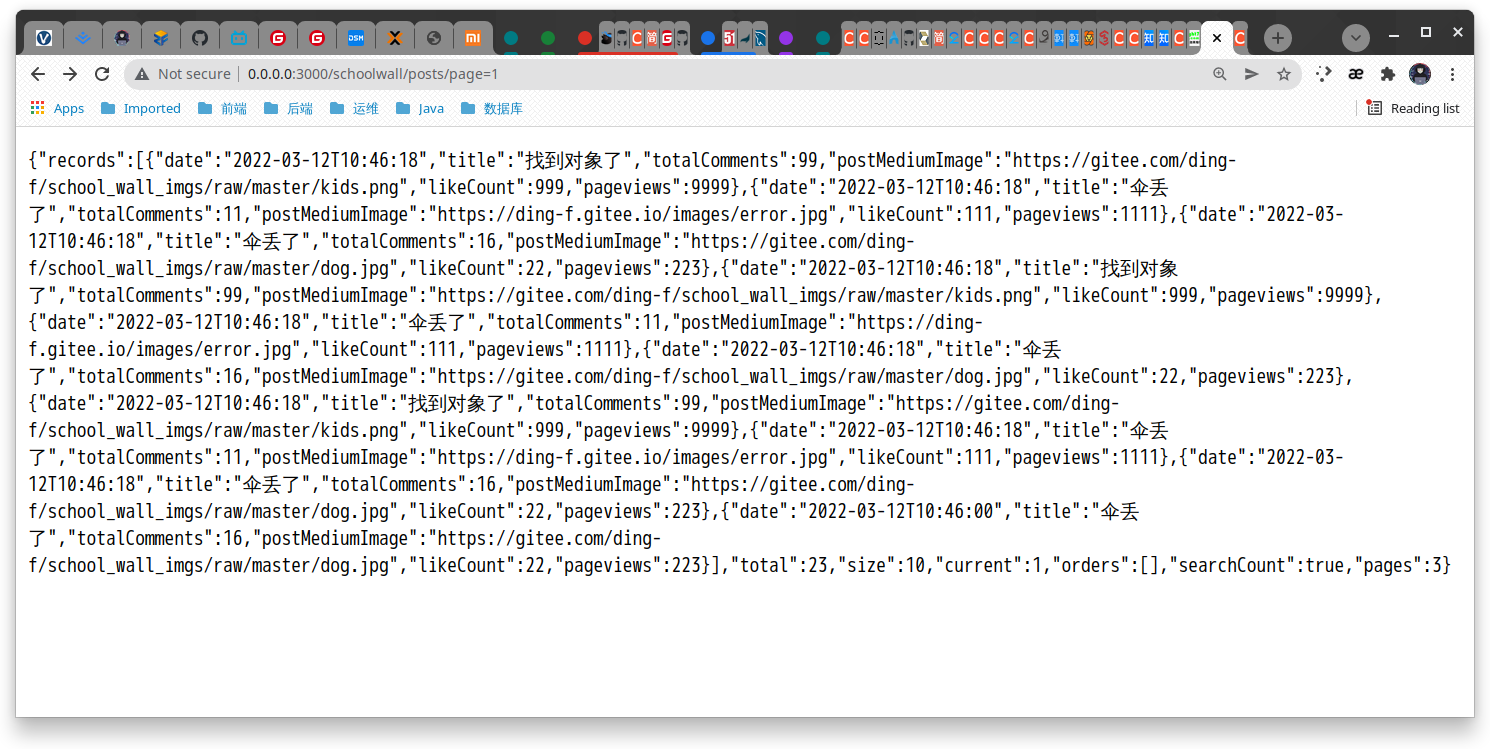
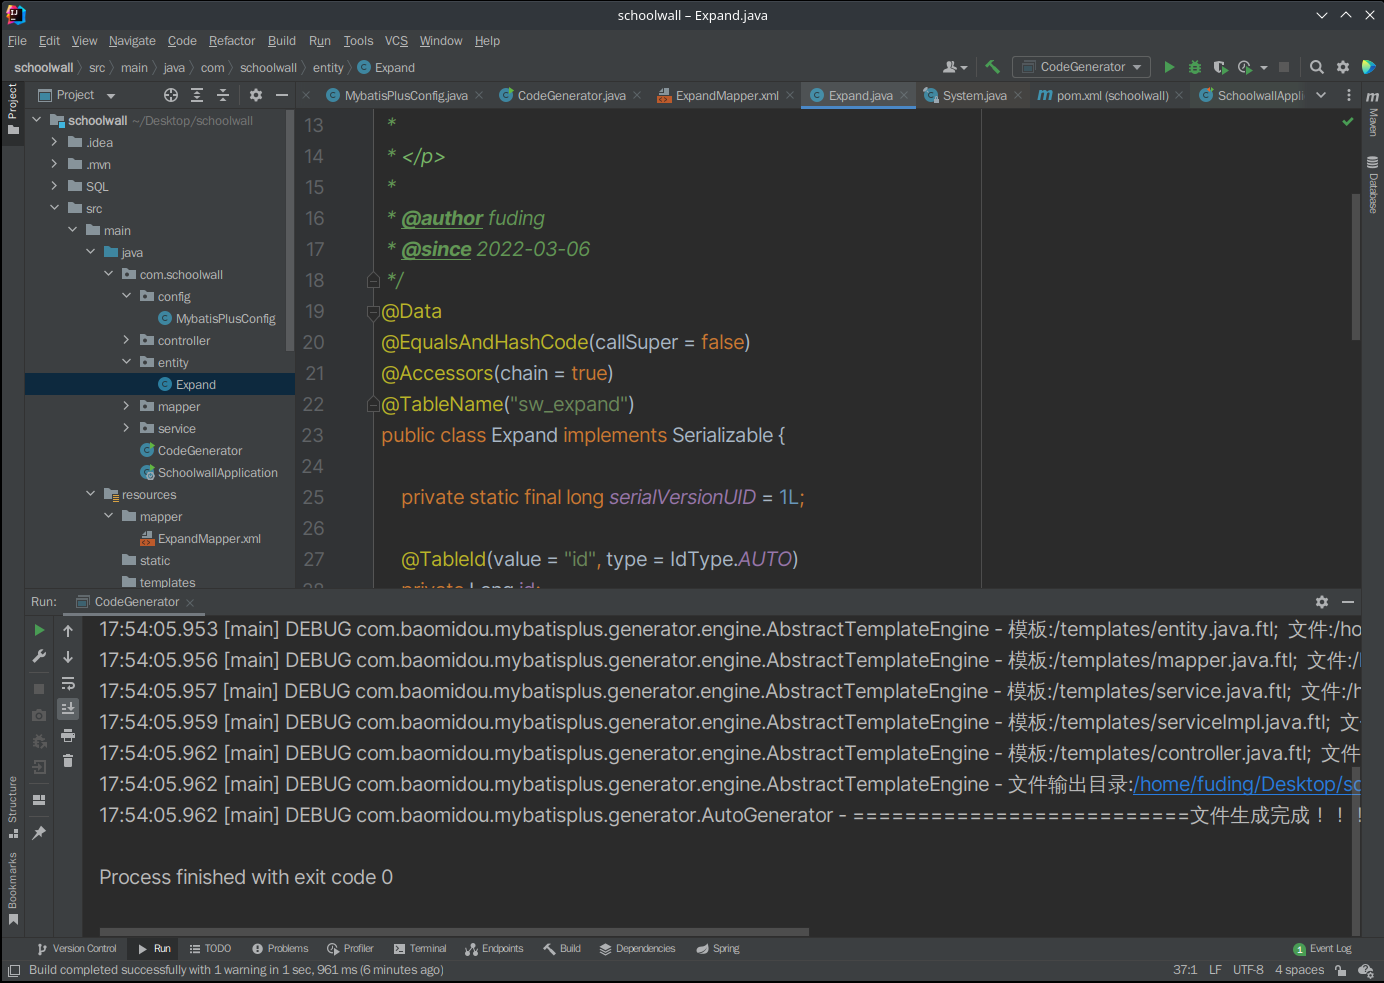
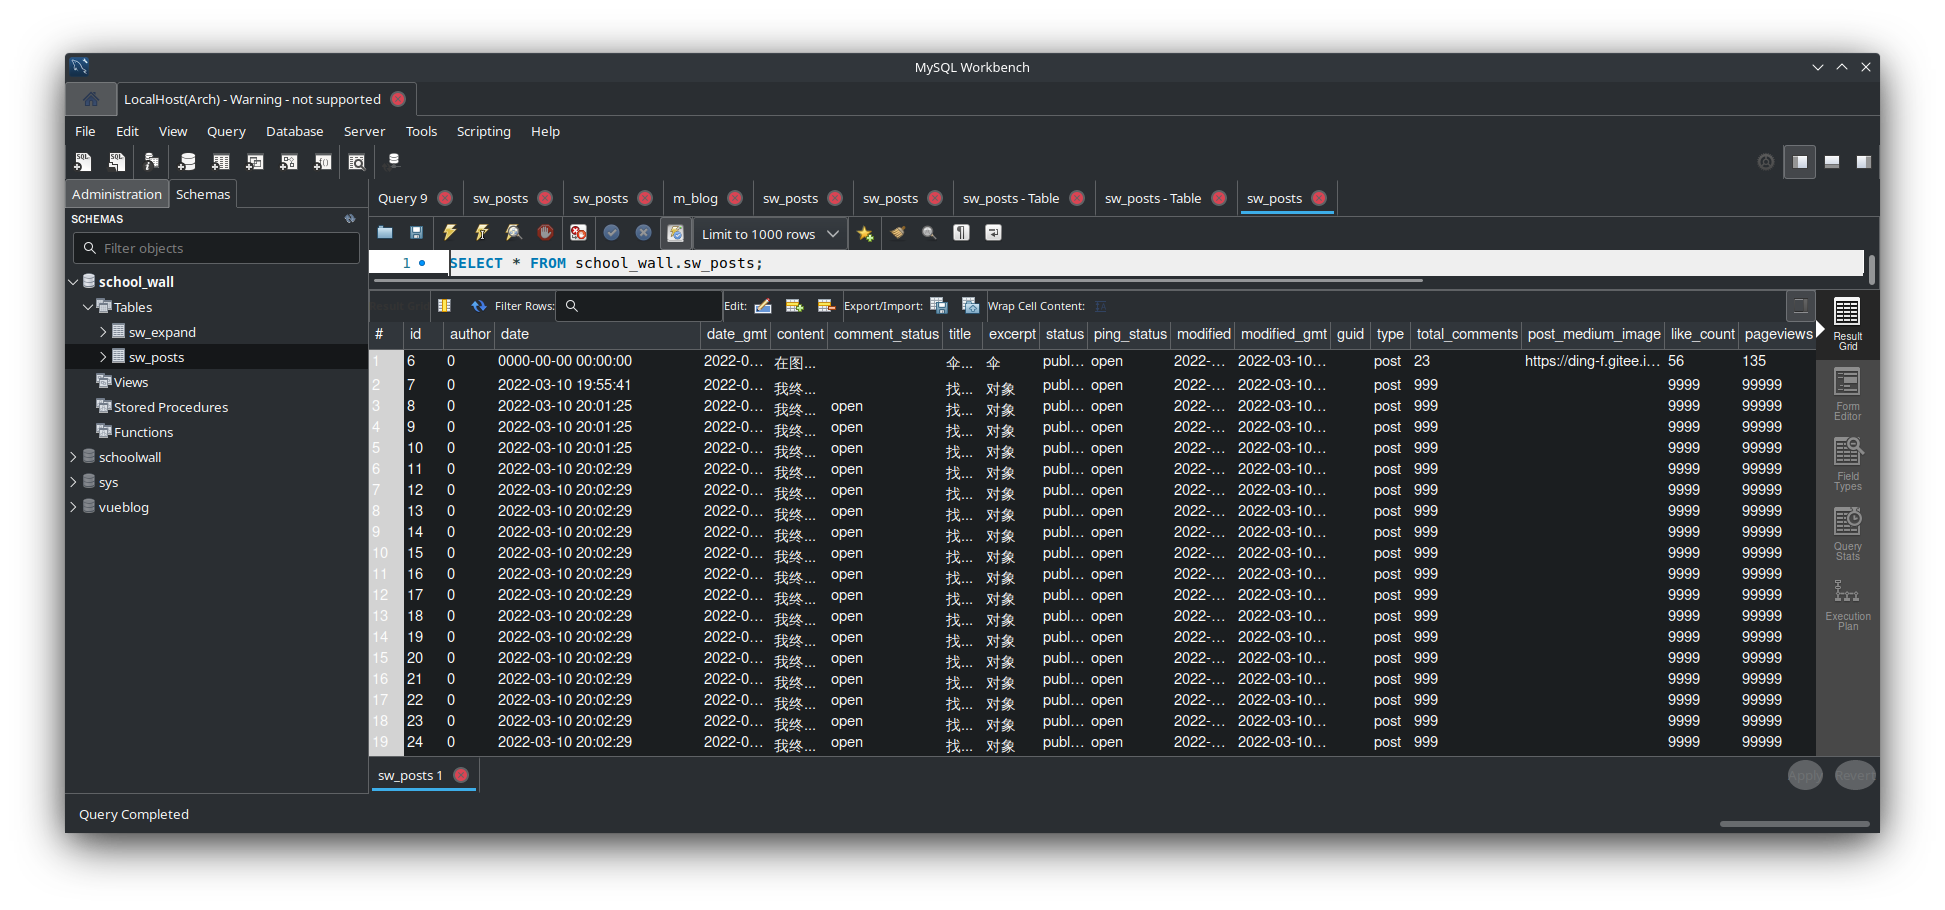
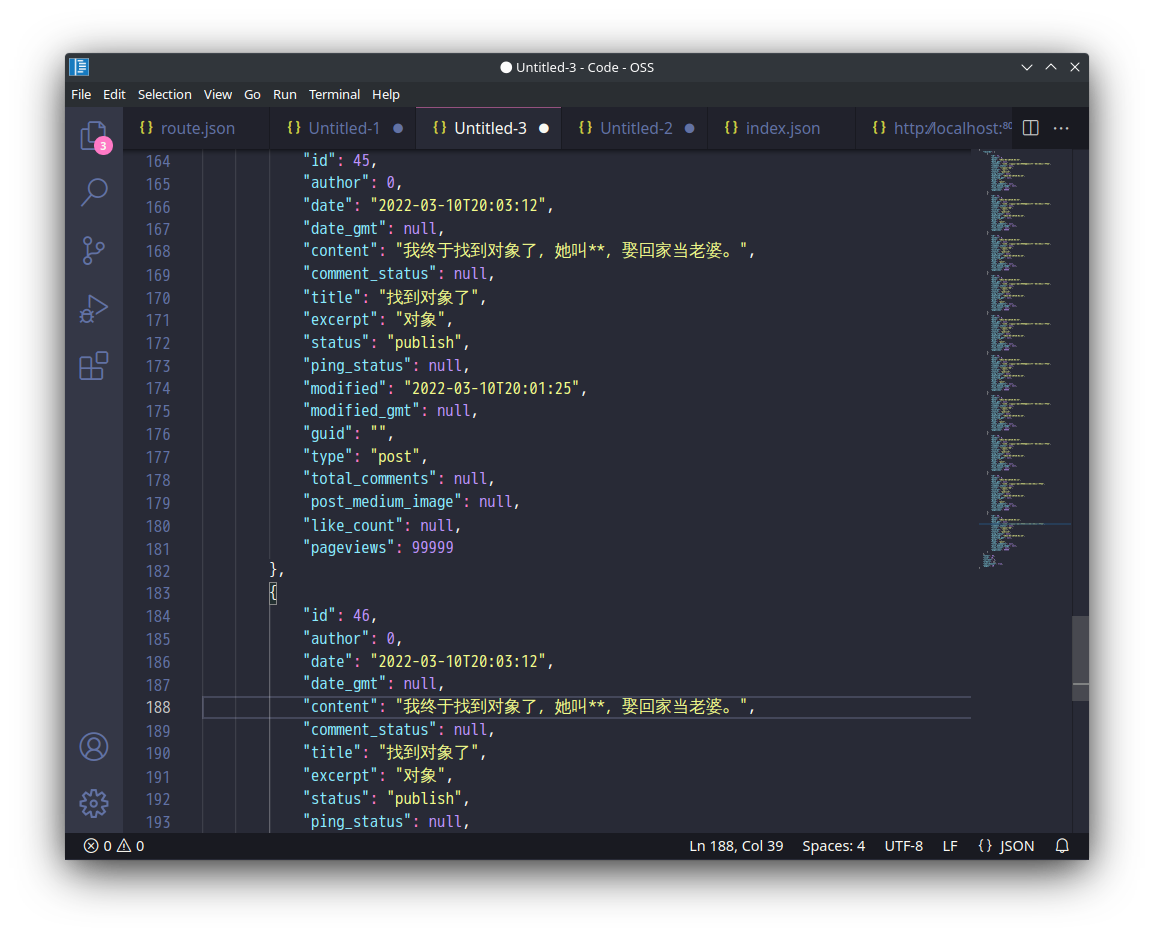
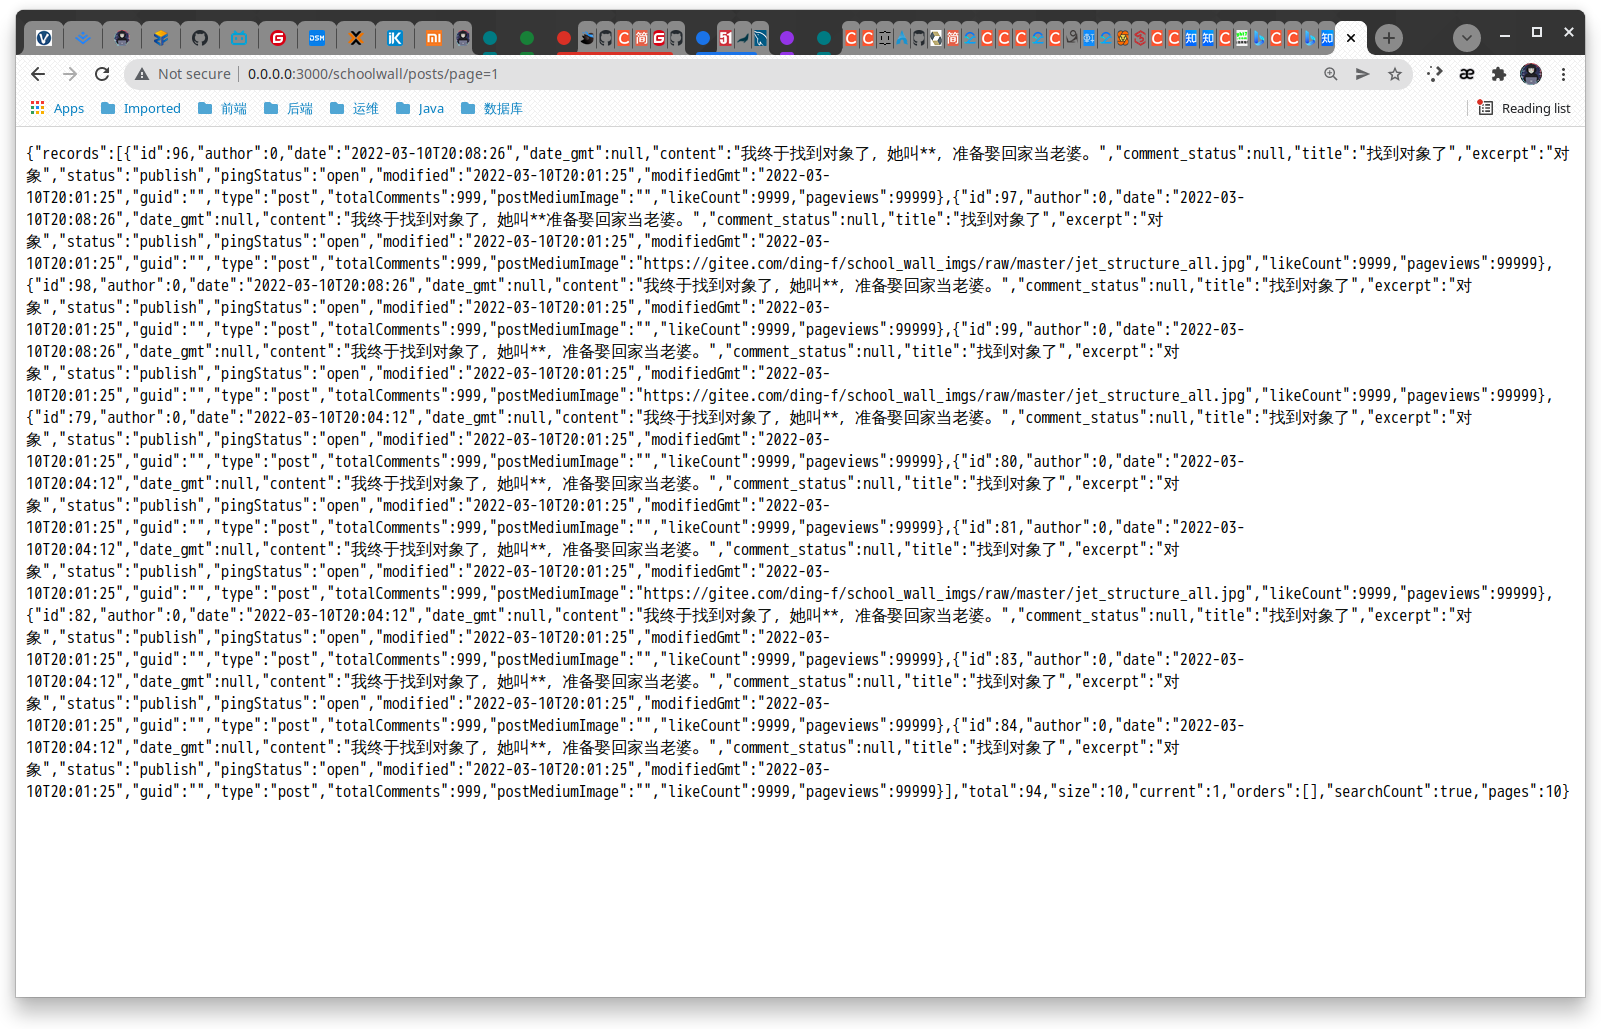
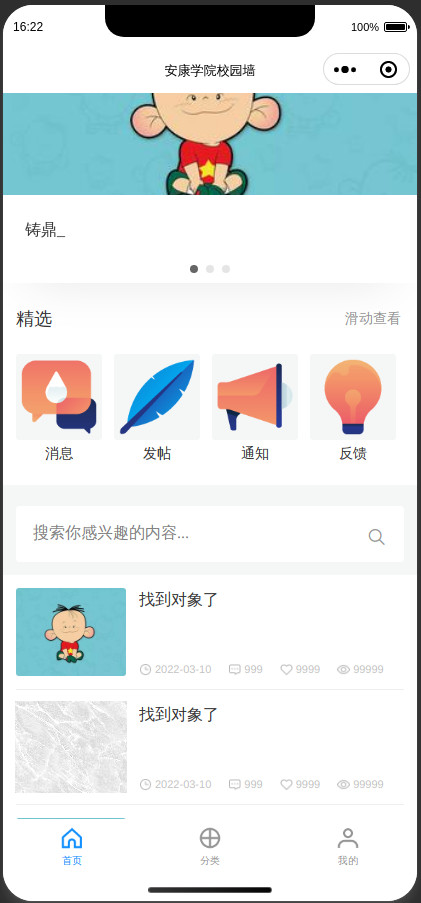


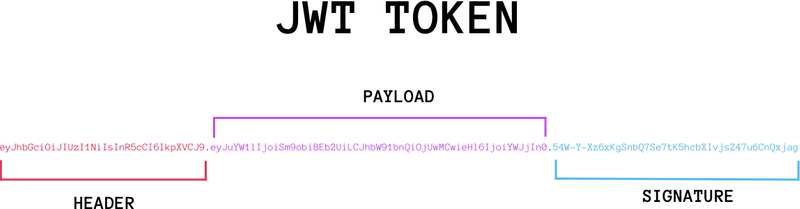

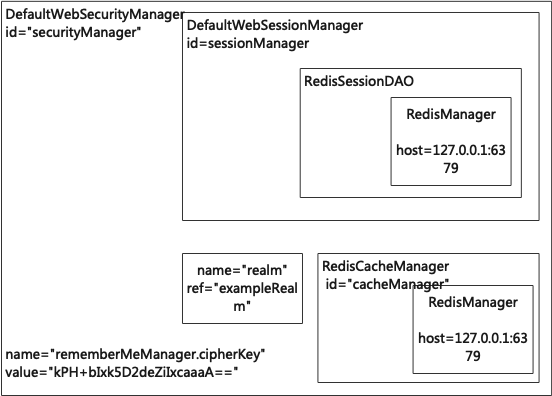
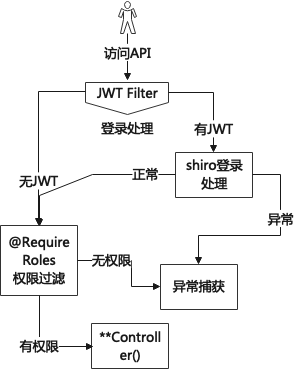
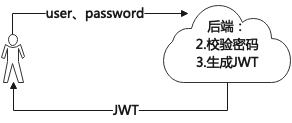
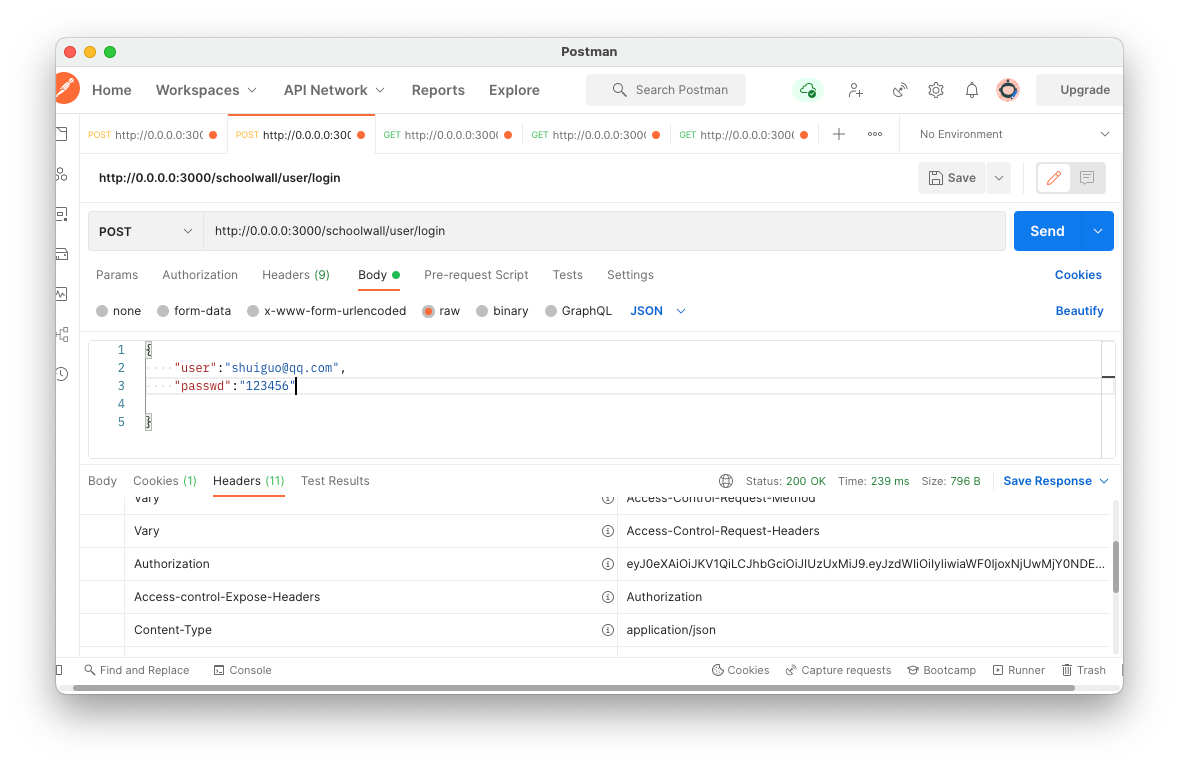


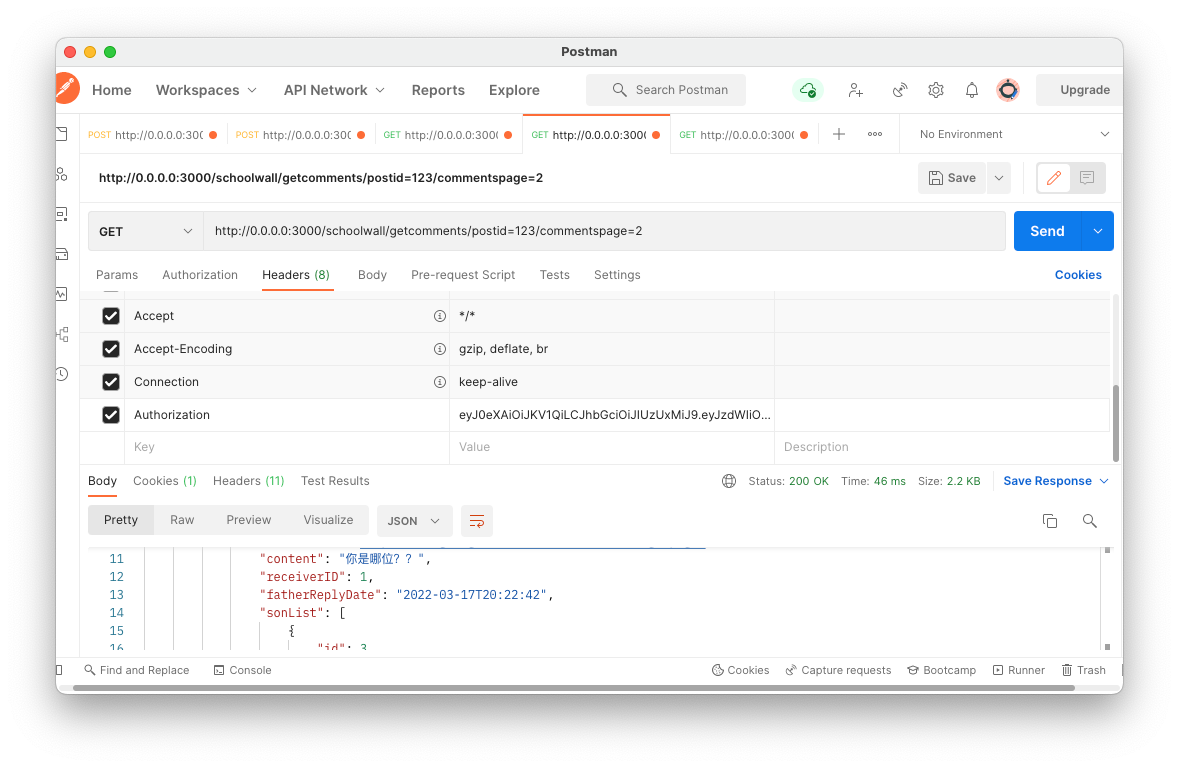
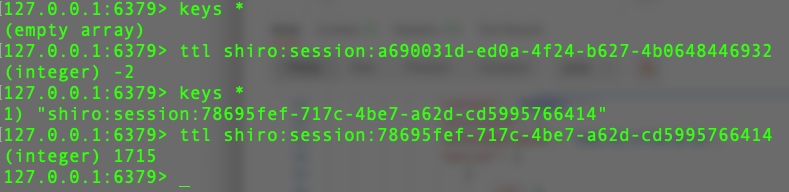
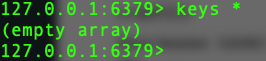
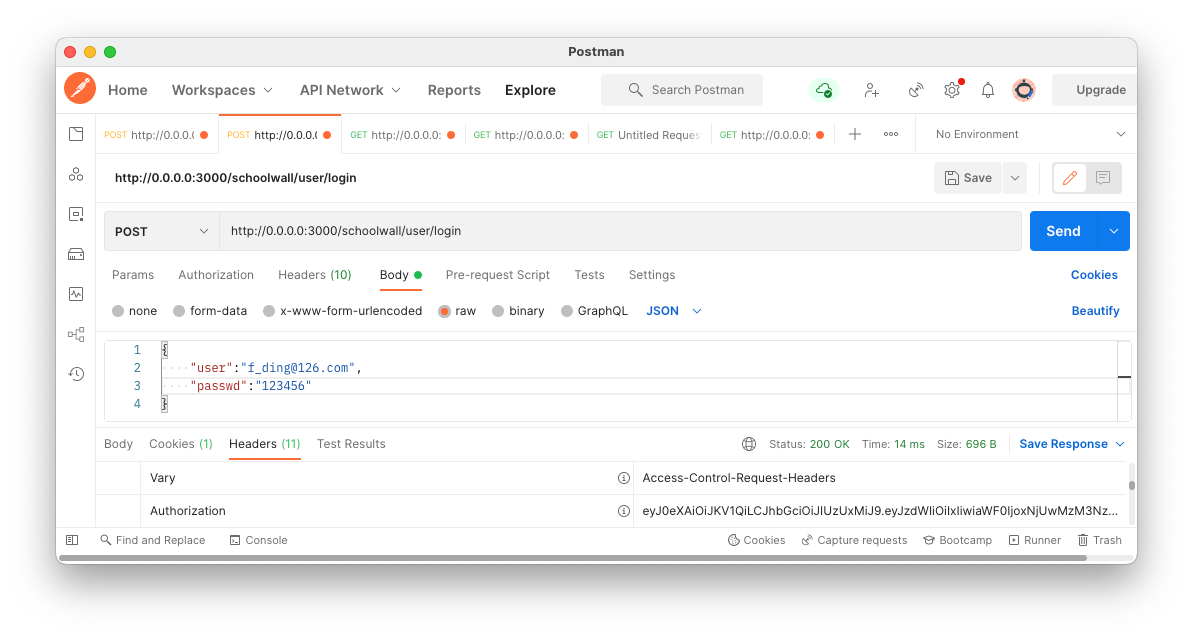
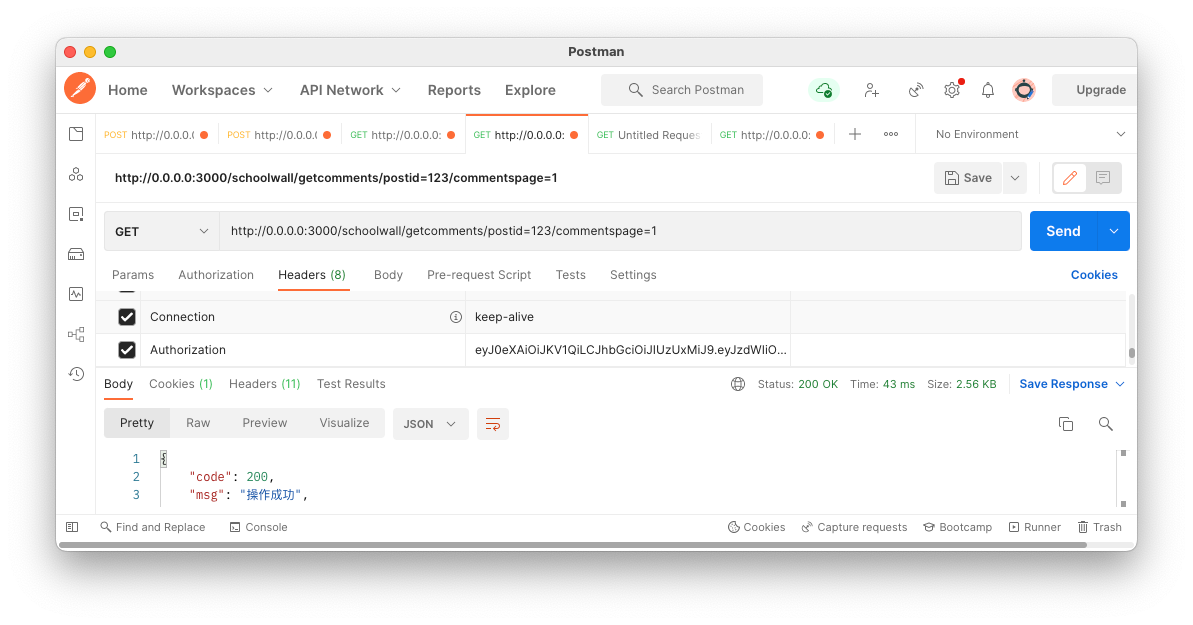

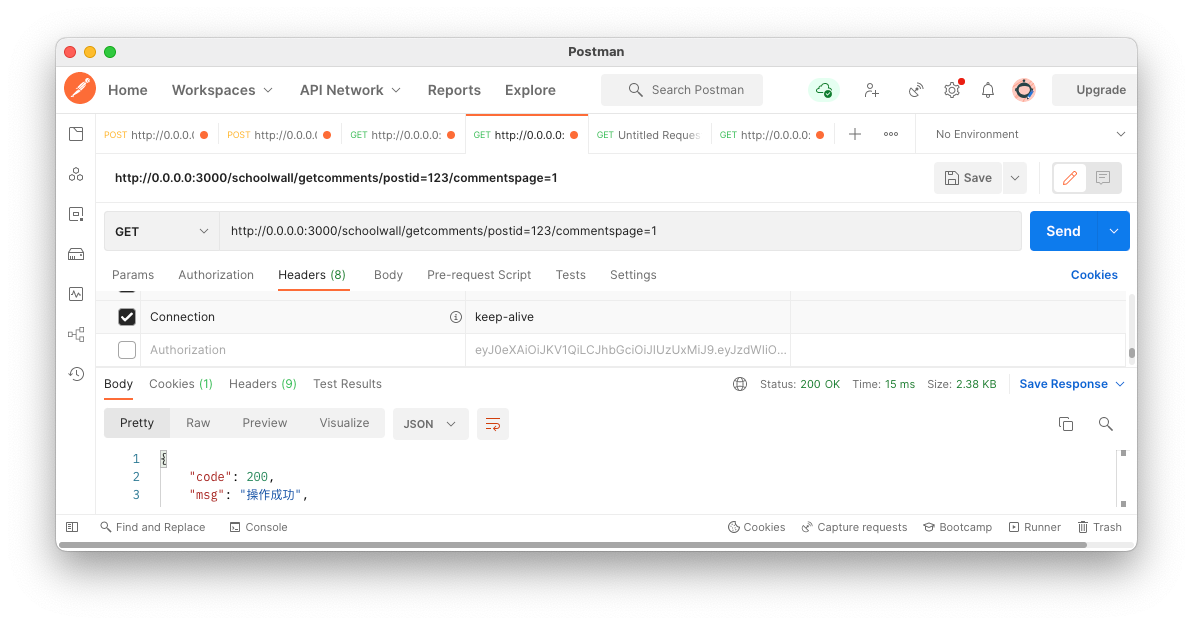
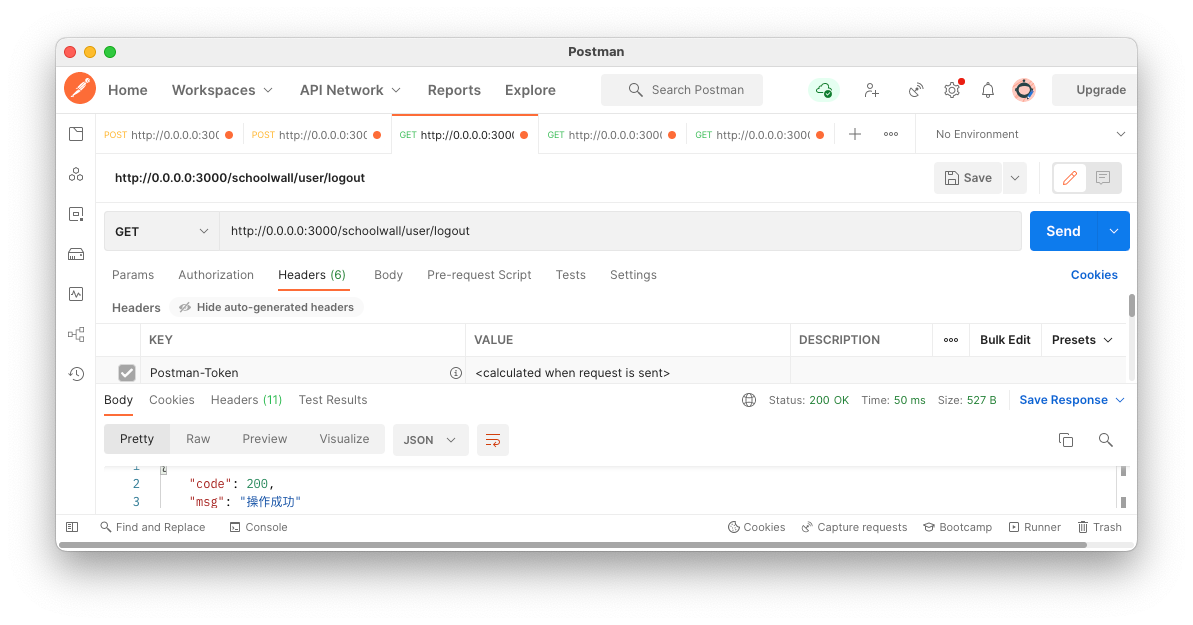

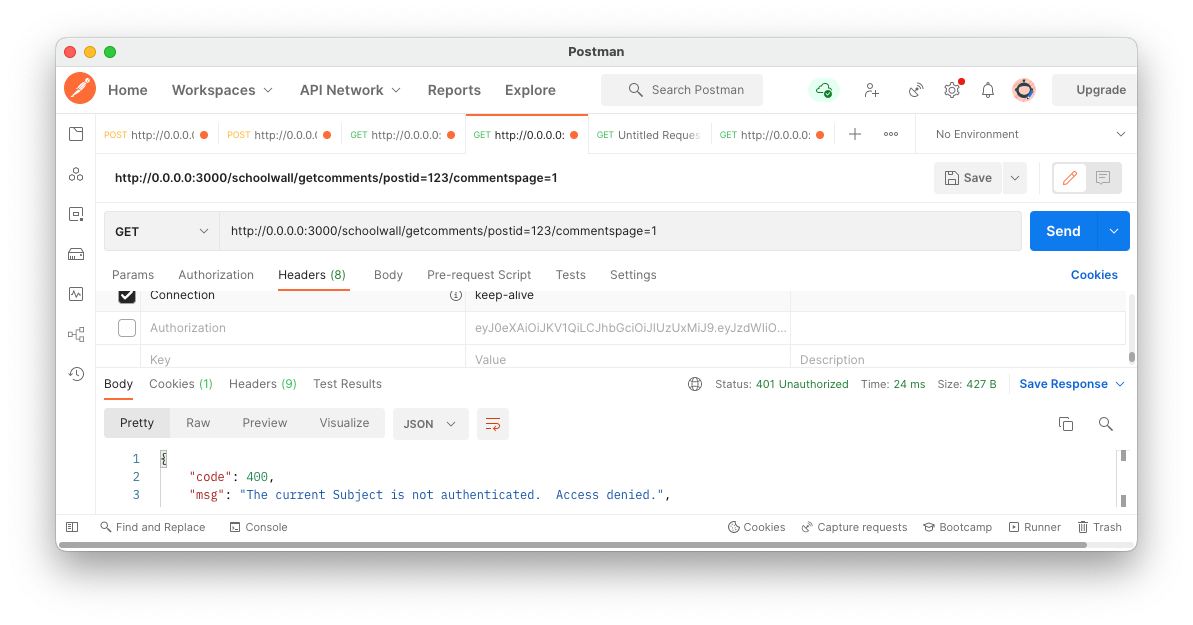

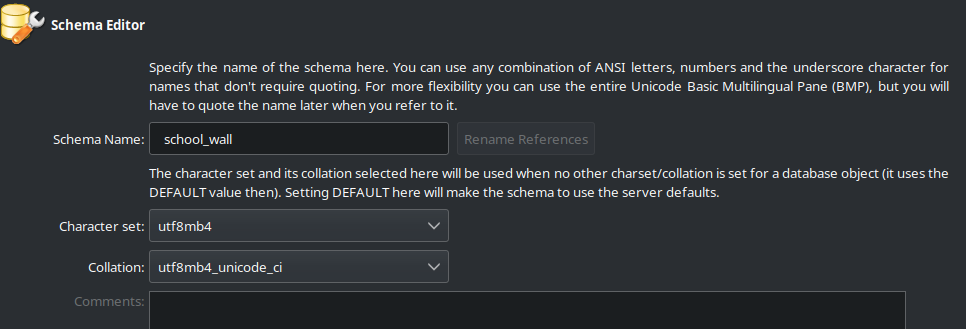
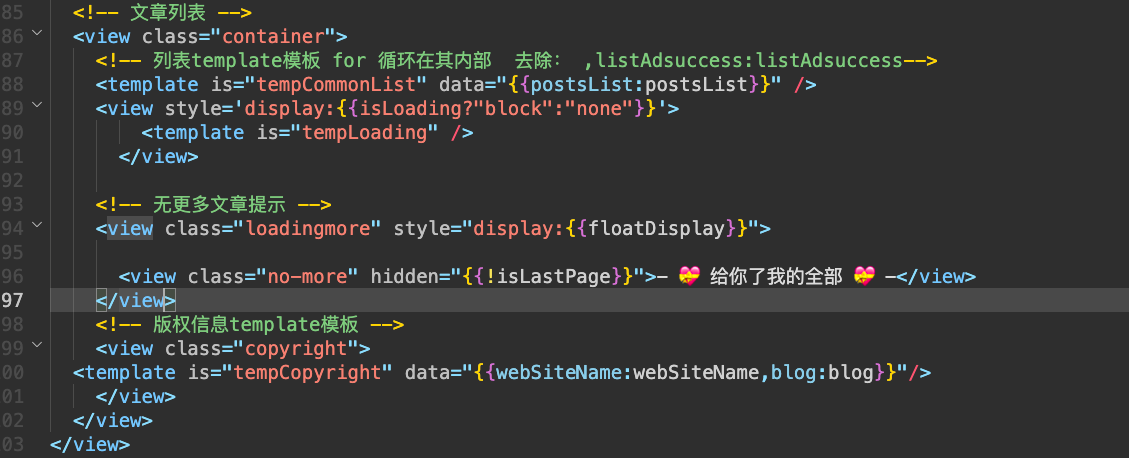
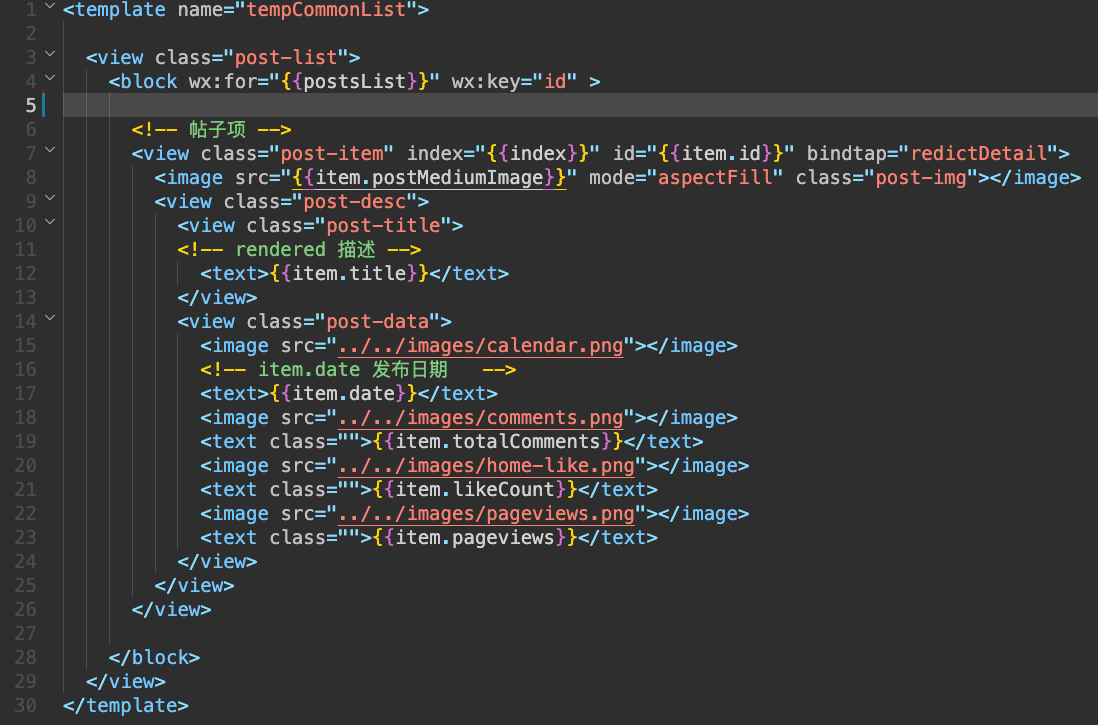
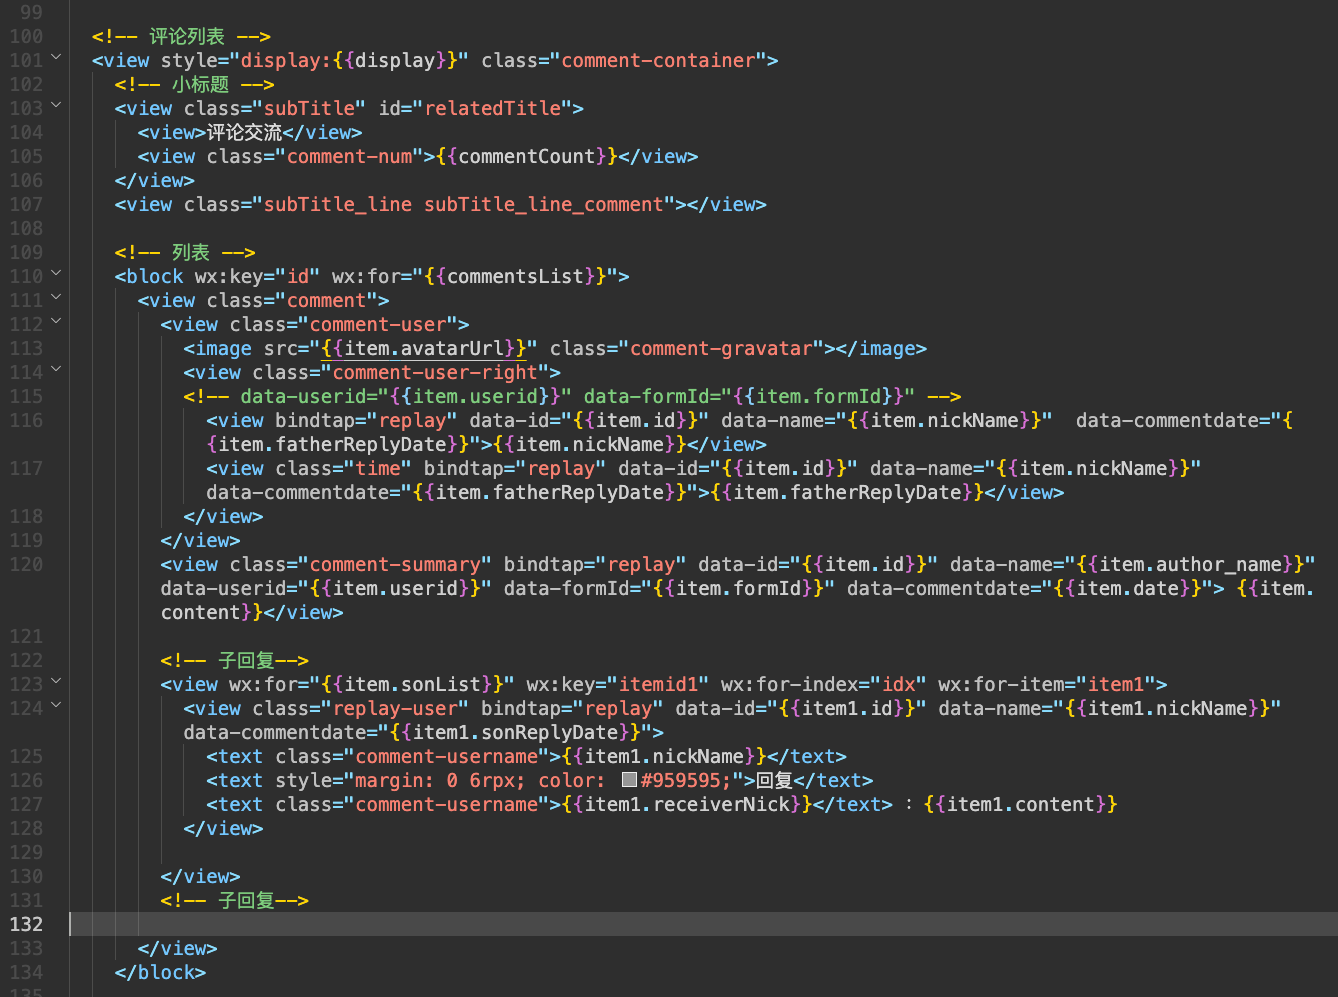
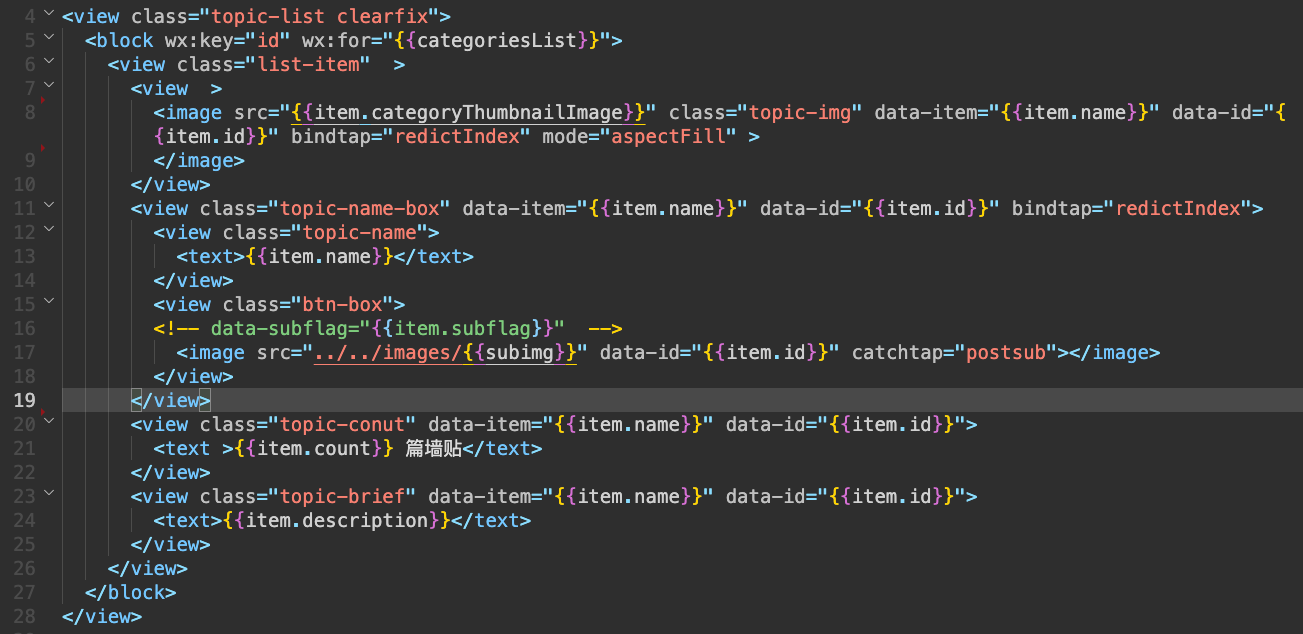
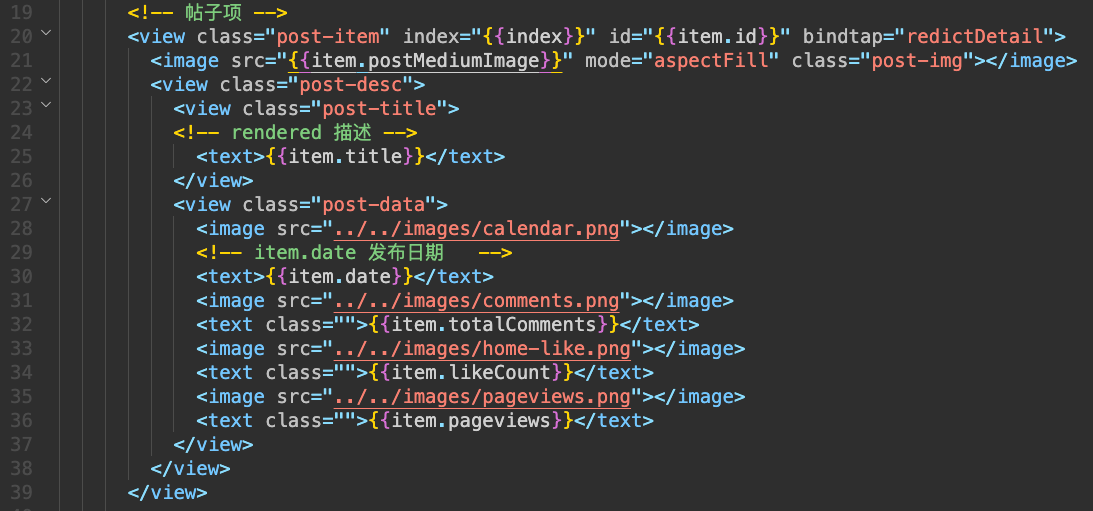

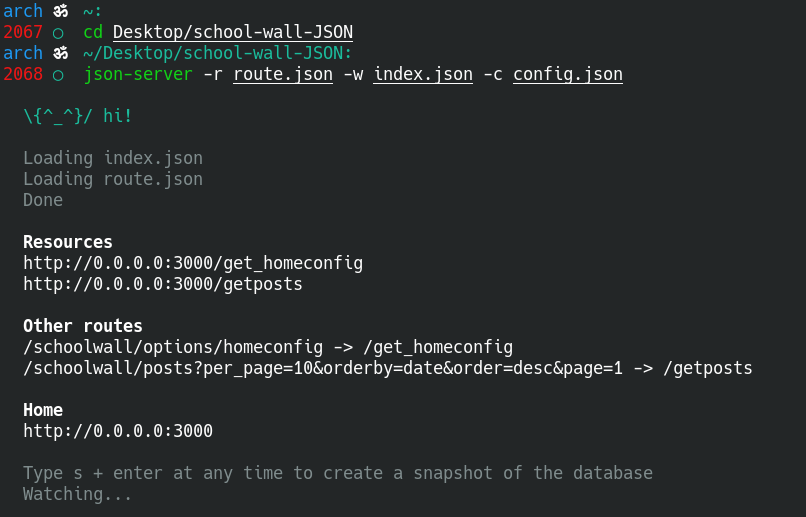
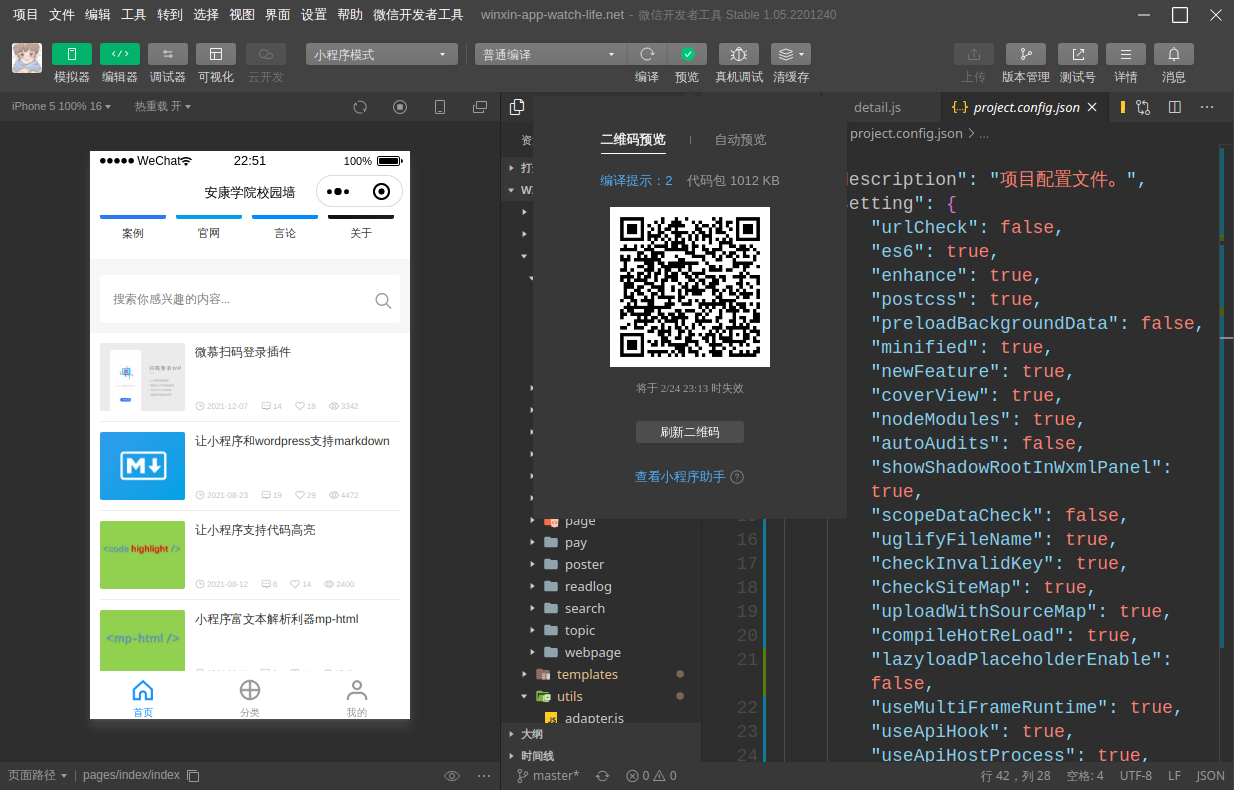
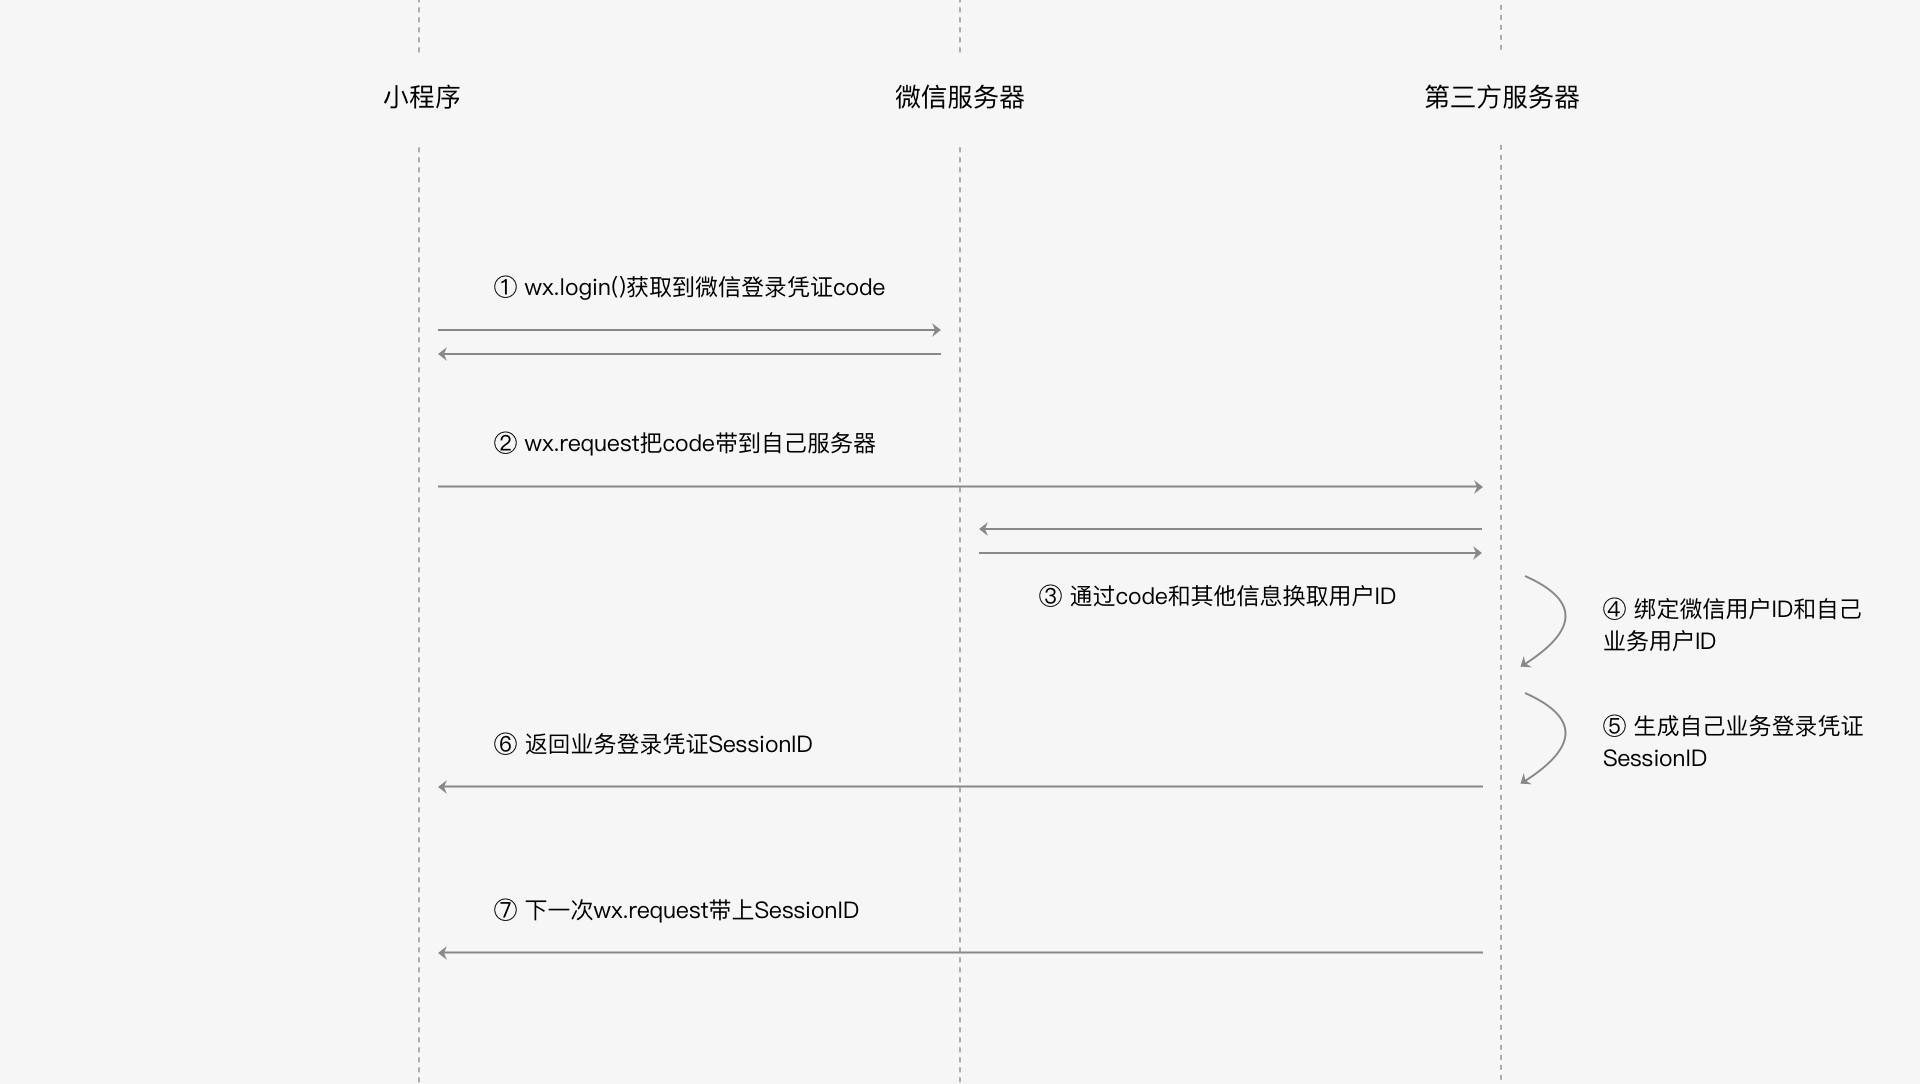


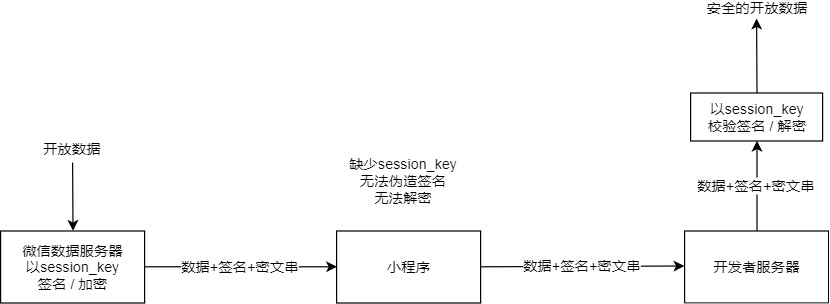
 支付宝
支付宝 🧧
🧧 微信
微信