Java Spring 介绍
Swagger 是一套基于 OpenAPI 规范(OpenAPI Specification,OAS)构建的开源工具,后来成为了 Open API 标准的主要定义者,现在最新的版本为17年发布的 Swagger3(Open Api3)。 国内绝大部分人还在用过时的swagger2(17年停止维护并更名为swagger3) 对于 Rest API 来说很重要的一部分内容就是文档,Swagger 为我们提供了一套通过代码和注解自动生成文档的方法,这一点对于保证API 文档的及时性将有很大的帮助。
OpenAPI = SpecificationSwagger = Tools for implementing the specification
What is Swagger?
Swagger is a set of open-source tools that help you to describe REST-based APIs. This gives you the luxury to automatically build beautiful and interactive API documentation, automatically generate client libraries for your API in many languages, and explore other possibilities like automated testing.
Swagger 是一组开源工具,可帮助您描述基于 REST 的 API。 这使您可以轻松地自动构建漂亮的交互式 API 文档,自动为您的 API 生成多种语言的客户端库,并探索其他可能性,例如自动化测试。
参考:
Swagger官网
Better Programming-Farzin Pashaee:Spring Boot and Swagger — Writing Good API Documentations
腾讯云开发者社区-斑马:Swagger 3.0使用教程
ARIAWAN-Documenting Spring Boot REST API with SpringDoc + OpenAPI 3
Swagger Logo-Ryan Pinkham:What Is the Difference Between Swagger and OpenAPI?
共包含三部分
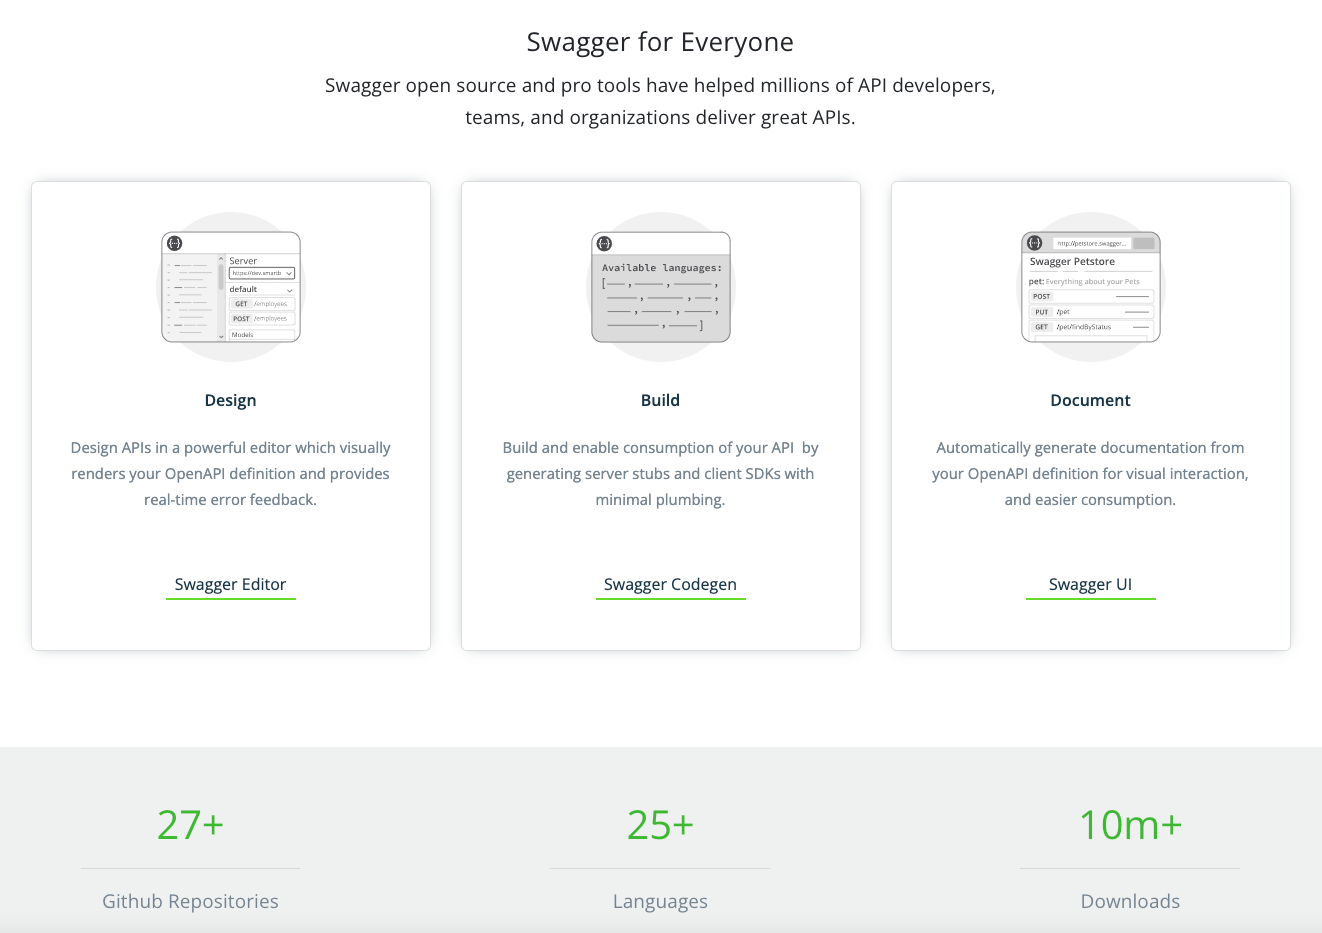
Swagger Editor:基于浏览器的编辑器,我们可以使用它编写我们 OpenAPI 规范。
Swagger UI:它会将我们编写的 OpenAPI 规范呈现为交互式的 API 文档,后文我将使用浏览器来查看并且操作我们的 Rest API。
Swagger Codegen:它可以通过为 OpenAPI(以前称为 Swagger)规范定义的任何 API 生成服务器存根和客户端 SDK 来简化构建过程。
Spring Fox 由于Spring的流行,Marty Pitt编写了一个基于Spring的组件swagger-springmvc,用于将swagger集成到springmvc中来,而springfox则是从这个组件发展而来。
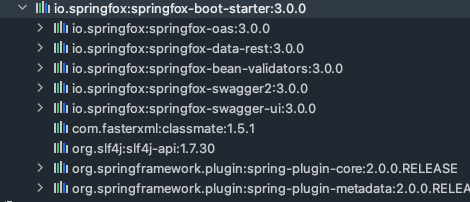
上图可观察到SpringFox已经引入Spring Boot中,并且支持Swagger3,但不知道为什么铸鼎在使用过程中,使用的Swagger3注解不能在Swagger-UI中显示,最后才发现又在其他网站上发现了一个即支持Swagger3 又支持UI显示Swagger3 的项目springdoc-openapi,可惜我已经用上SpringFox了,至于为什么不想换,就一句话,又不是不能用。
导入所需依赖 方式一 直接使用SpringFox 3.0.0 ,就相当于使用Swagger2的注解才能显示在UI中,虽然可以使用Swagger3注解,但比配置Swagger2要方便,只需导入一个依赖即可使用。
1 2 3 4 5 6 7 8 <dependencies > <dependency > <groupId > io.springfox</groupId > <artifactId > springfox-boot-starter</artifactId > <version > 3.0.0</version > </dependency > </dependencies >
方式二 使用springdoc-openapi 可直接使用Swagger3注解,且可以直接显示在UI中。
1 2 3 4 5 6 7 <dependencies > <dependency > <groupId > org.springdoc</groupId > <artifactId > springdoc-openapi-ui</artifactId > <version > 1.1.49</version > </dependency > </dependencies >
Swagger2与Swagger3对比
参考:
简书-fzhyzamt:swagger2与swagger3的注解对应表
STACK OVERFLOW-:Migrating from Springfox Swagger 2 to Springdoc Open API
村雨遥-Spring Boot 使用 Swagger3 生成 API 接口文档
Baeldung-Sallo Szrajbman:Set JWT with Spring Boot and Swagger UI
注解 Swagger2注解使用以及常用参数说明:
1 2 3 4 5 6 7 8 9 10 11 12 13 14 15 16 17 18 19 20 21 22 23 24 25 26 27 28 29 30 31 32 33 34 35 36 37 38 39 40 41 42 43 44 45 46 47 48 49 50 51 52 53 54 55 56 57 58 59 @Api( //可以在UI界面列表项看到该注解tages定义的说明 tags="说明该类的作用" ) @ApiOperation( //可以在接口后看到该注解value定义的说明 value="说明接口的用途、作用" ) @ApiParam( //UI显示该参数的作用 value = "需获取评论列表的墙贴ID", //参数举例(UI不显示) example = "123", //UI是否显示红色必填星 required = true, //路径参数中的参数名 name = "postid" ) @ApiModel( value = "说明DTO的作用" ) @ApiModelProperty( //UI显示属性的作用 value = "微信用户昵称", //UI是否显示红色必填星 required = true, //UI自动填写举例值 example = "Immortal\uD83C\uDF40" ) @ApiImplicitParams :用在请求的方法上,表示一组参数说明 @ApiImplicitParam :用在@ApiImplicitParams 注解中,指定一个请求参数的各个方面 name:参数名 value:参数的汉字说明、解释 required:参数是否必须传 paramType:参数放在哪个地方 · header --> 请求参数的获取:@RequestHeader · query --> 请求参数的获取:@RequestParam · path(用于restful接口)--> 请求参数的获取:@PathVariable · div(不常用) · form(不常用) dataType:参数类型,默认String,其它值dataType="Integer" defaultValue:参数的默认值 @ApiResponses :用在请求的方法上,表示一组响应 @ApiResponse :用在@ApiResponses 中,一般用于表达一个错误的响应信息 code:数字,例如400 message:信息,例如"请求参数没填好" response:抛出异常的类 /images/
最关注的应该还是最重要的部分才对,直接可以将新的技术快速应用到项目中来才是最终目的。
swagger2
swagger3
注解位置
@Api
@Tag
Controller类
@ApiOperation(value = “foo”, notes = “bar”)
@Operation(summary = “foo”, description = “bar”)
api端口方法
@ApiImplicitParams
@Parameters
api端口方法
@ApiImplicitParam
@Parameter
api方法的参数
@ApiParam
@Parameter
api方法的参数
@ApiIgnore
@Parameter(hidden = true) 或 @Operation(hidden = true) 或 @Hidden
各处皆可
@ApiModel
@Schema
DTO类
@ApiModelProperty
@Schema
DTO属性
@ApiModelProperty(hidden = true)
@Schema(accessMode = READ_ONLY)
DTO属性
@ApiResponse(code = 404, message = “foo”)
@ApiResponse(responseCode = “404”, description = “foo”)
api端口方法
Spring Boot方式配置 参考了Swagger2的配置方式,Swagger3配置方式以及两者配置对比,还请前往ARIAWAN-Documenting Spring Boot REST API with SpringDoc + OpenAPI 3 。
以下信息中,配置了Jwt方式认证,主要添加两个,定义界面显示配置JWT 和 定义请求Header中的Authorization从哪获取JWT,详细请参考:Baeldung-Sallo Szrajbman:Set JWT with Spring Boot and Swagger UI ,但其中有错误自己给改过来了:
1
2
3
4
5
6
7
8
9
10
11
12
13
14
15
16
17
18
19
20
21
22
23
24
25
26
27
28
29
30
31
32
33
34
35
36
37
38
39
40
41
42
43
44
45
46
47
48
49
50
51
52
53
54
55
56
57
58
59
60
61
62
63
64
65
66
67
68
69
70
71
72
73
74
75
76
77
78
79
80
81
82
83
84
85
86
87
88
89
import io.swagger.annotations.ApiOperation;import org.springframework.beans.factory.annotation.Value;import org.springframework.context.annotation.Bean;import org.springframework.context.annotation.Configuration;import springfox.documentation.builders.ApiInfoBuilder;import springfox.documentation.builders.PathSelectors;import springfox.documentation.builders.RequestHandlerSelectors;import springfox.documentation.oas.annotations.EnableOpenApi;import springfox.documentation.service.*;import springfox.documentation.spi.DocumentationType;import springfox.documentation.spi.service.contexts.SecurityContext;import springfox.documentation.spring.web.plugins.Docket;import java.util.Collections;import java.util.List;@Configuration @EnableOpenApi public class SwaggerConfig { @Value("${swagger.enabled}") Boolean swaggerEnabled; @Bean public Docket createRestApi () { return new Docket (DocumentationType.OAS_30) .apiInfo(apiInfo()) .enable(swaggerEnabled) .securitySchemes(Collections.singletonList(apiKey())) .securityContexts(Collections.singletonList(securityContext())) .select() .apis(RequestHandlerSelectors.withMethodAnnotation(ApiOperation.class)) .paths(PathSelectors.any()) .build(); } private ApiInfo apiInfo () { Contact contact = new Contact ("铸鼎_" , "https://ding-f.github.io/" , "f_ding@126.com" ); return new ApiInfoBuilder () .title("AKU校园墙项目接口文档" ) .description("安康学院校园墙(前后端)" ) .contact(contact) .version("1.0" ) .build(); } private ApiKey apiKey () { return new ApiKey ("Authorization" , "JWT" , "header" ); } private SecurityContext securityContext () { return SecurityContext.builder().securityReferences(defaultAuth()).build(); } private List<SecurityReference> defaultAuth () { AuthorizationScope authorizationScope = new AuthorizationScope ("global" , "accessEverything" ); AuthorizationScope[] authorizationScopes = new AuthorizationScope [1 ]; authorizationScopes[0 ] = authorizationScope; return Collections.singletonList(new SecurityReference ("Authorization" , authorizationScopes)); } }
代码中配置了方便在application.yml方便开启或停止Swagger:
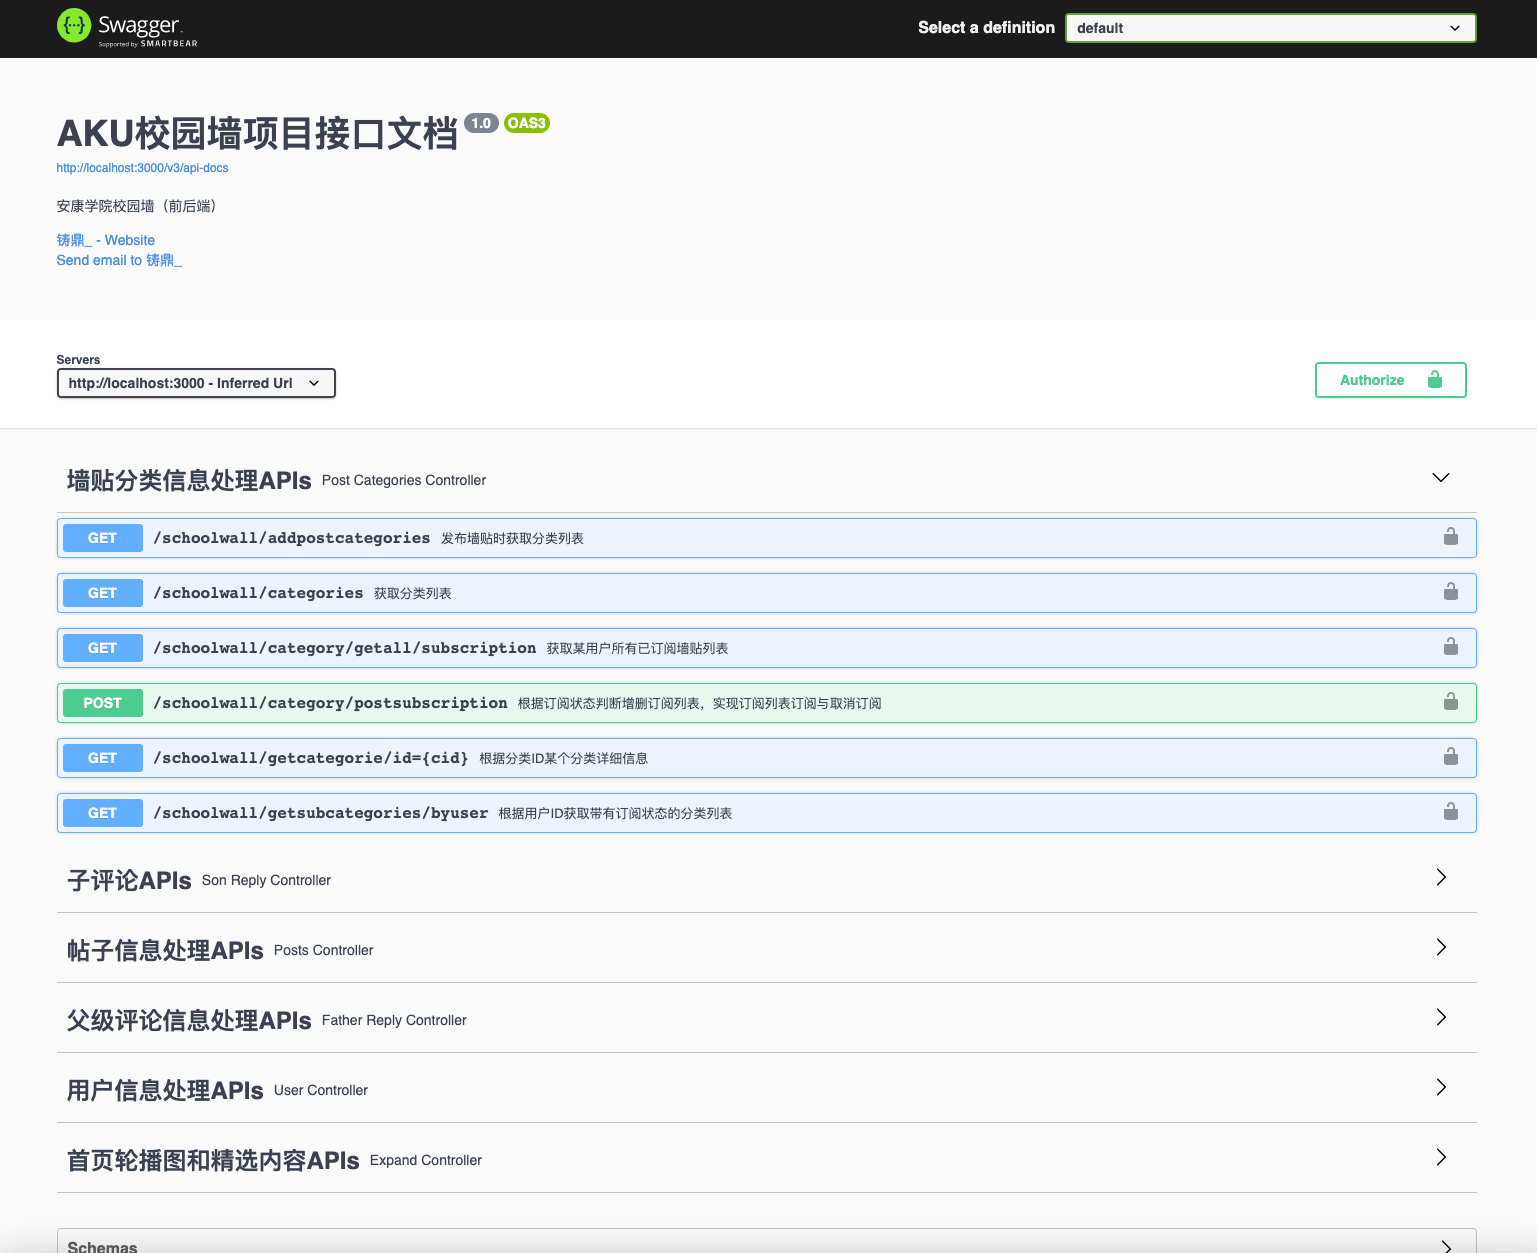
测试实现 将以上不超过10个的注解加入项目代码的相应位置,即可实现自动生成API文档:
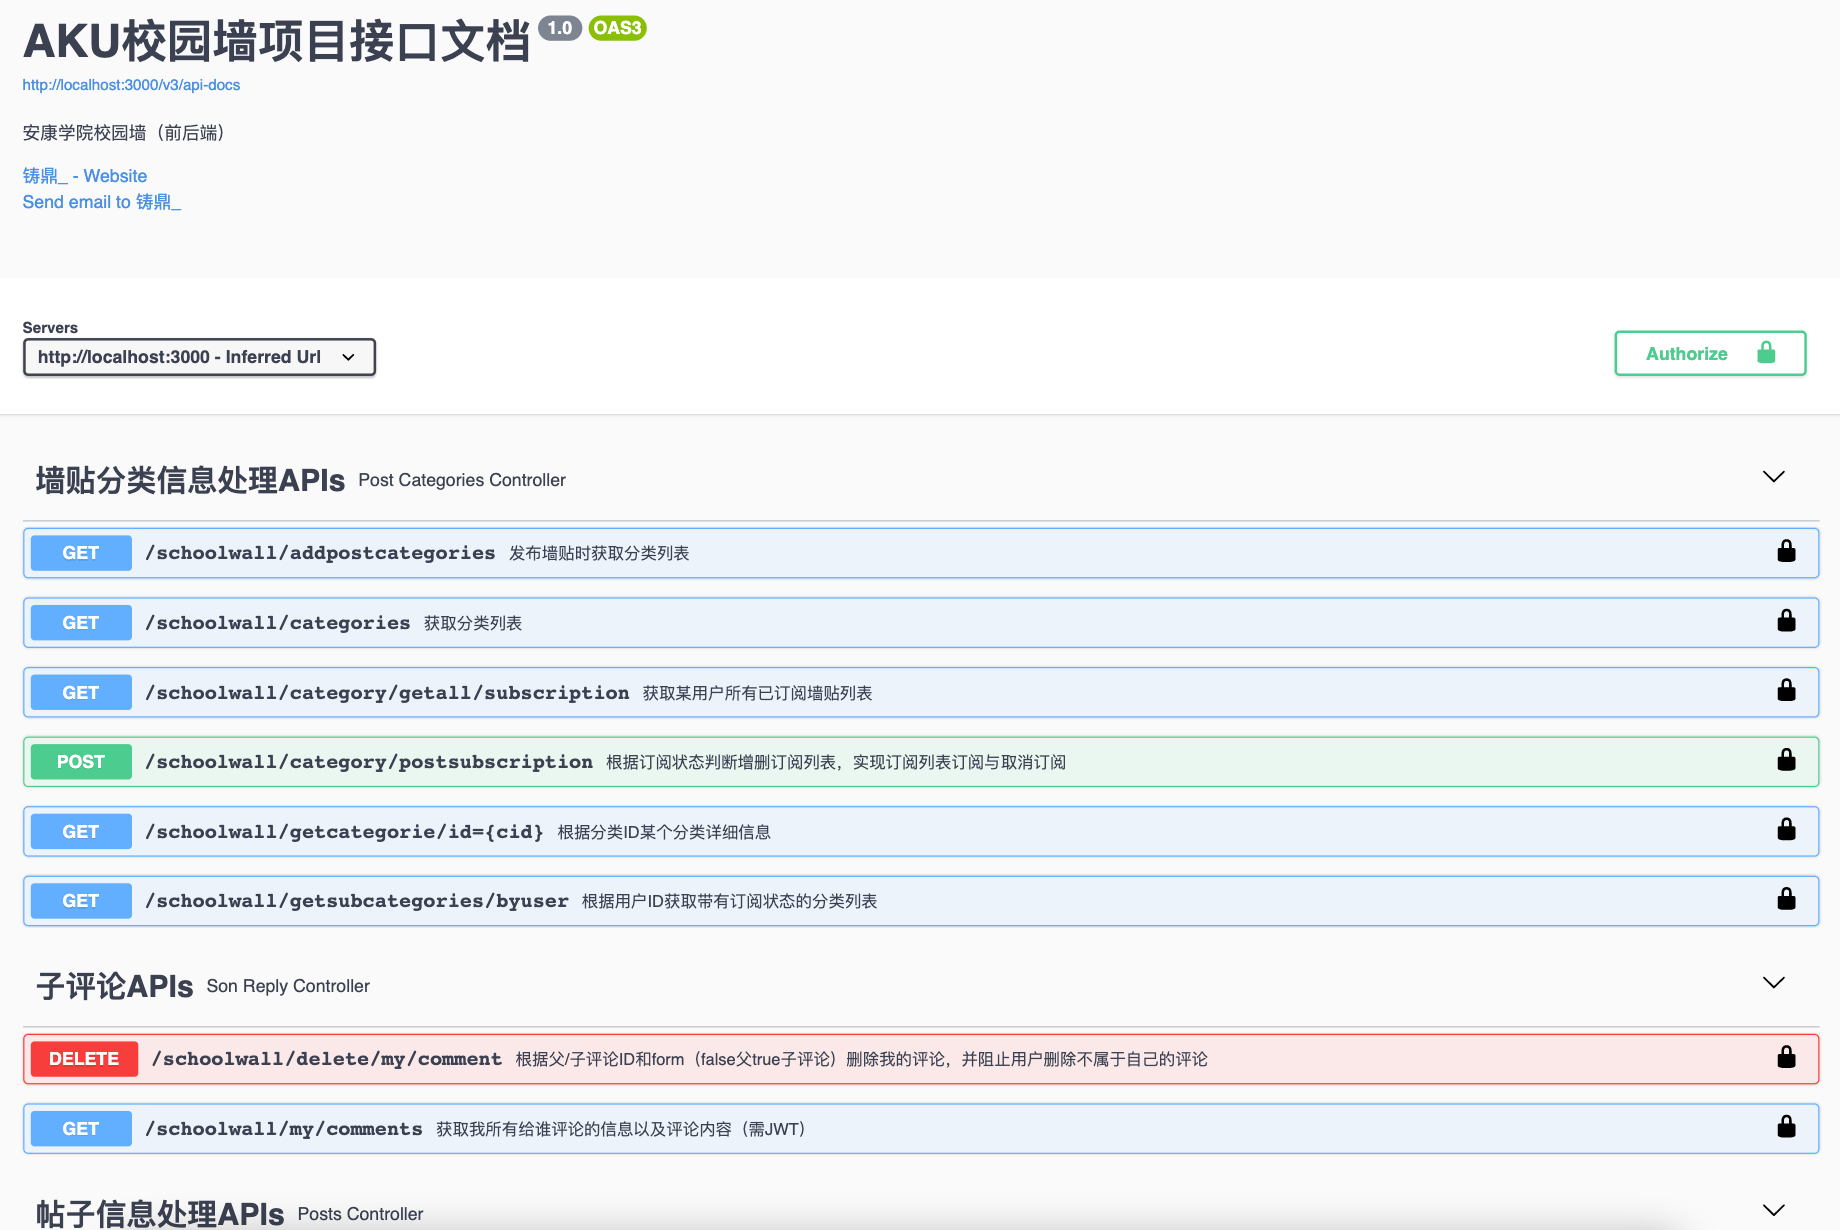
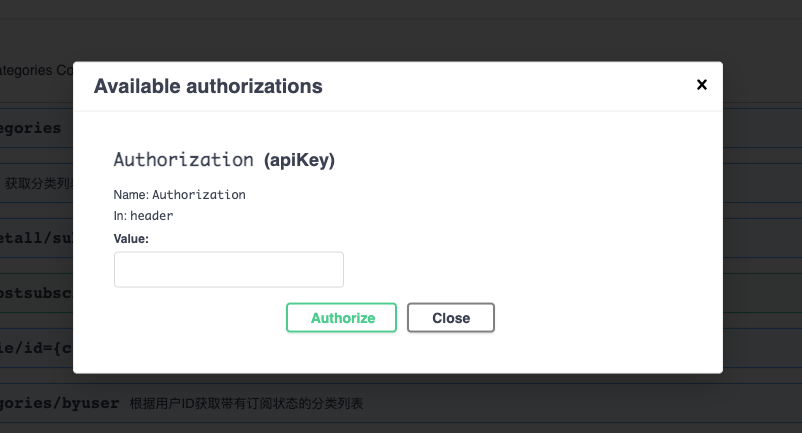
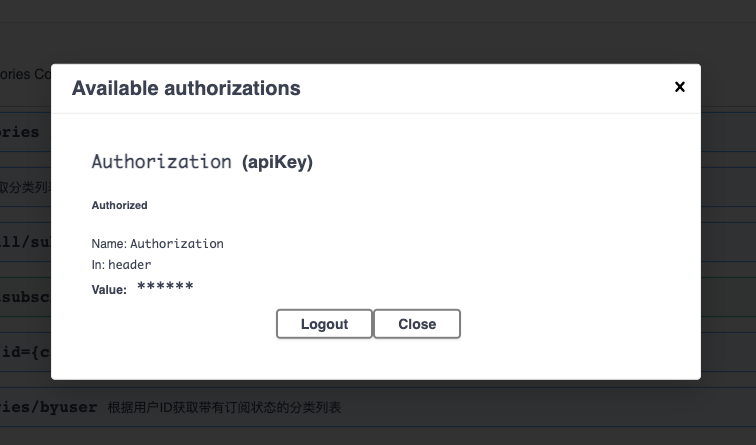
实现JWT添加效果:
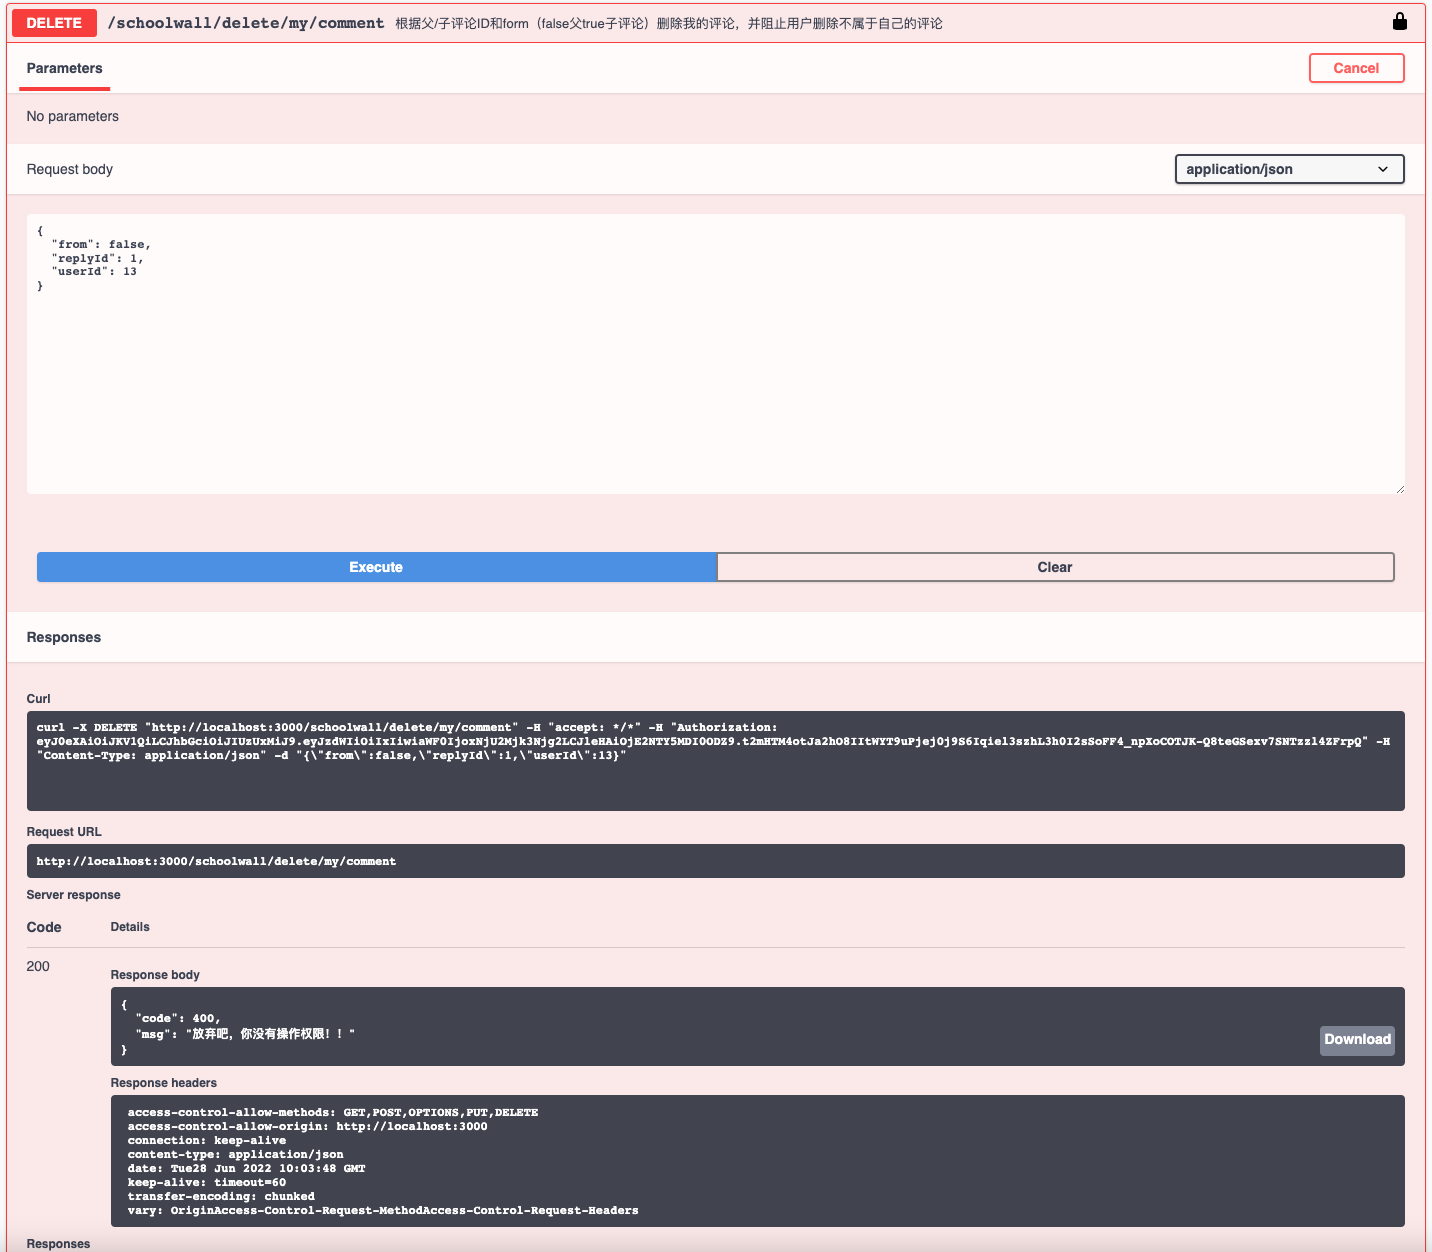
并且可在网页上对每一个API进行手动测试:
Python Django
自动文档必须使用Django rest framework(DRF)框架,因此需要Django框架、基于Django框架开发的DRF框架,此外需要两个关键依赖实现Swagger的自动文档。
依赖 1 2 3 4 # coreapi: 这是DRF项目所需的核心API库,Swagger使用它来生成API文档。 pip install coreapi # drf-yasg: 这是一个用于在DRF项目中集成Swagger的库。 pip install drf-yasg
加入路由 需要在总路由文件urls.py,中添加/路由拦截,使得访问localhots:8000时被Swagger网页服务处理成自动API文档。
1 2 3 4 5 6 7 8 9 10 11 12 13 14 15 16 17 18 19 20 21 22 23 24 25 26 27 28 29 30 from drf_yasg import openapifrom drf_yasg.views import get_schema_viewschema_view = get_schema_view( openapi.Info( title="****后端" , default_version="v1" , description="西安**智能科技-物业管理后端API" , contact=openapi.Contact(email="f_ding@126.com" ), license=openapi.License(name="BSD License" ), ), public=True , permission_classes=(permissions.AllowAny,), generator_class=OpenAPISchemaGenerator, ) urlpatterns = [ path( "" , schema_view.with_ui("swagger" , cache_timeout=0 ), name="schema-swagger-ui" , ), path( r"redoc/" , schema_view.with_ui("redoc" , cache_timeout=0 ), name="schema-redoc" , ), ]
最后注册相关应用到Django总配置文件
1
2
3
INSTALLED_APPS = [ 'drf_yasg' , ]
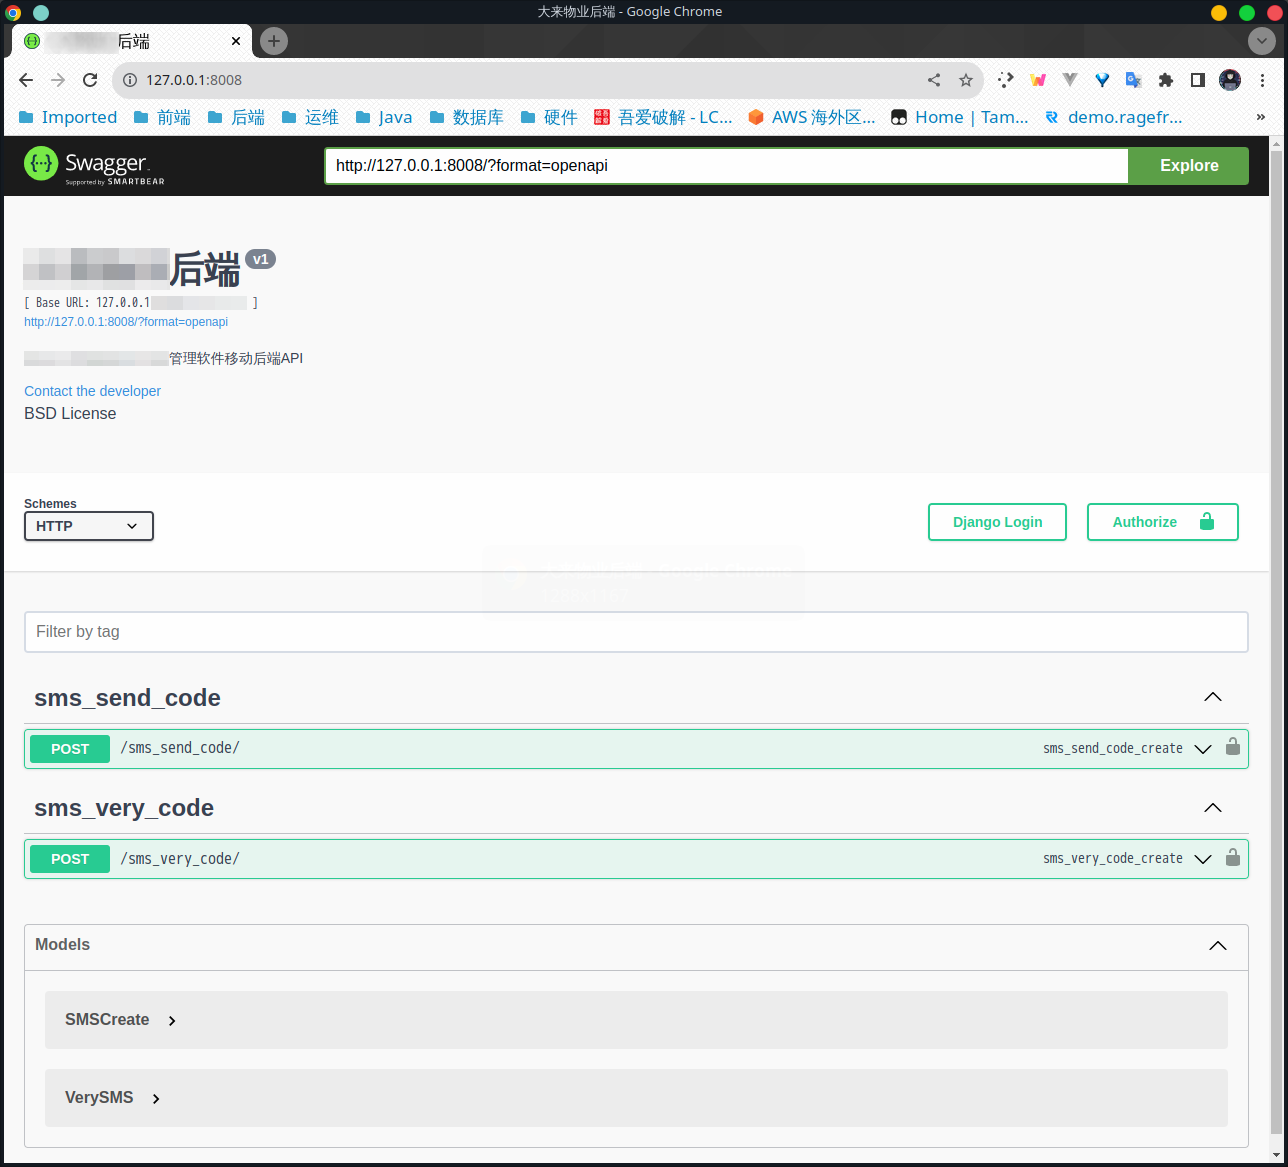
访问测试 打开浏览器访问localhost:8080 你会发现已经正常工作,如果没有显示任何接口可能是你的项目未使用DRF开发接口。
